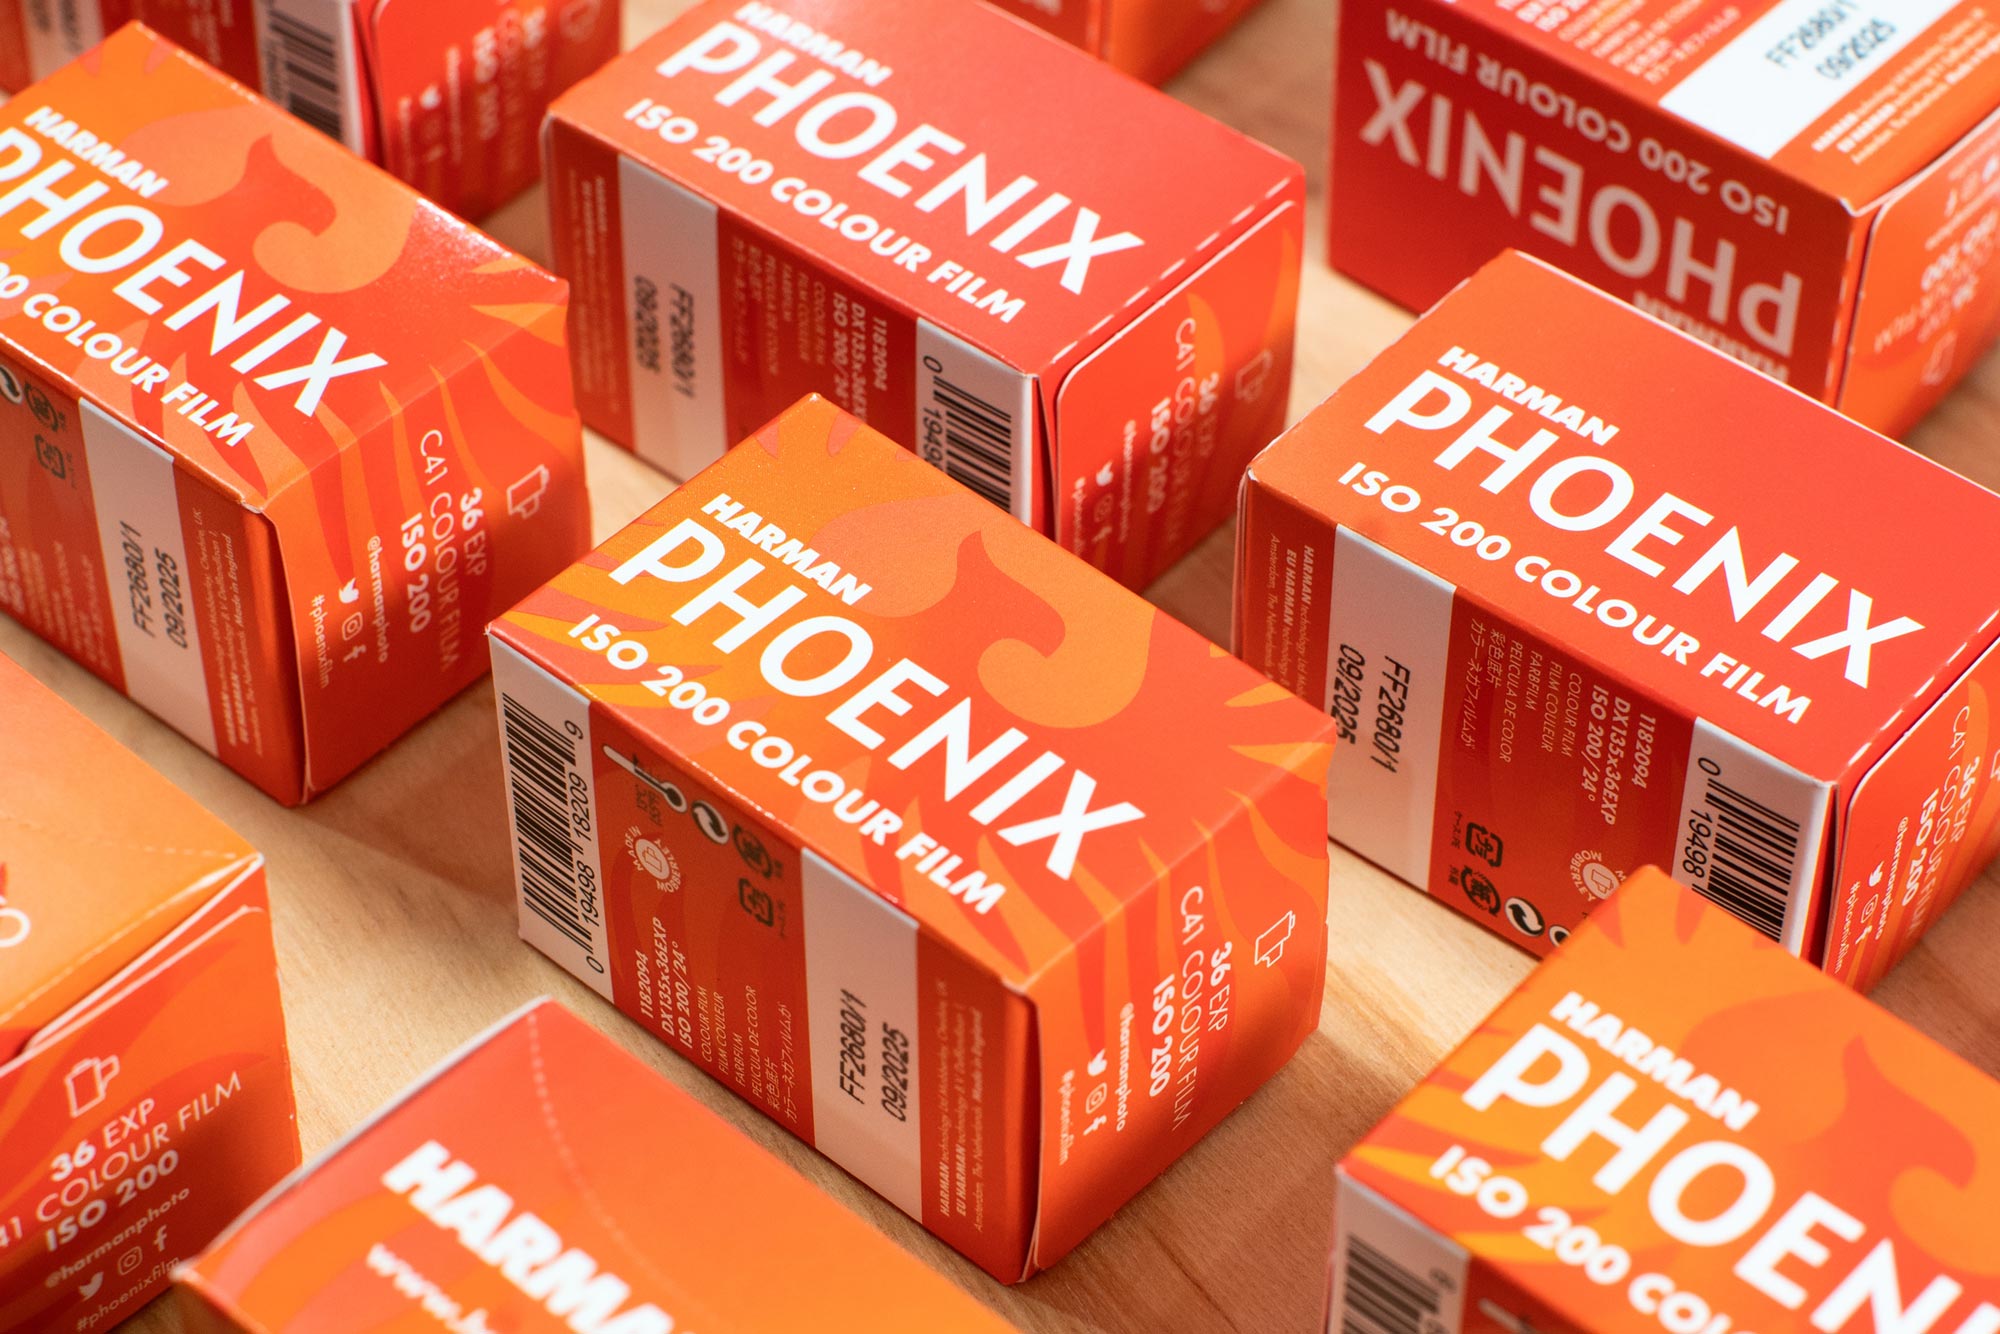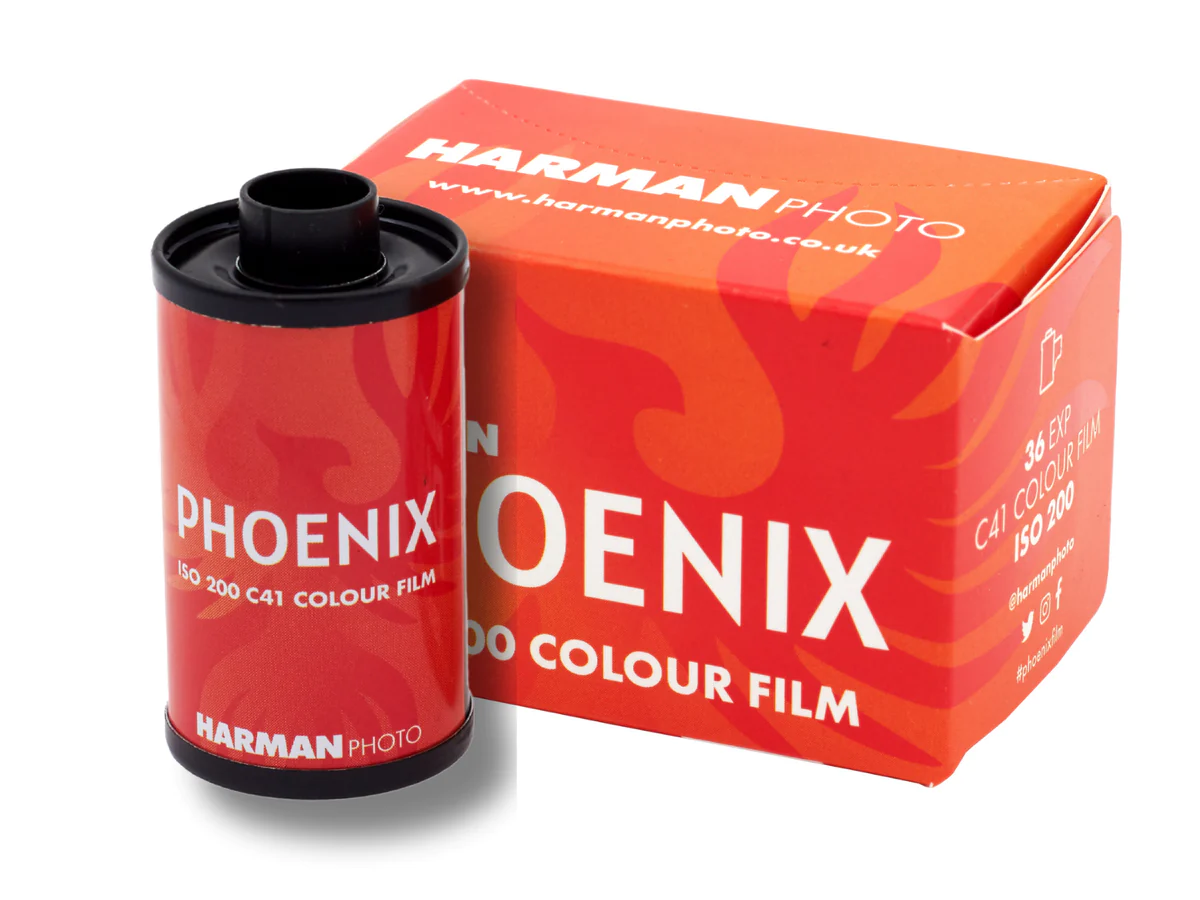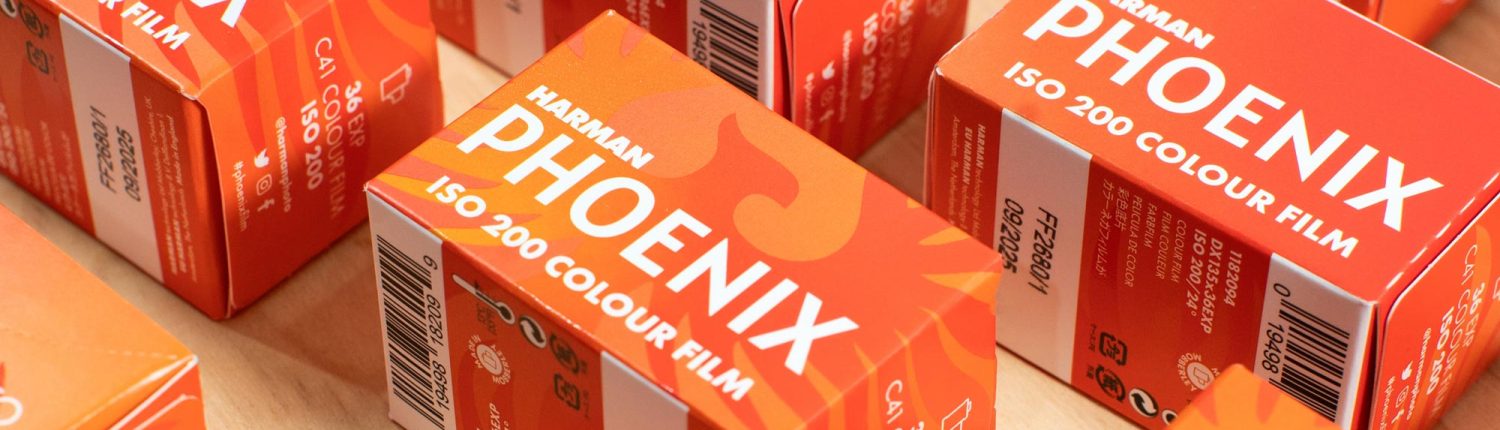
So, here it is! By the time you are reading this, unless you were living inside a digital cave, you know Ilford Harman, the British film manufacturer that we’ve known for years for their B&W timeless emulsions, has changed the game by releasing a C41 emulsion, a global release that took everyone by surprise.
If you had told me 10 years ago I’d see Ilford Harman color film, I would have told you to stop dreaming and to go get some ColorPlus at 2,95€.
IMPLICATIONS IN THE FILM INDUSTRY
From our point of view, as a small player in the film photography world, this is without a doubt a positive event. A new color film manufacturer diversifies the sources from which film can be produced, sending a message that film is more alive than ever (since digital photography was released, of course).
But not all that shines is gold. There are some important flaws in this film that should be acknowledged and addressed. There are already countless articles, videos, and posts about this film, but we feel, as a lab, we owe film photographers a deeper dive into this particular emulsion and not just take it “as is.” We are not going to sugarcoat this one; we want to show you the good, the bad, and the ugly. Let’s begin!

OUR TESTS AT CARMENCITA
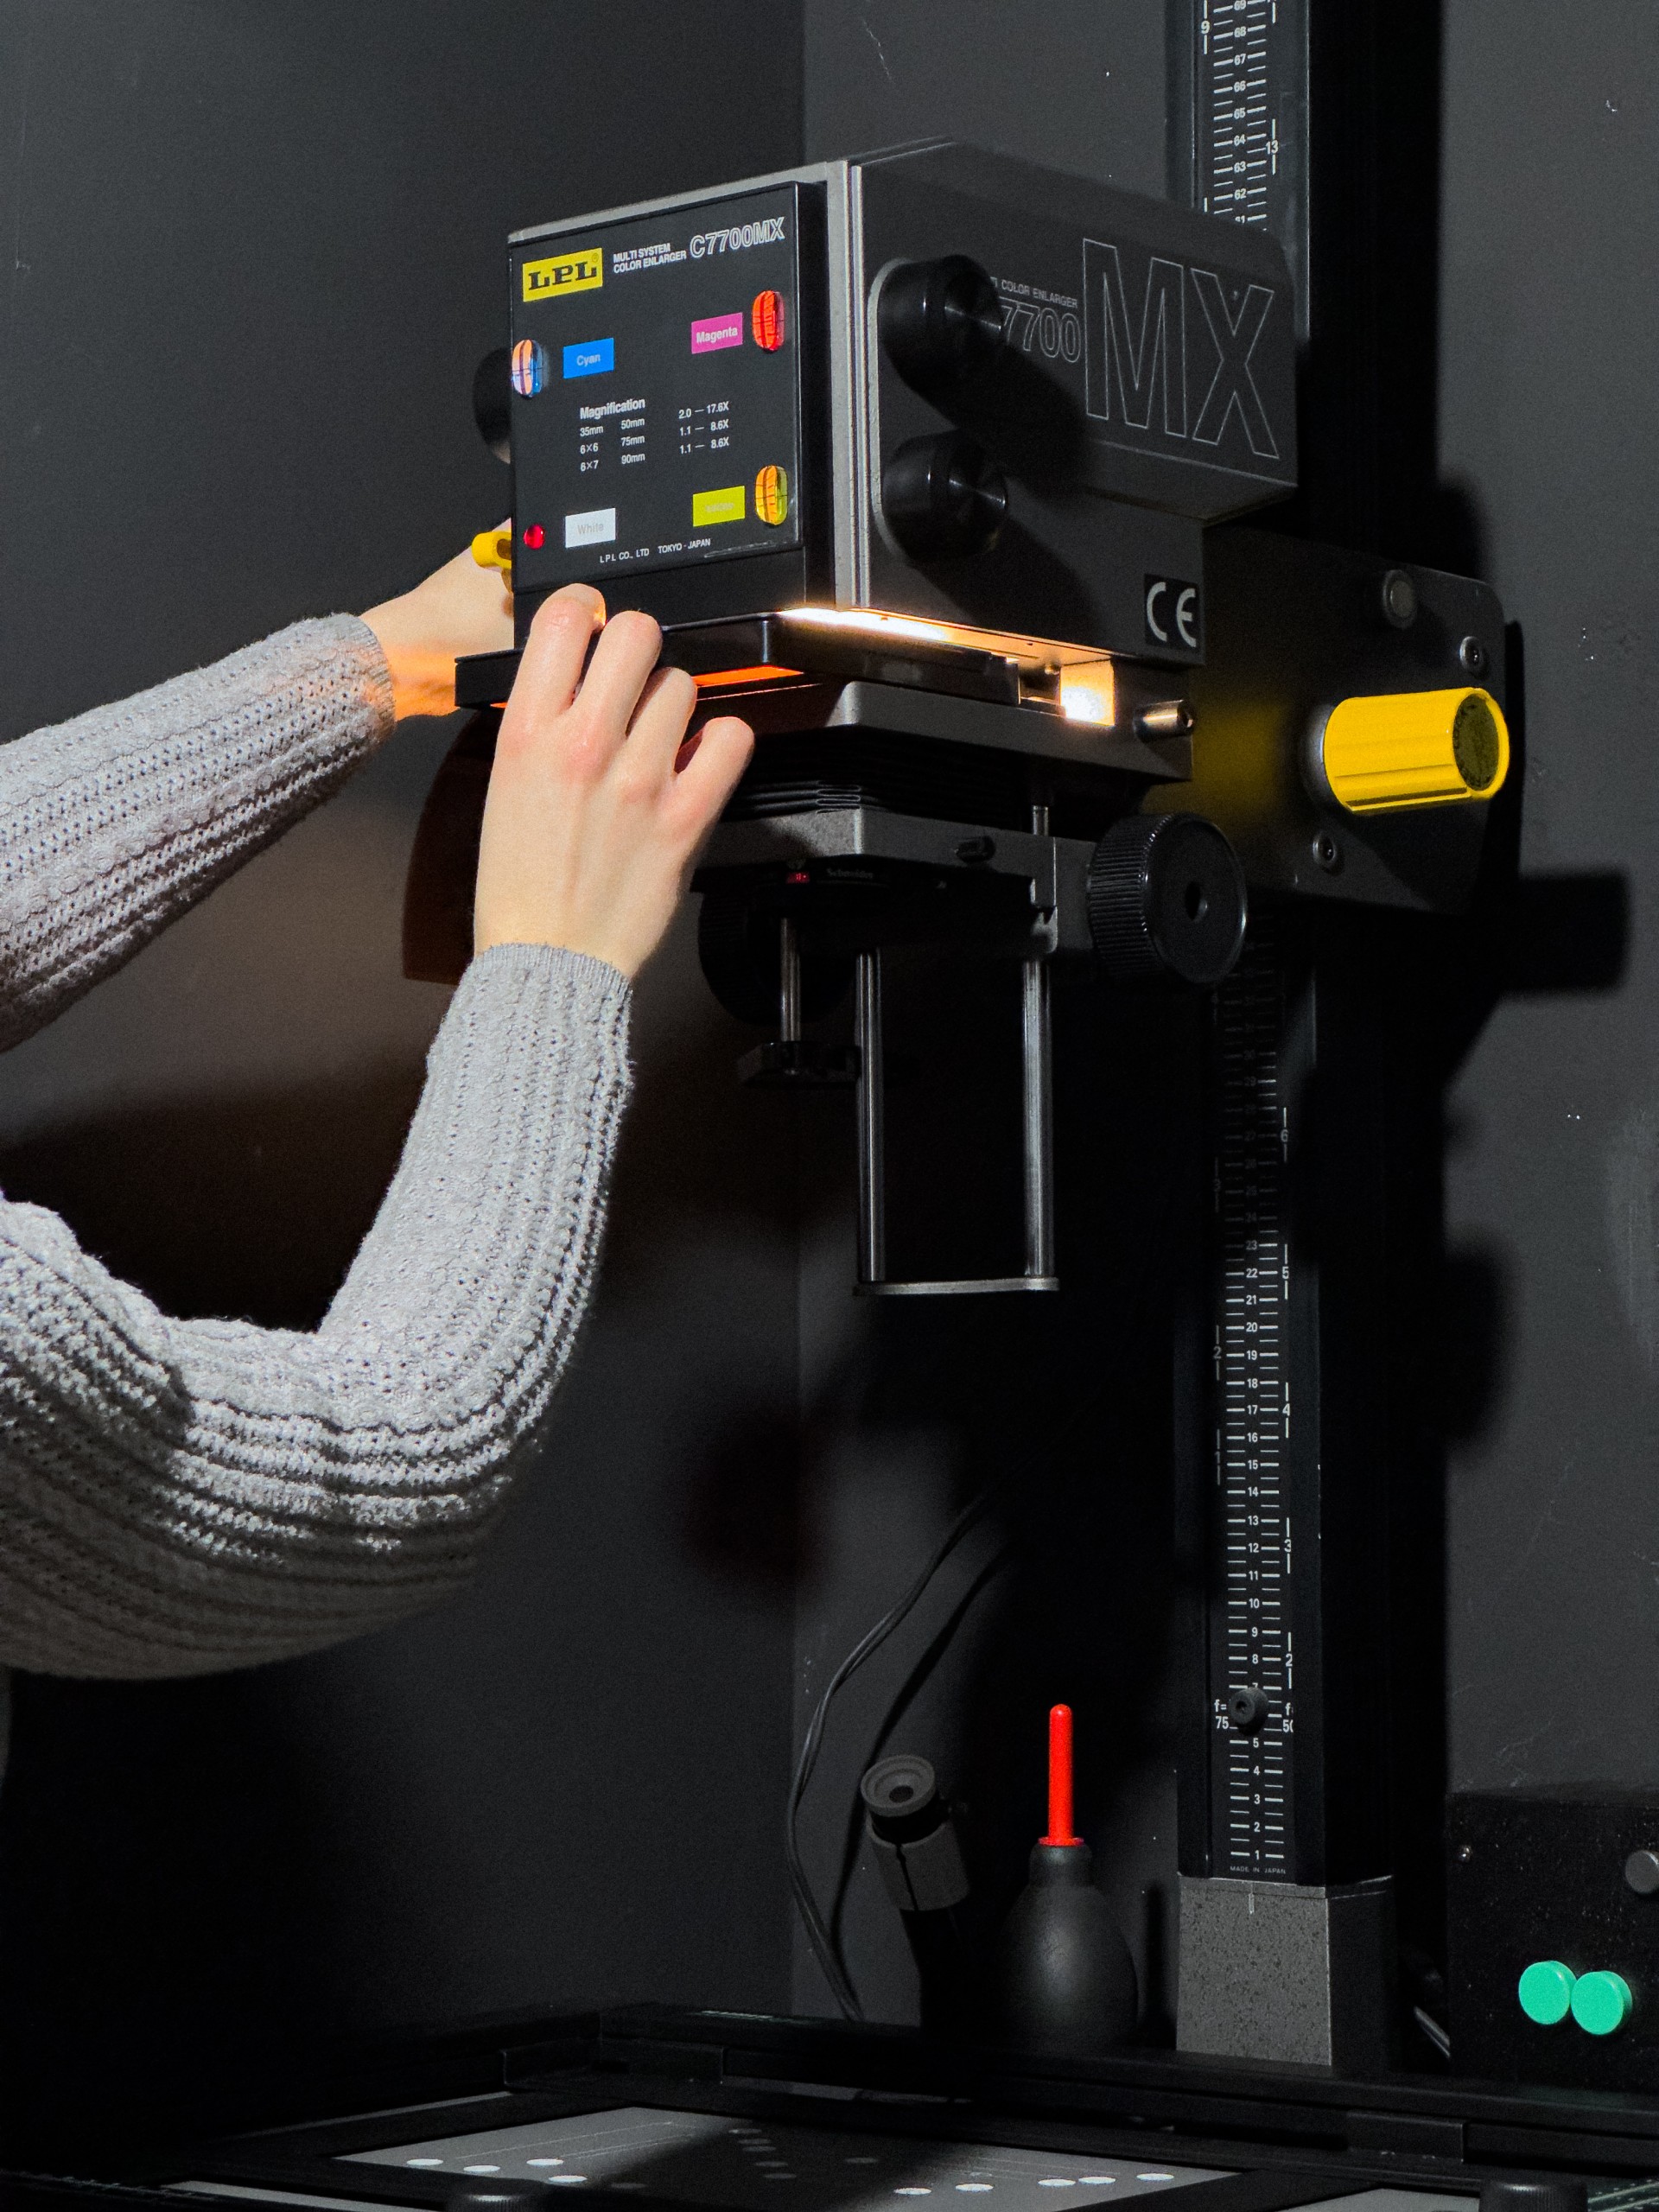
Seeing samples of this film has been an emotional rollercoaster. To be brutally honest, we were horrified by the very first tests; we thought there must have been an issue somewhere, and it’d been poorly developed, scanned, or both, because the results were pretty bad.
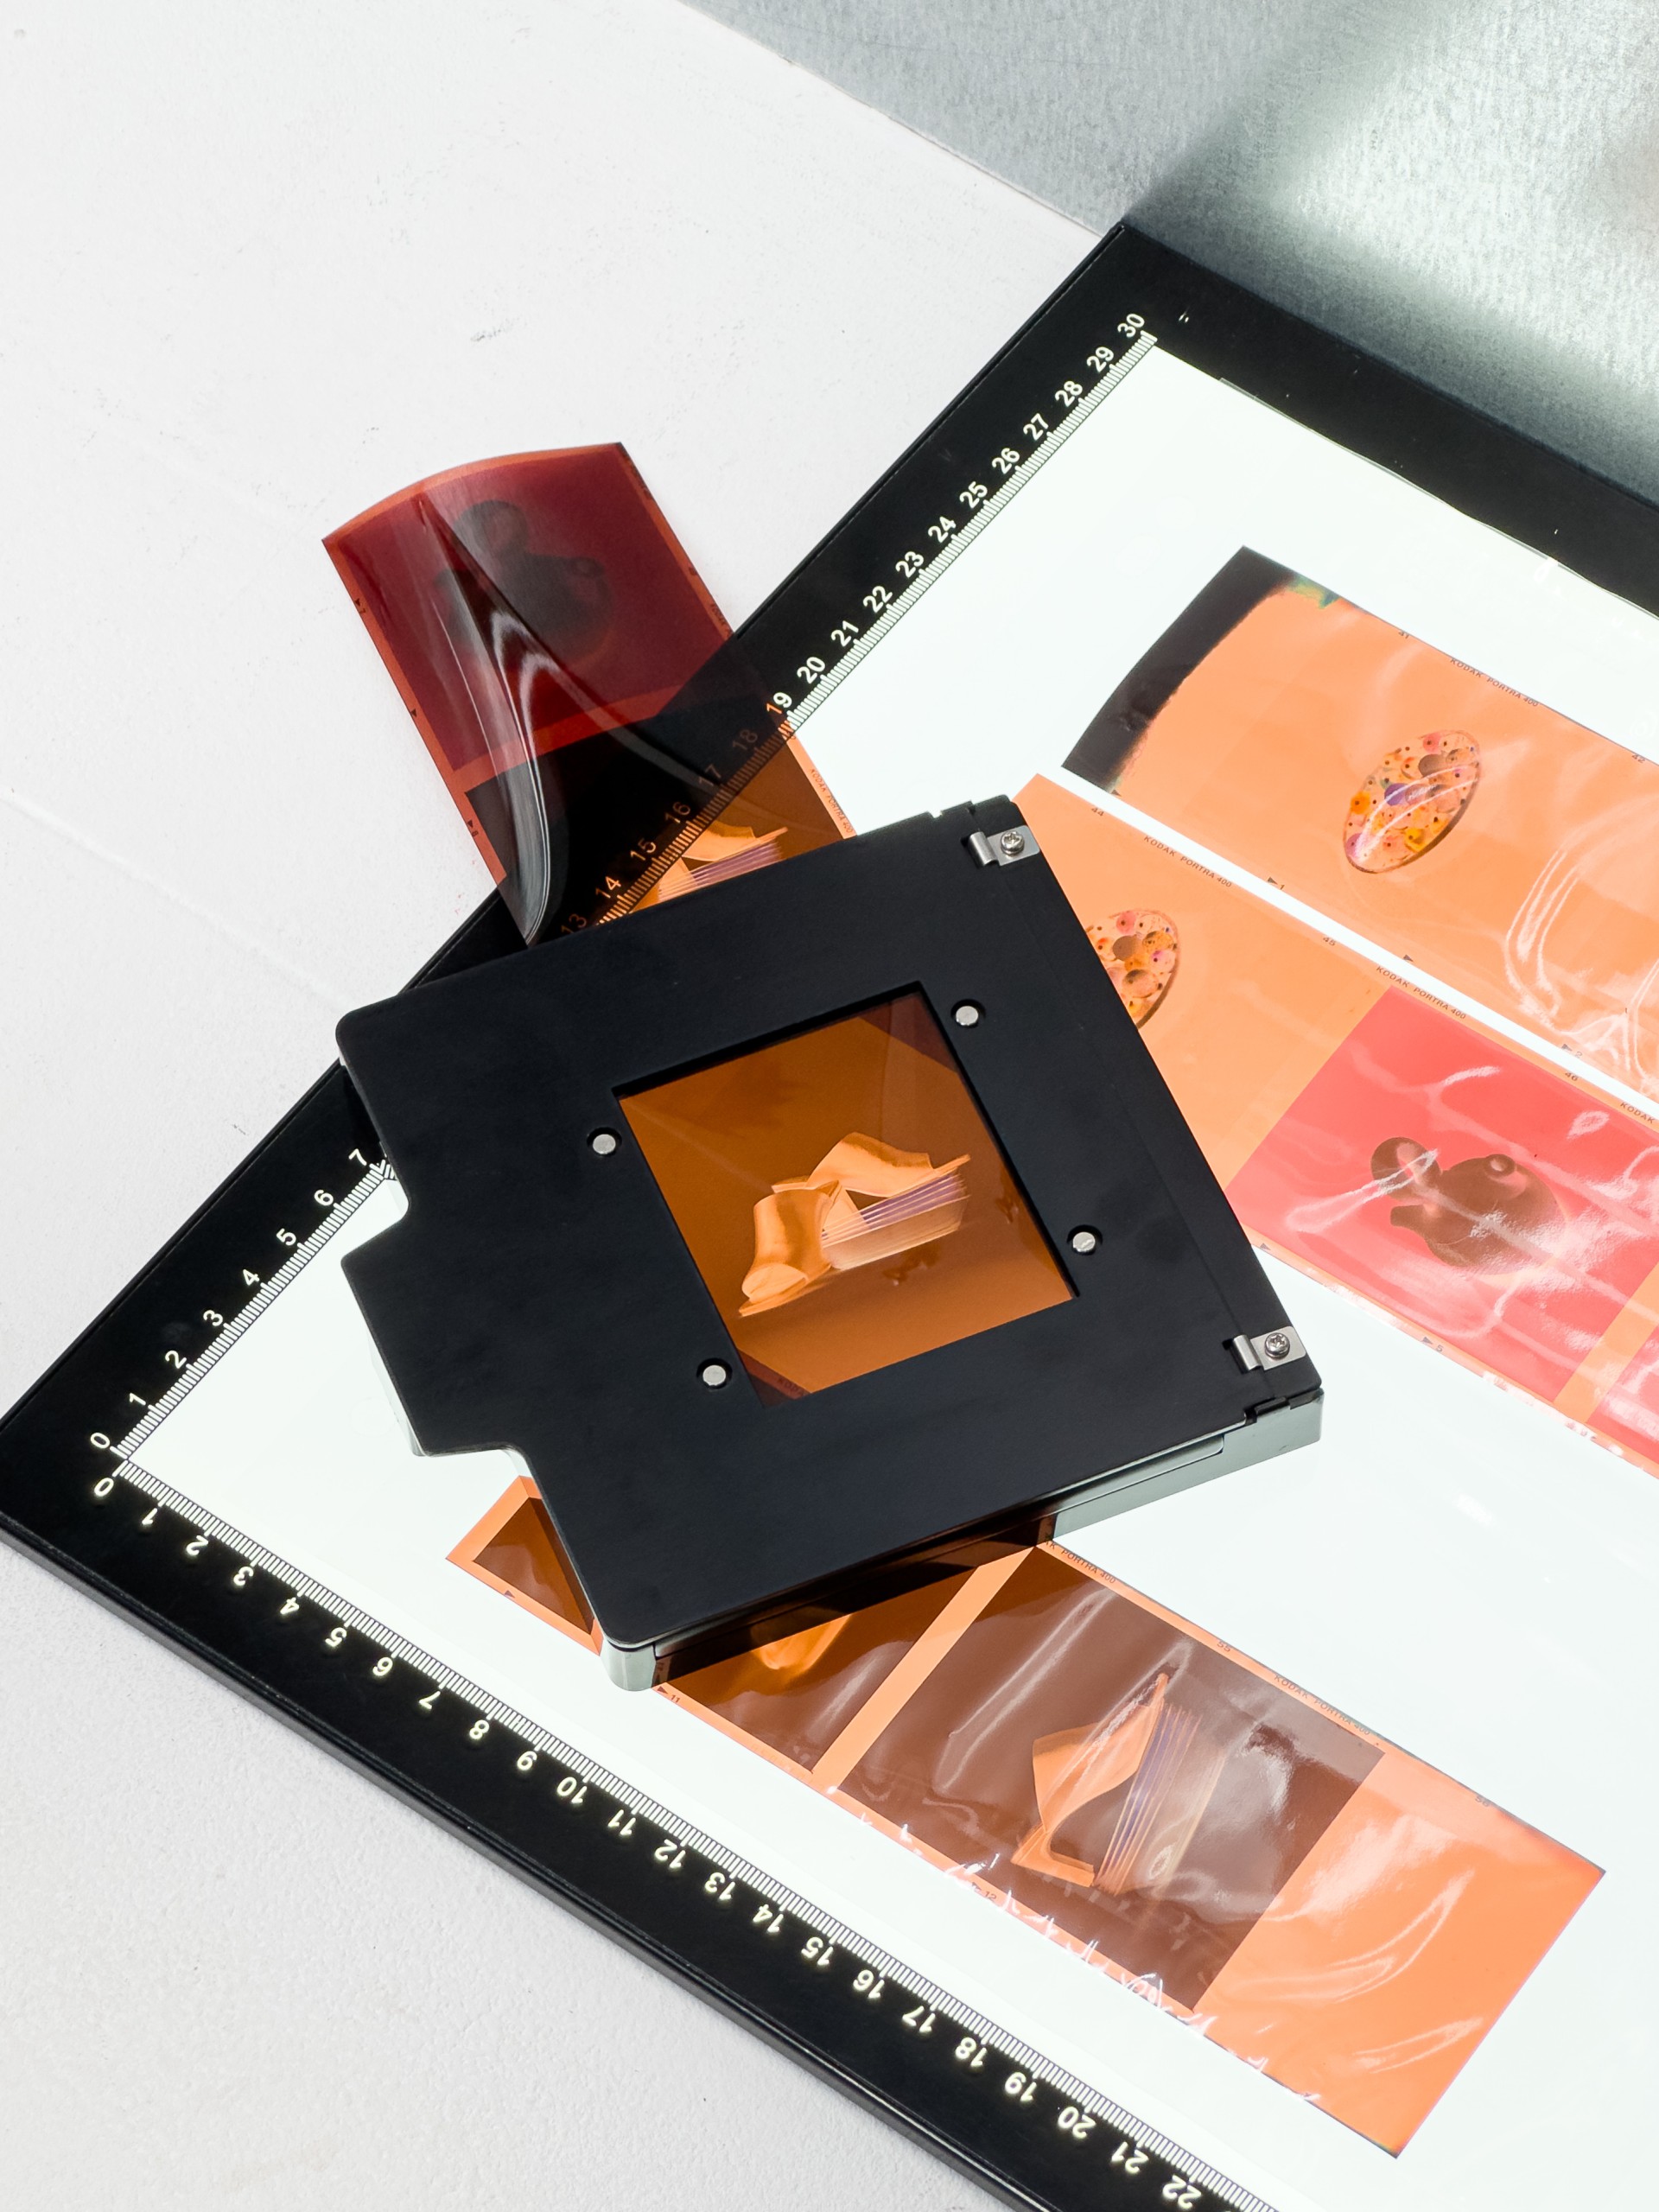
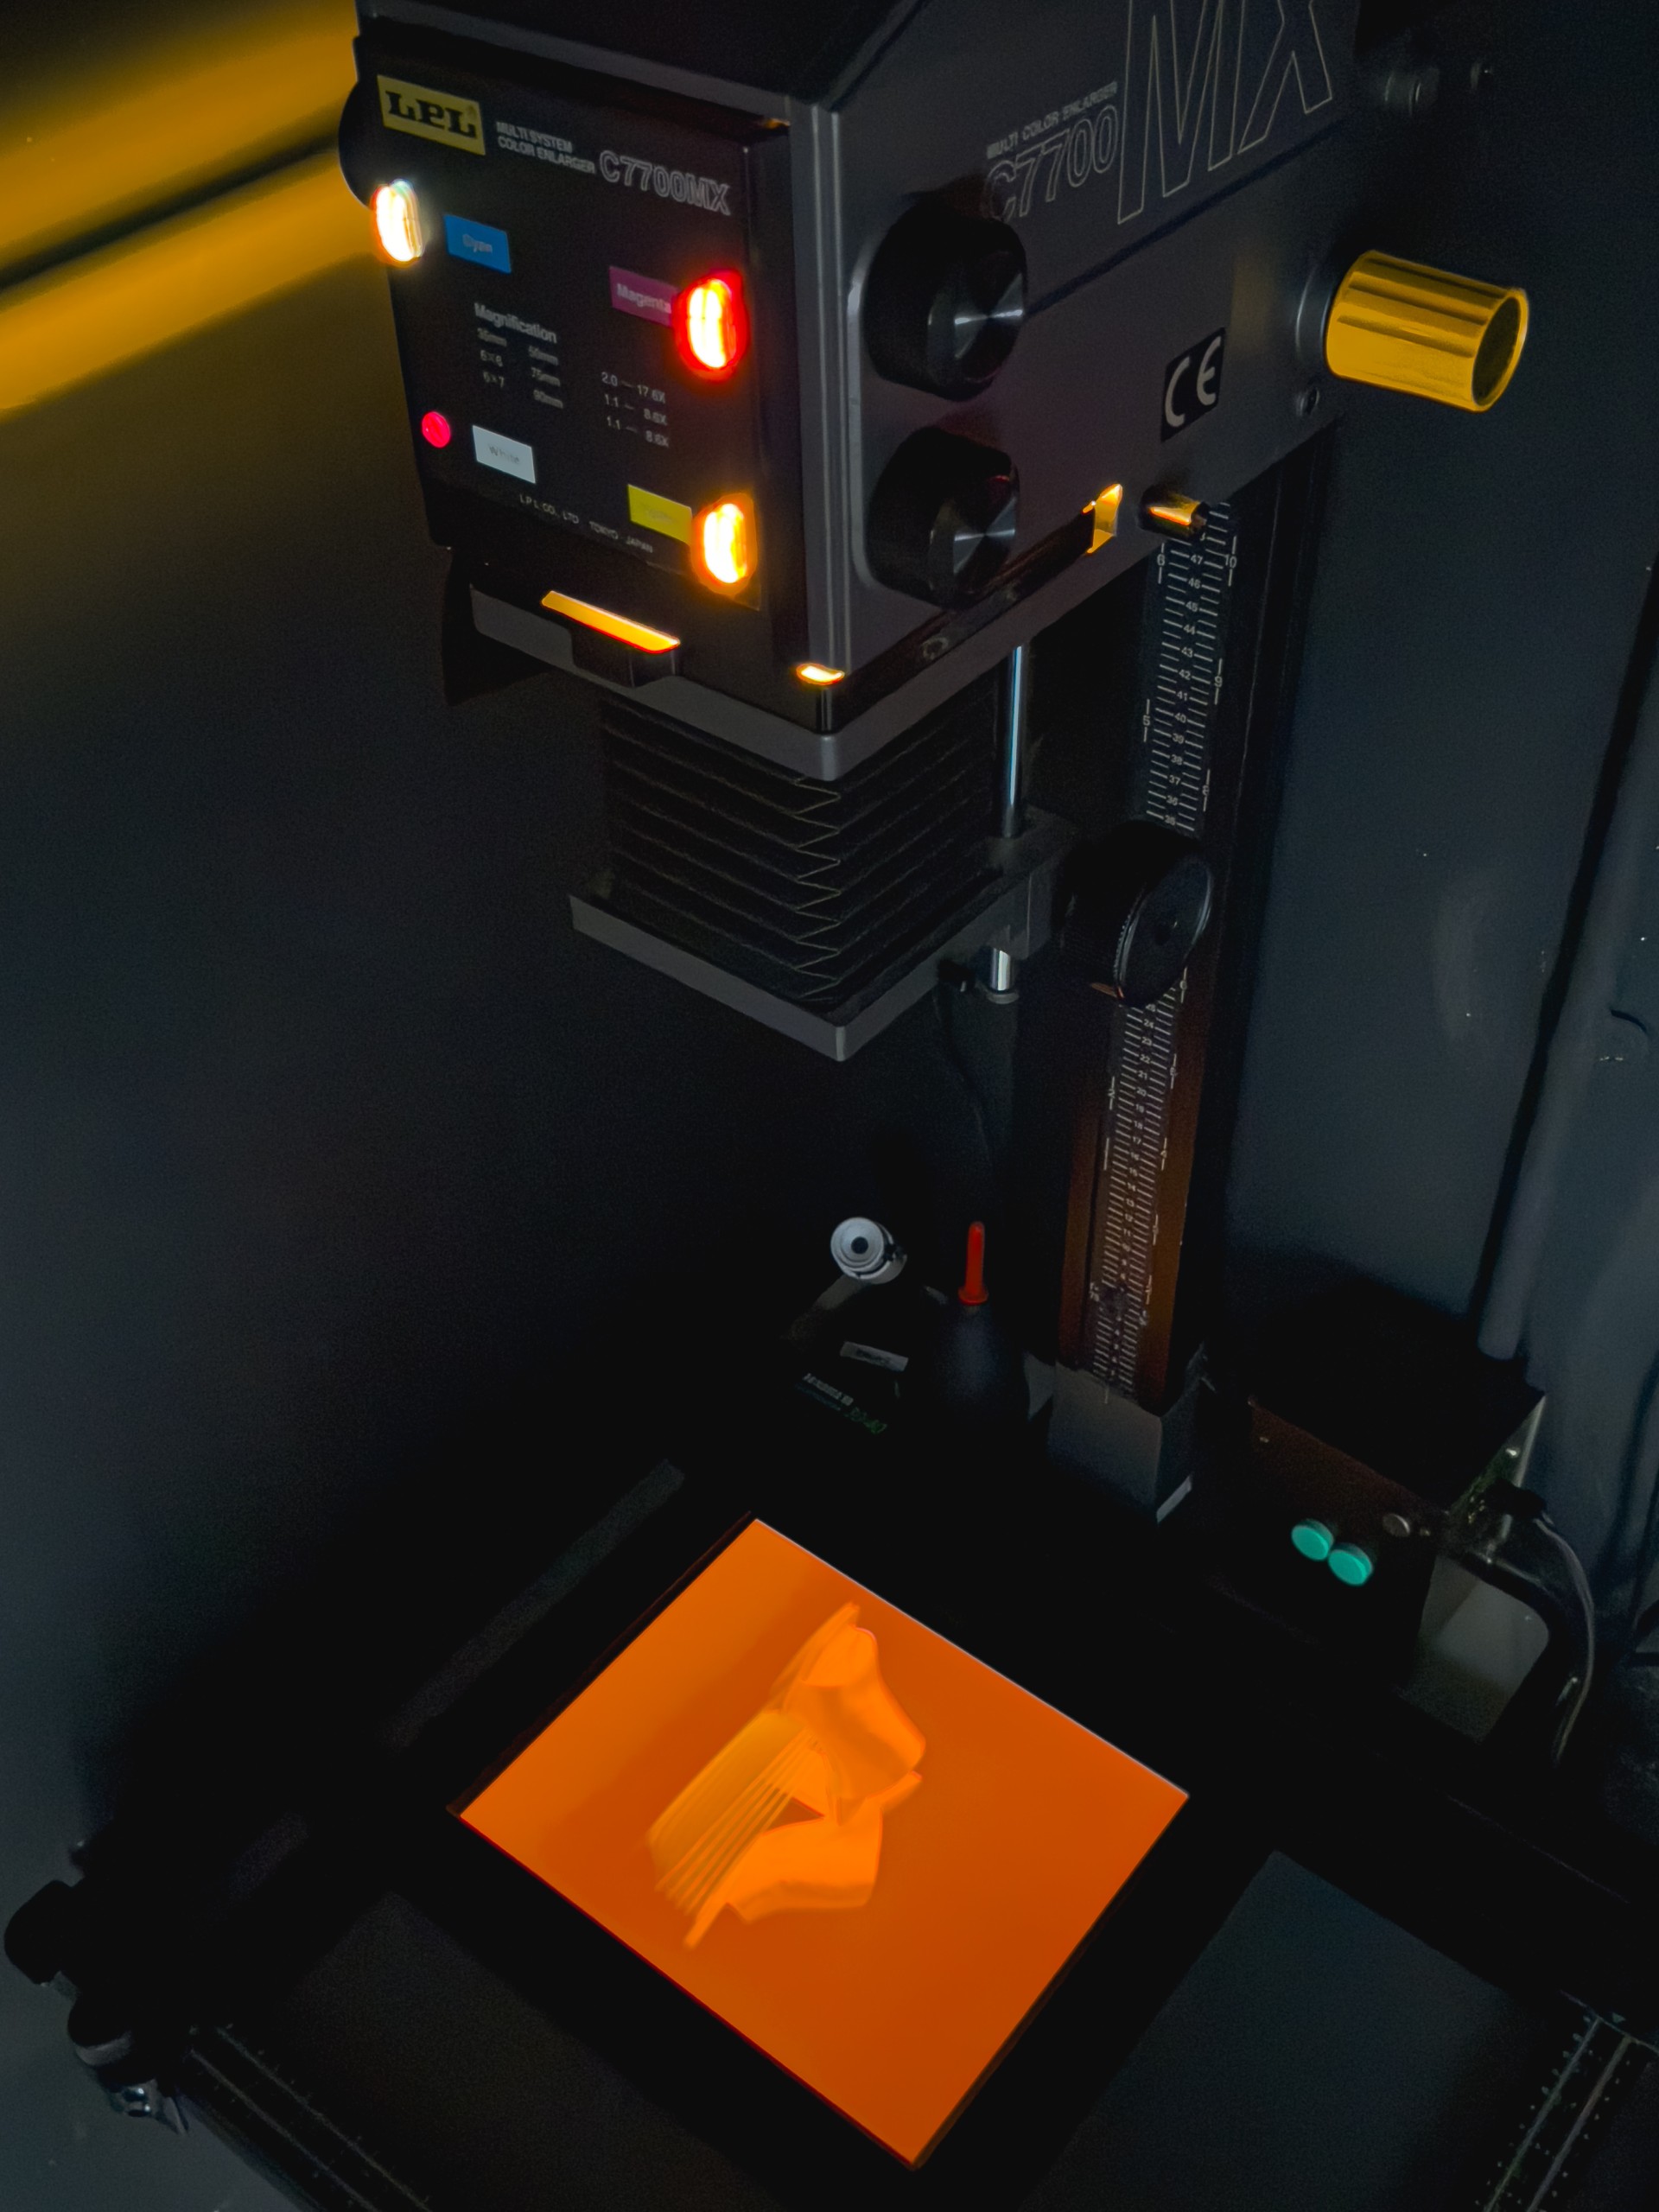
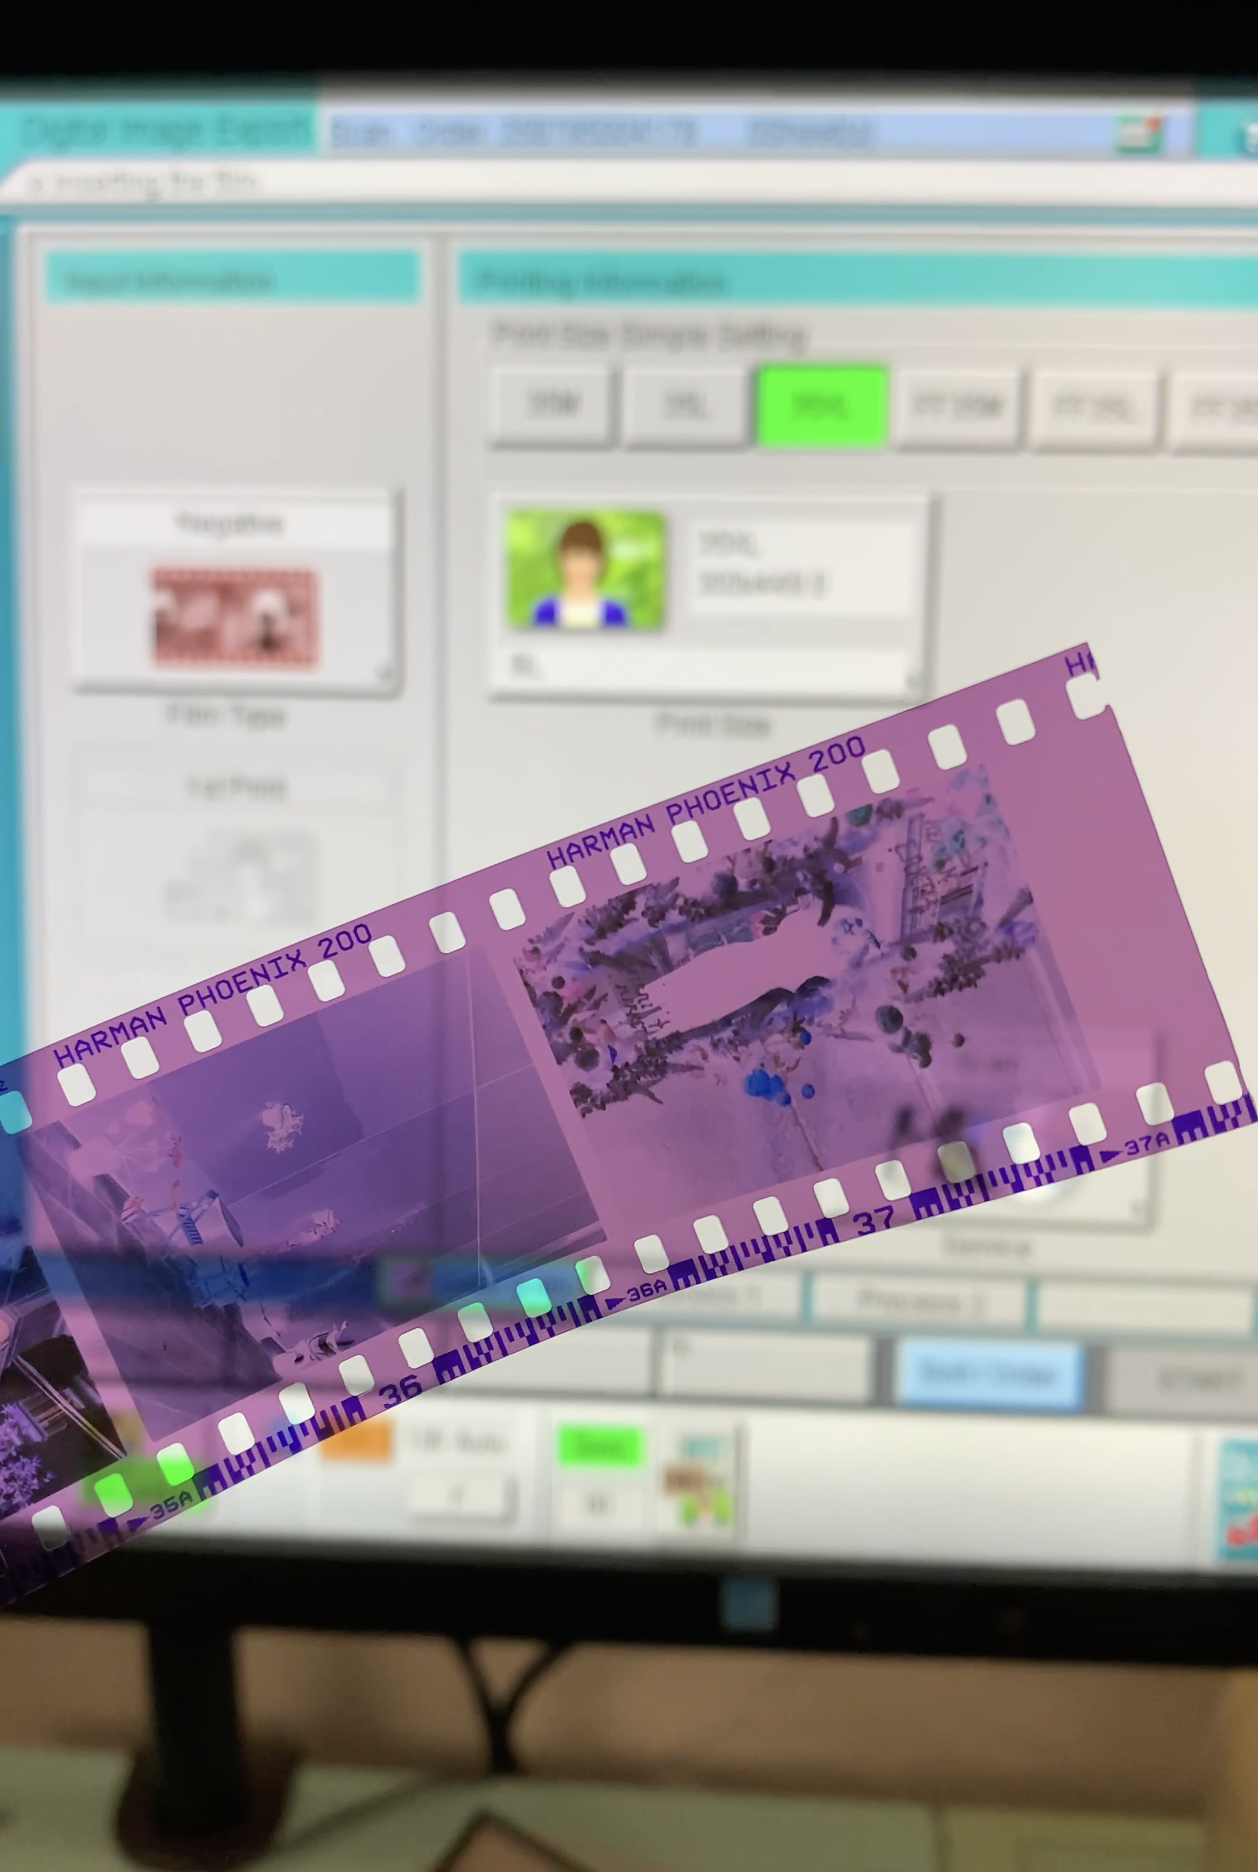
When we were able to develop the first roll ourselves, we confirmed it was wild. The base of the film looked purple when it’s usually orange or amber. After wrestling with it on the scanner, we realized you could tame it, especially depending on how and in what light situation you had shot it.

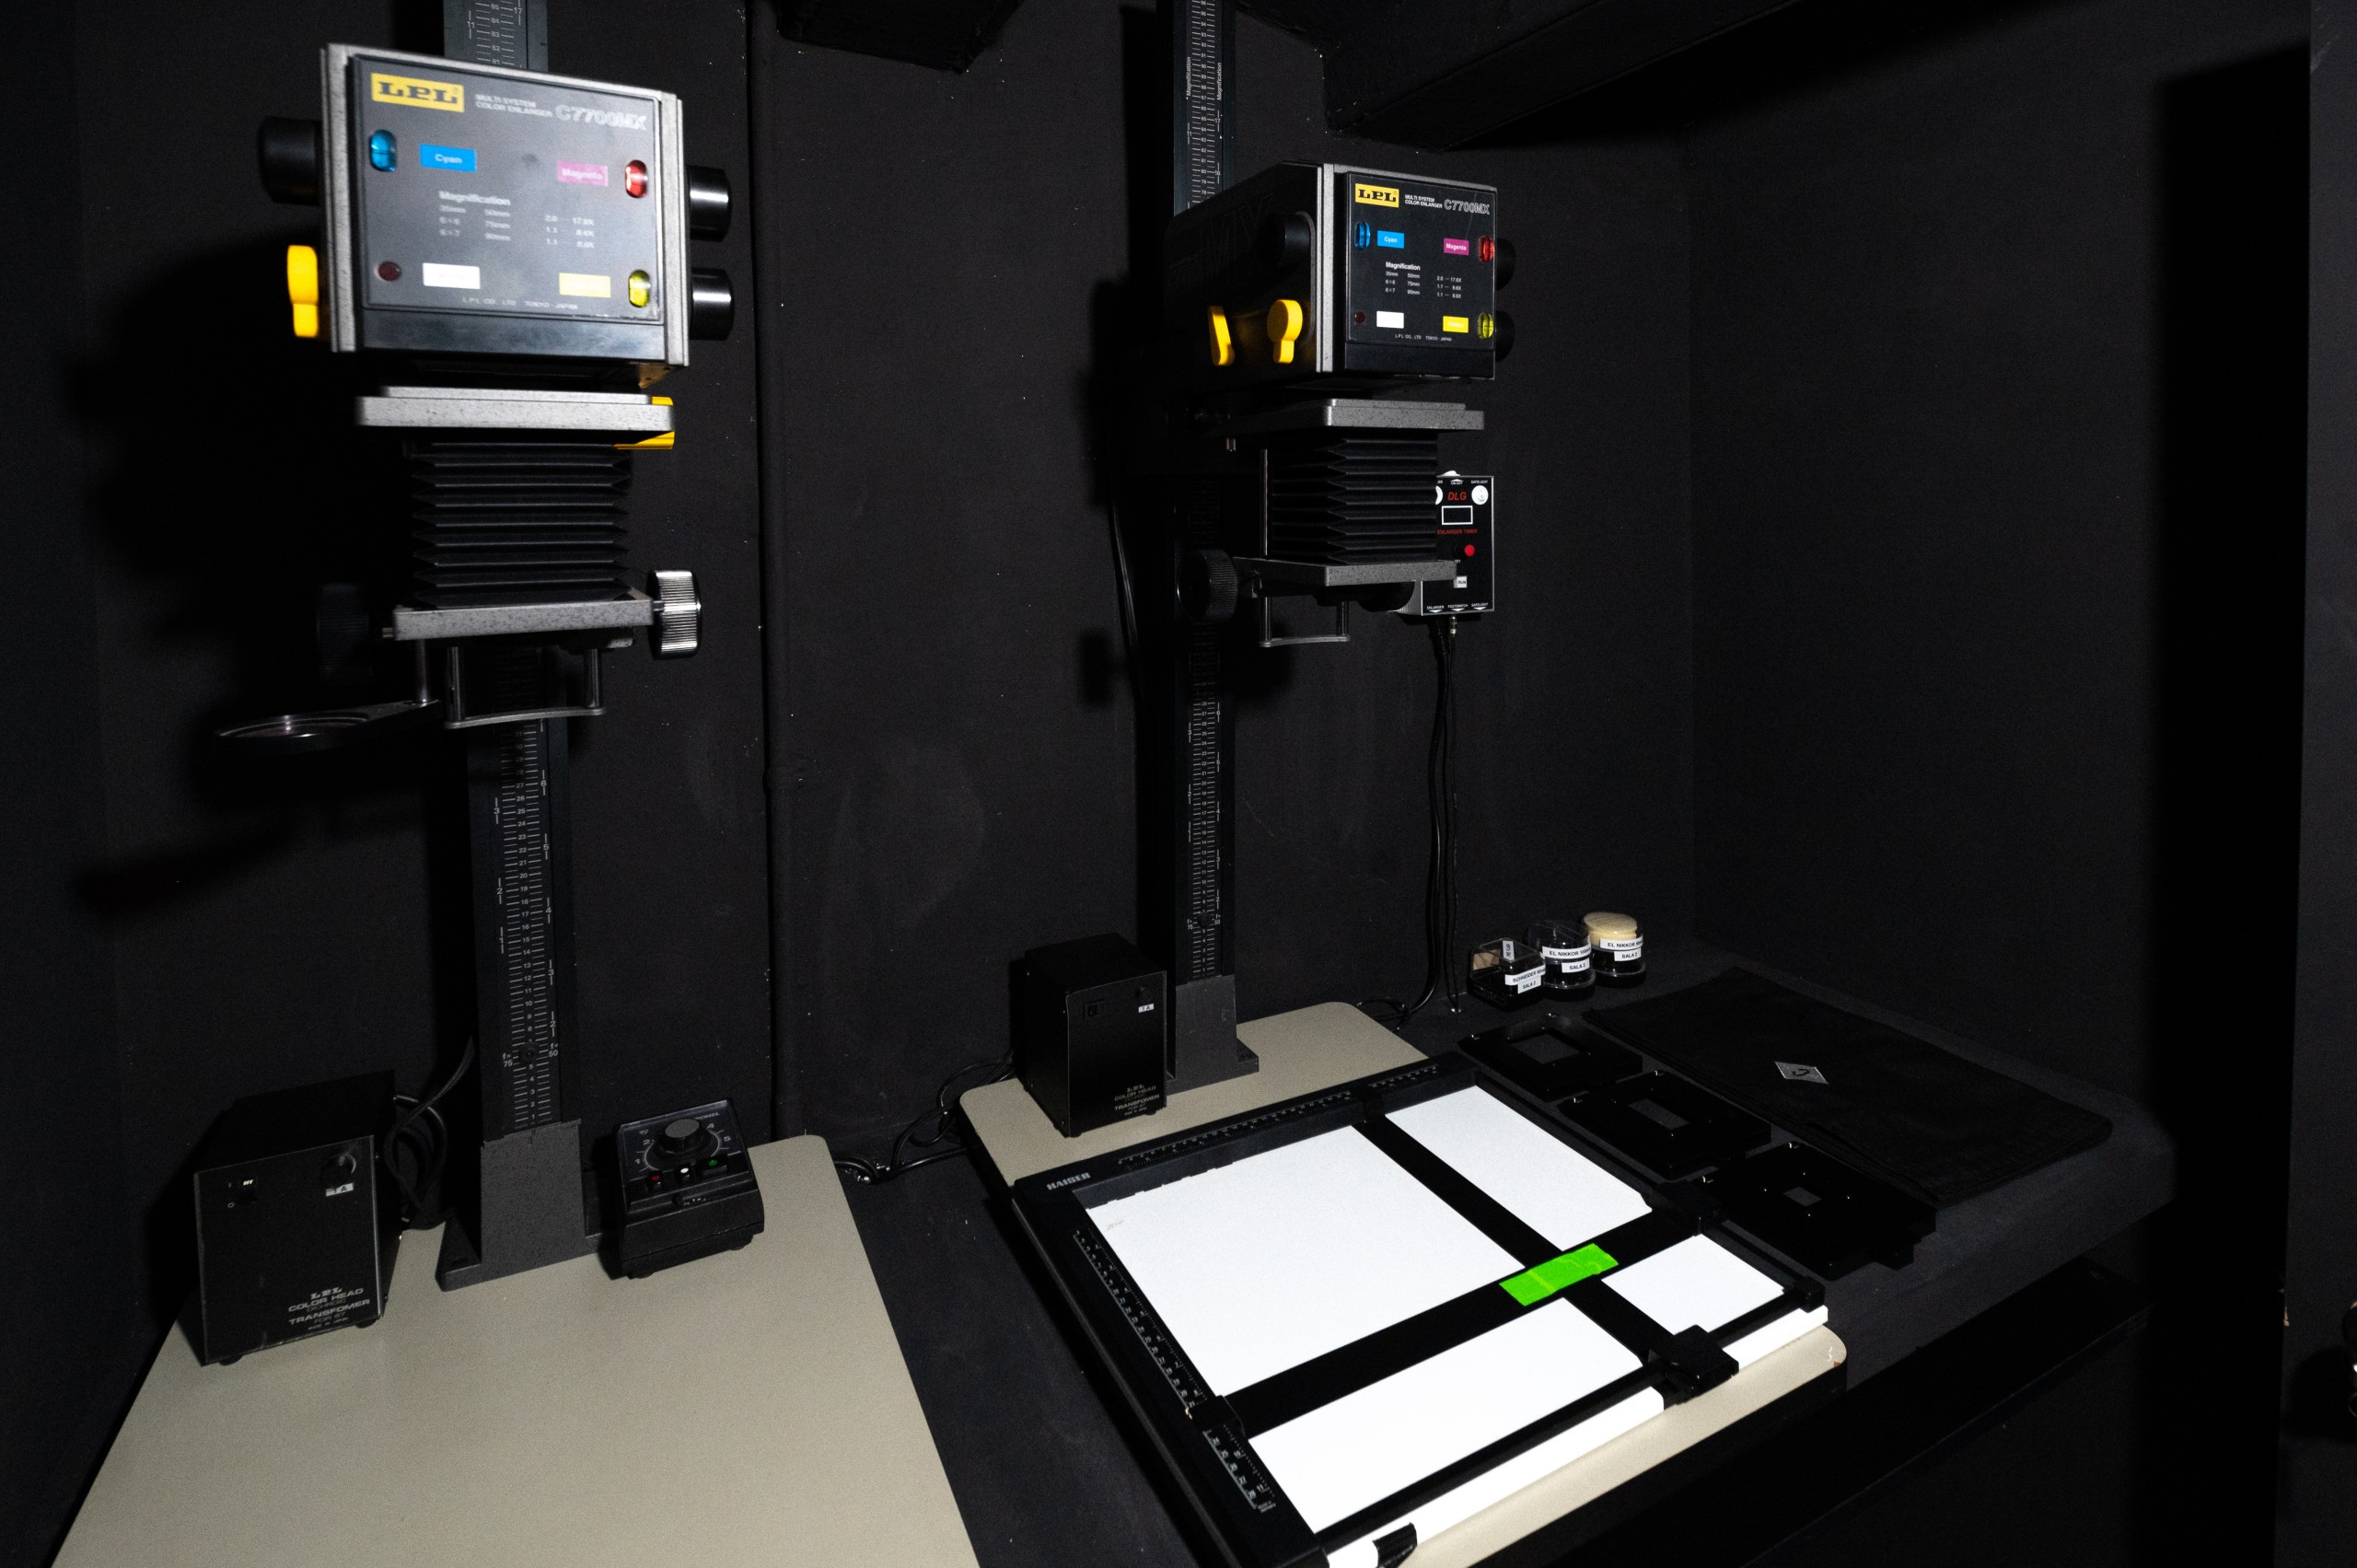
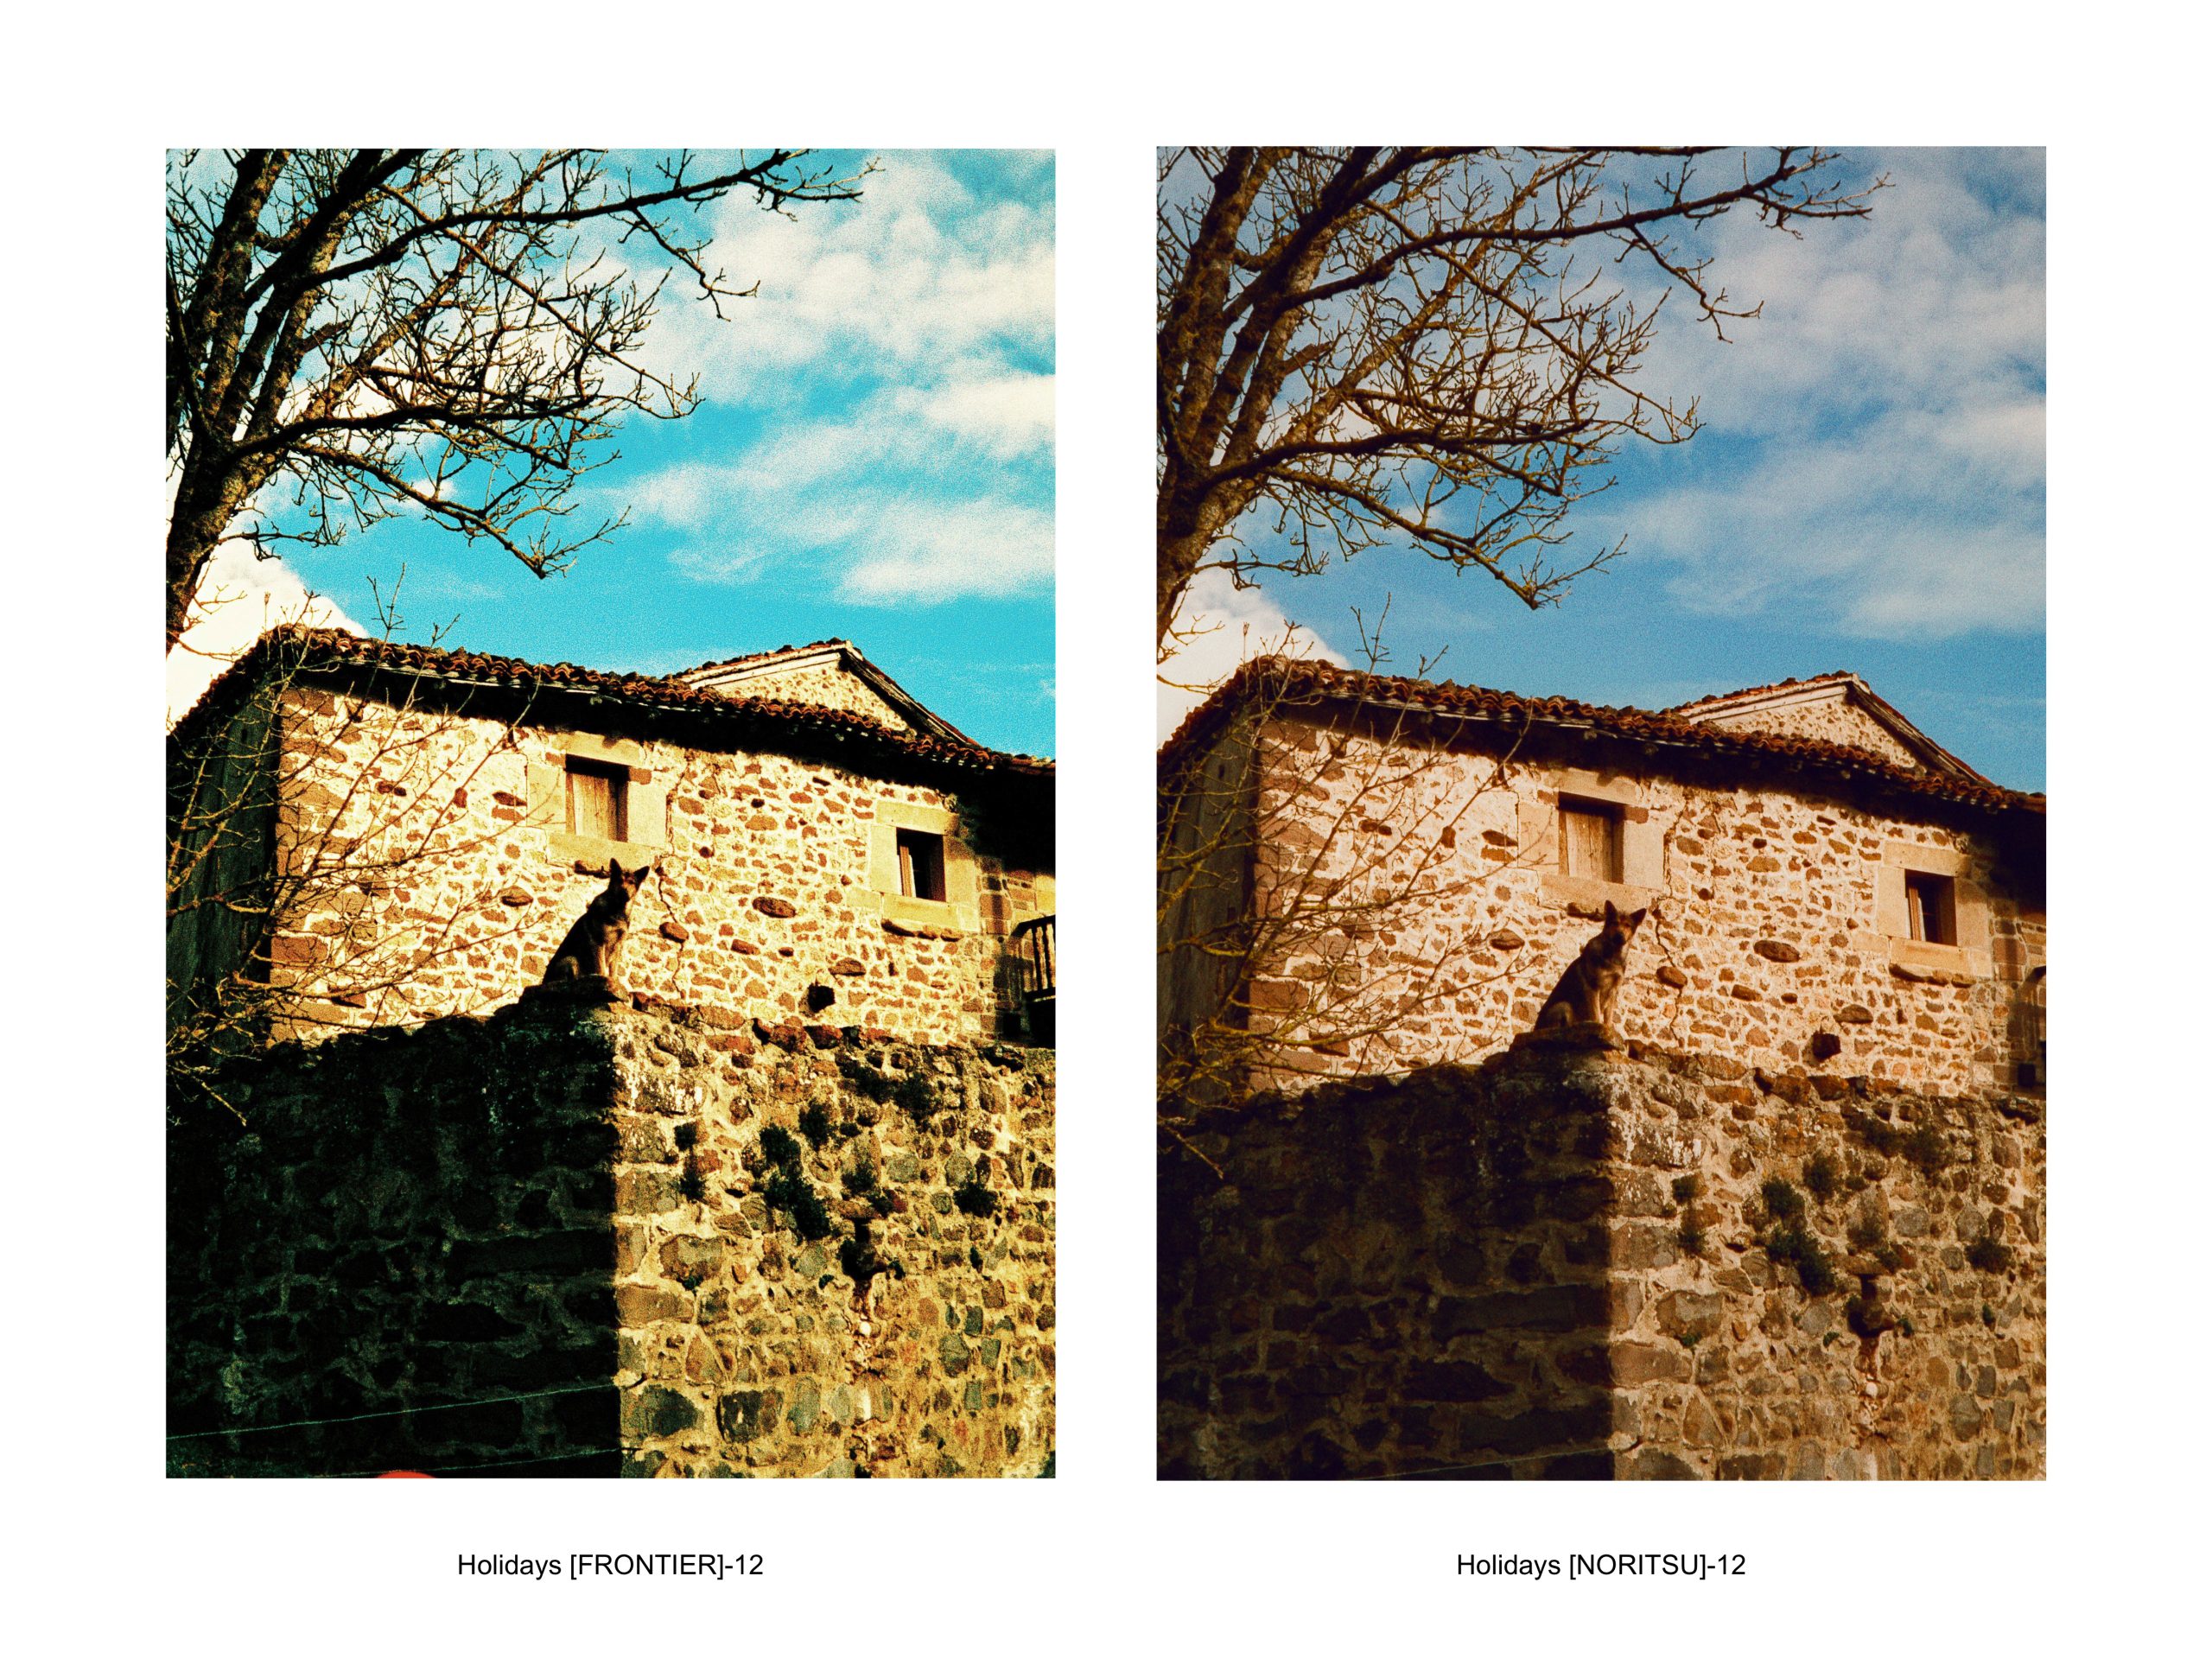
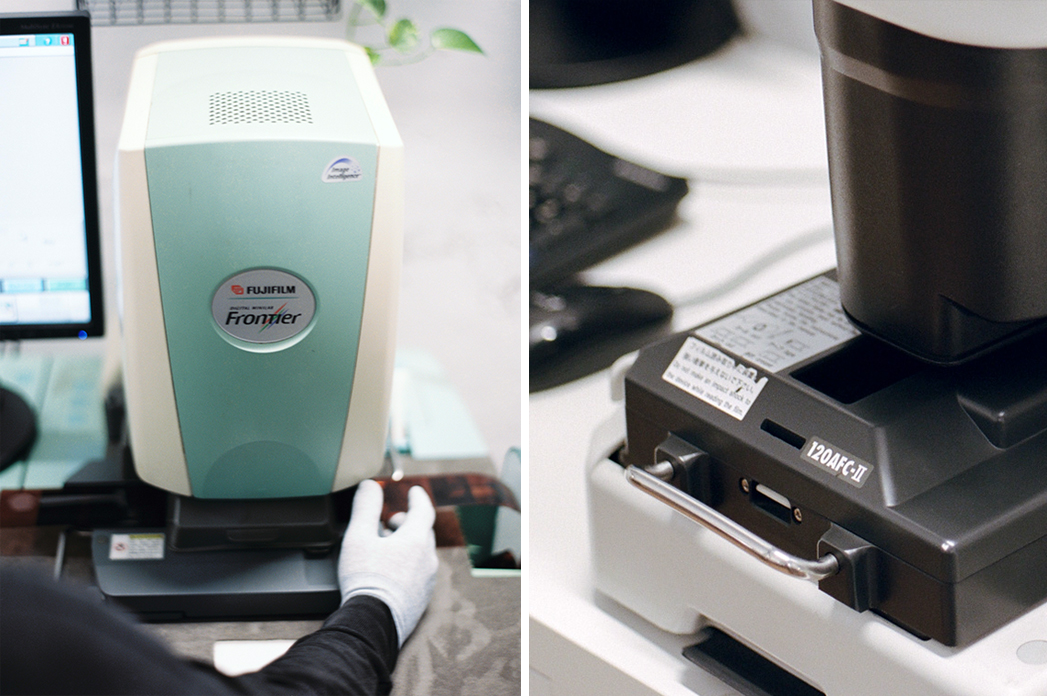
We tested this film at the lab in different lighting situations, we also tested it ‘in real life’ (a.k.a., while on vacation), and in studio lighting. All tests were scanned in Frontier and Noritsu, and the results were quite unexpected. We hope these tests help you decide for yourself!
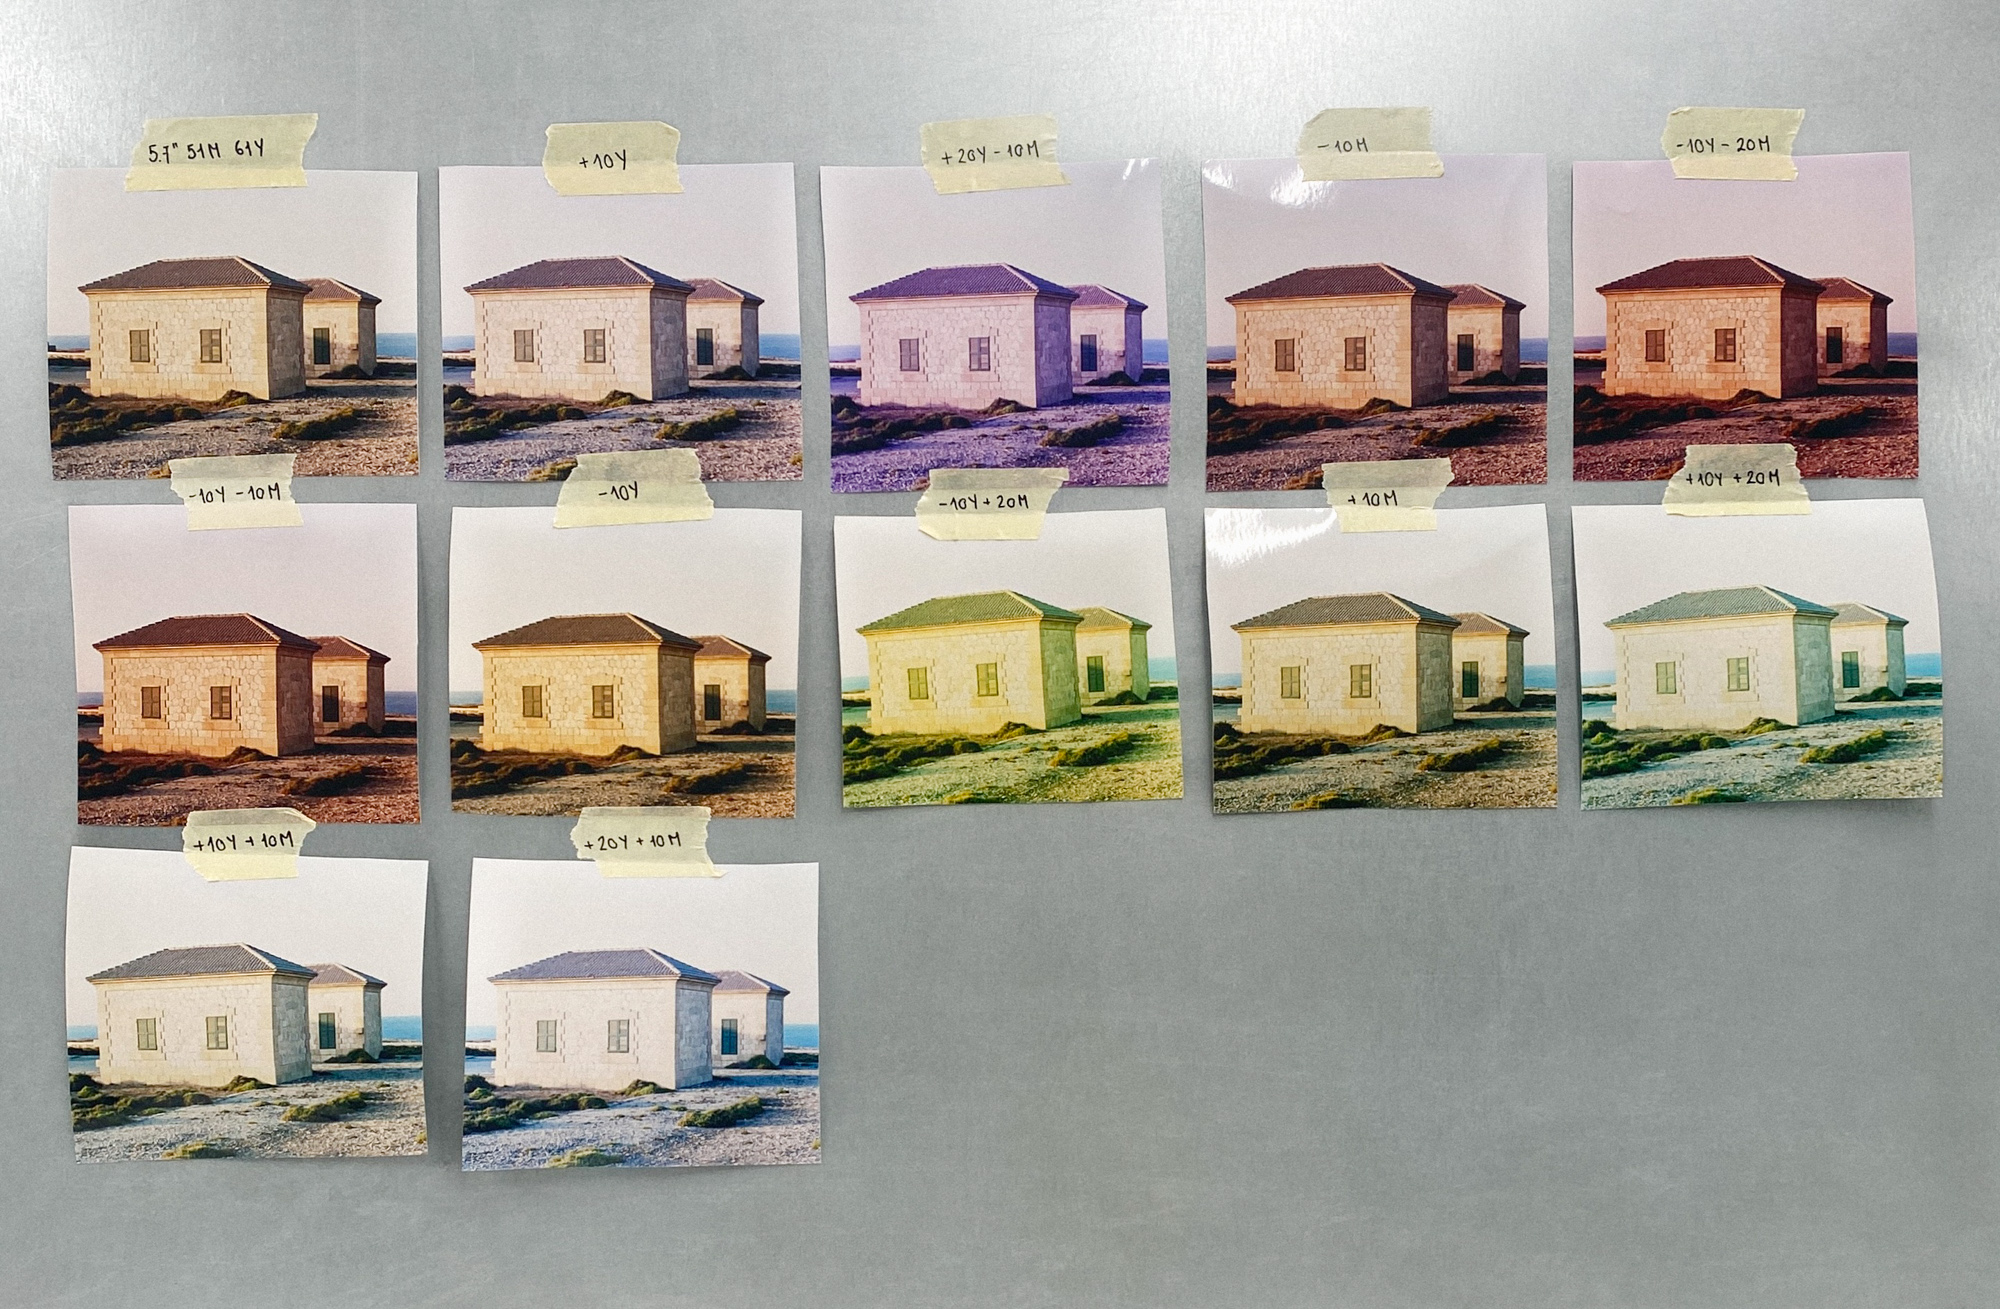
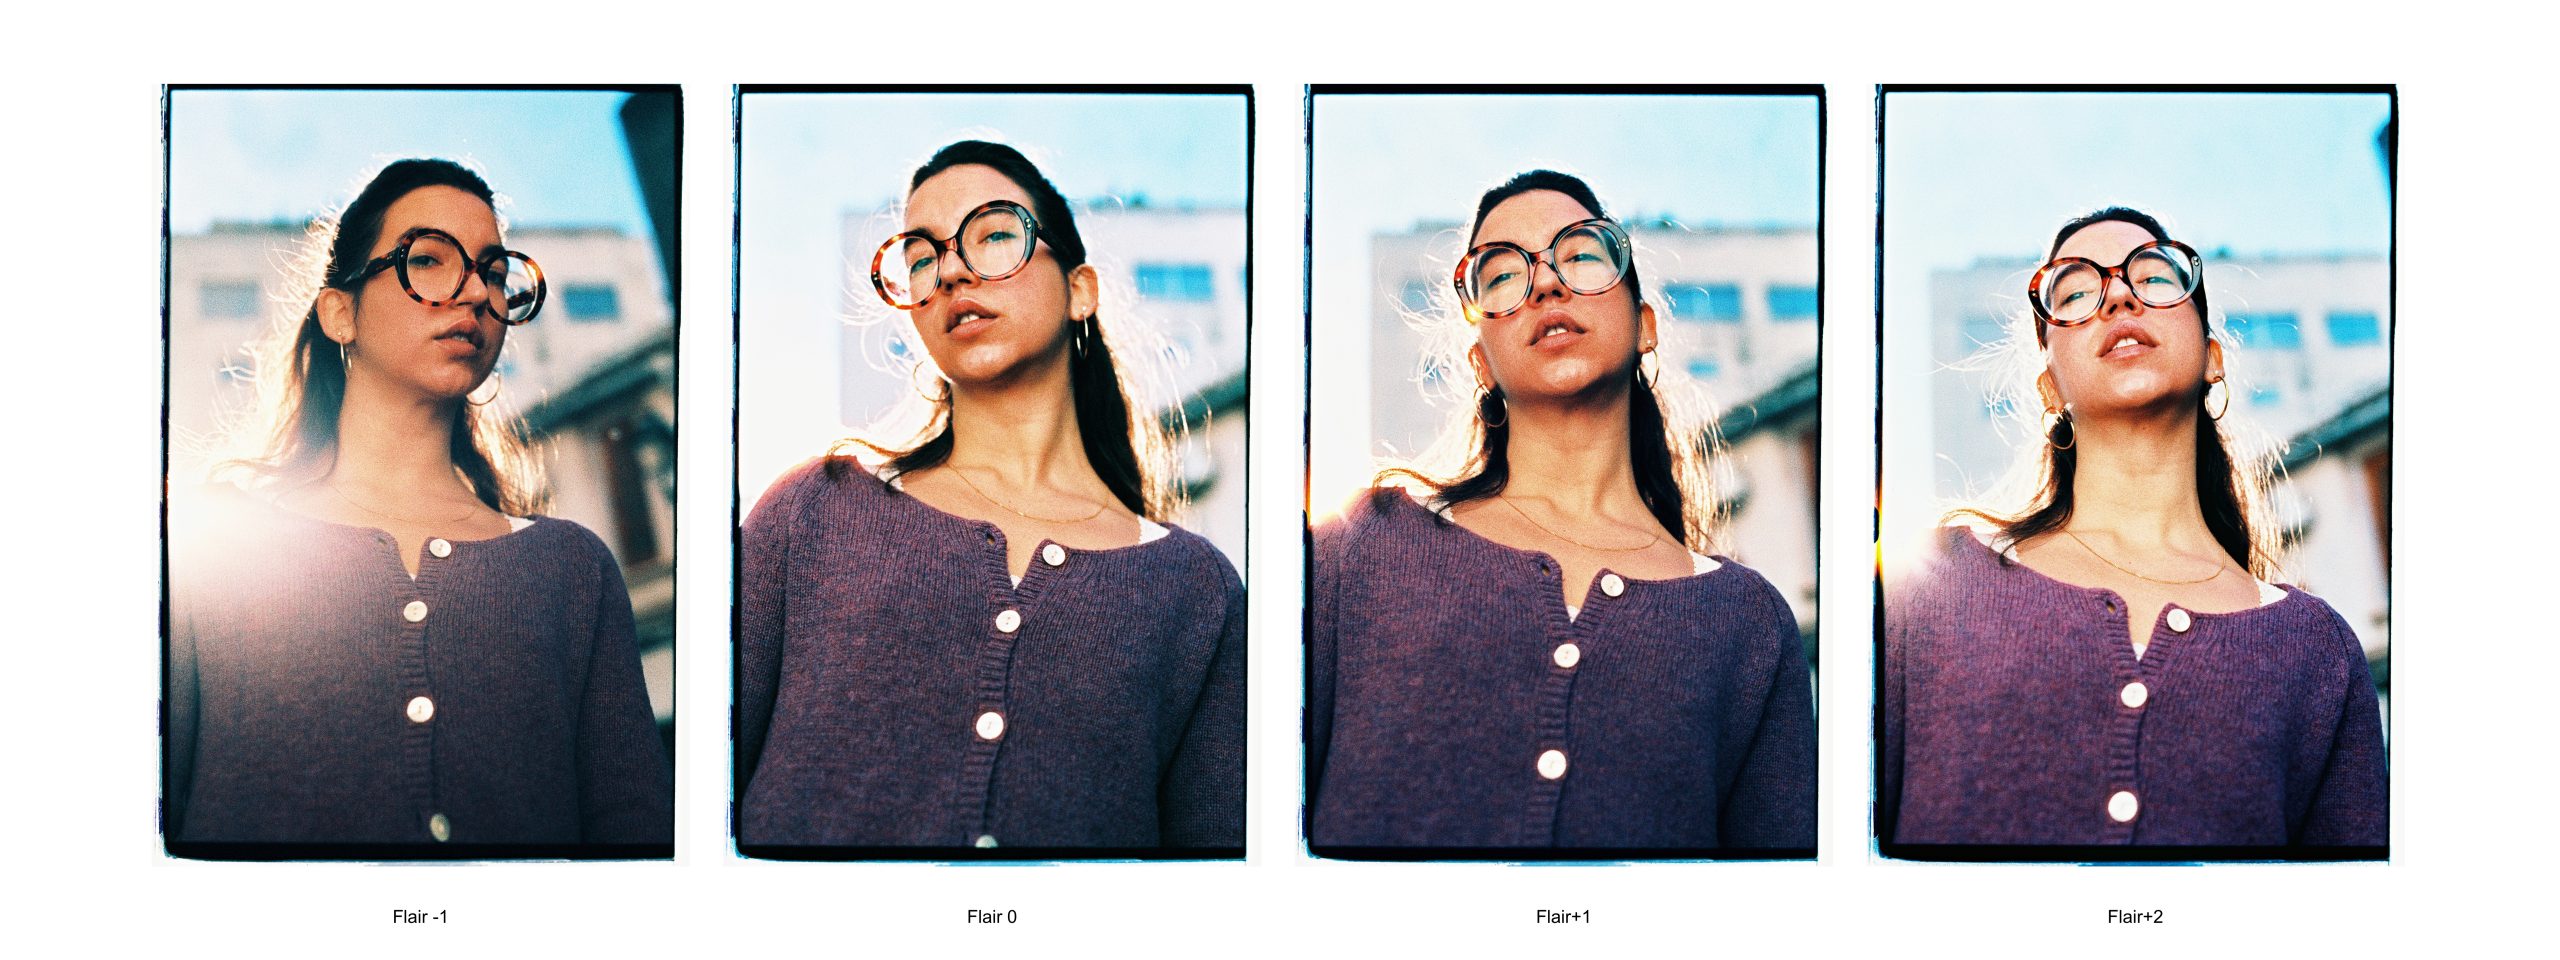
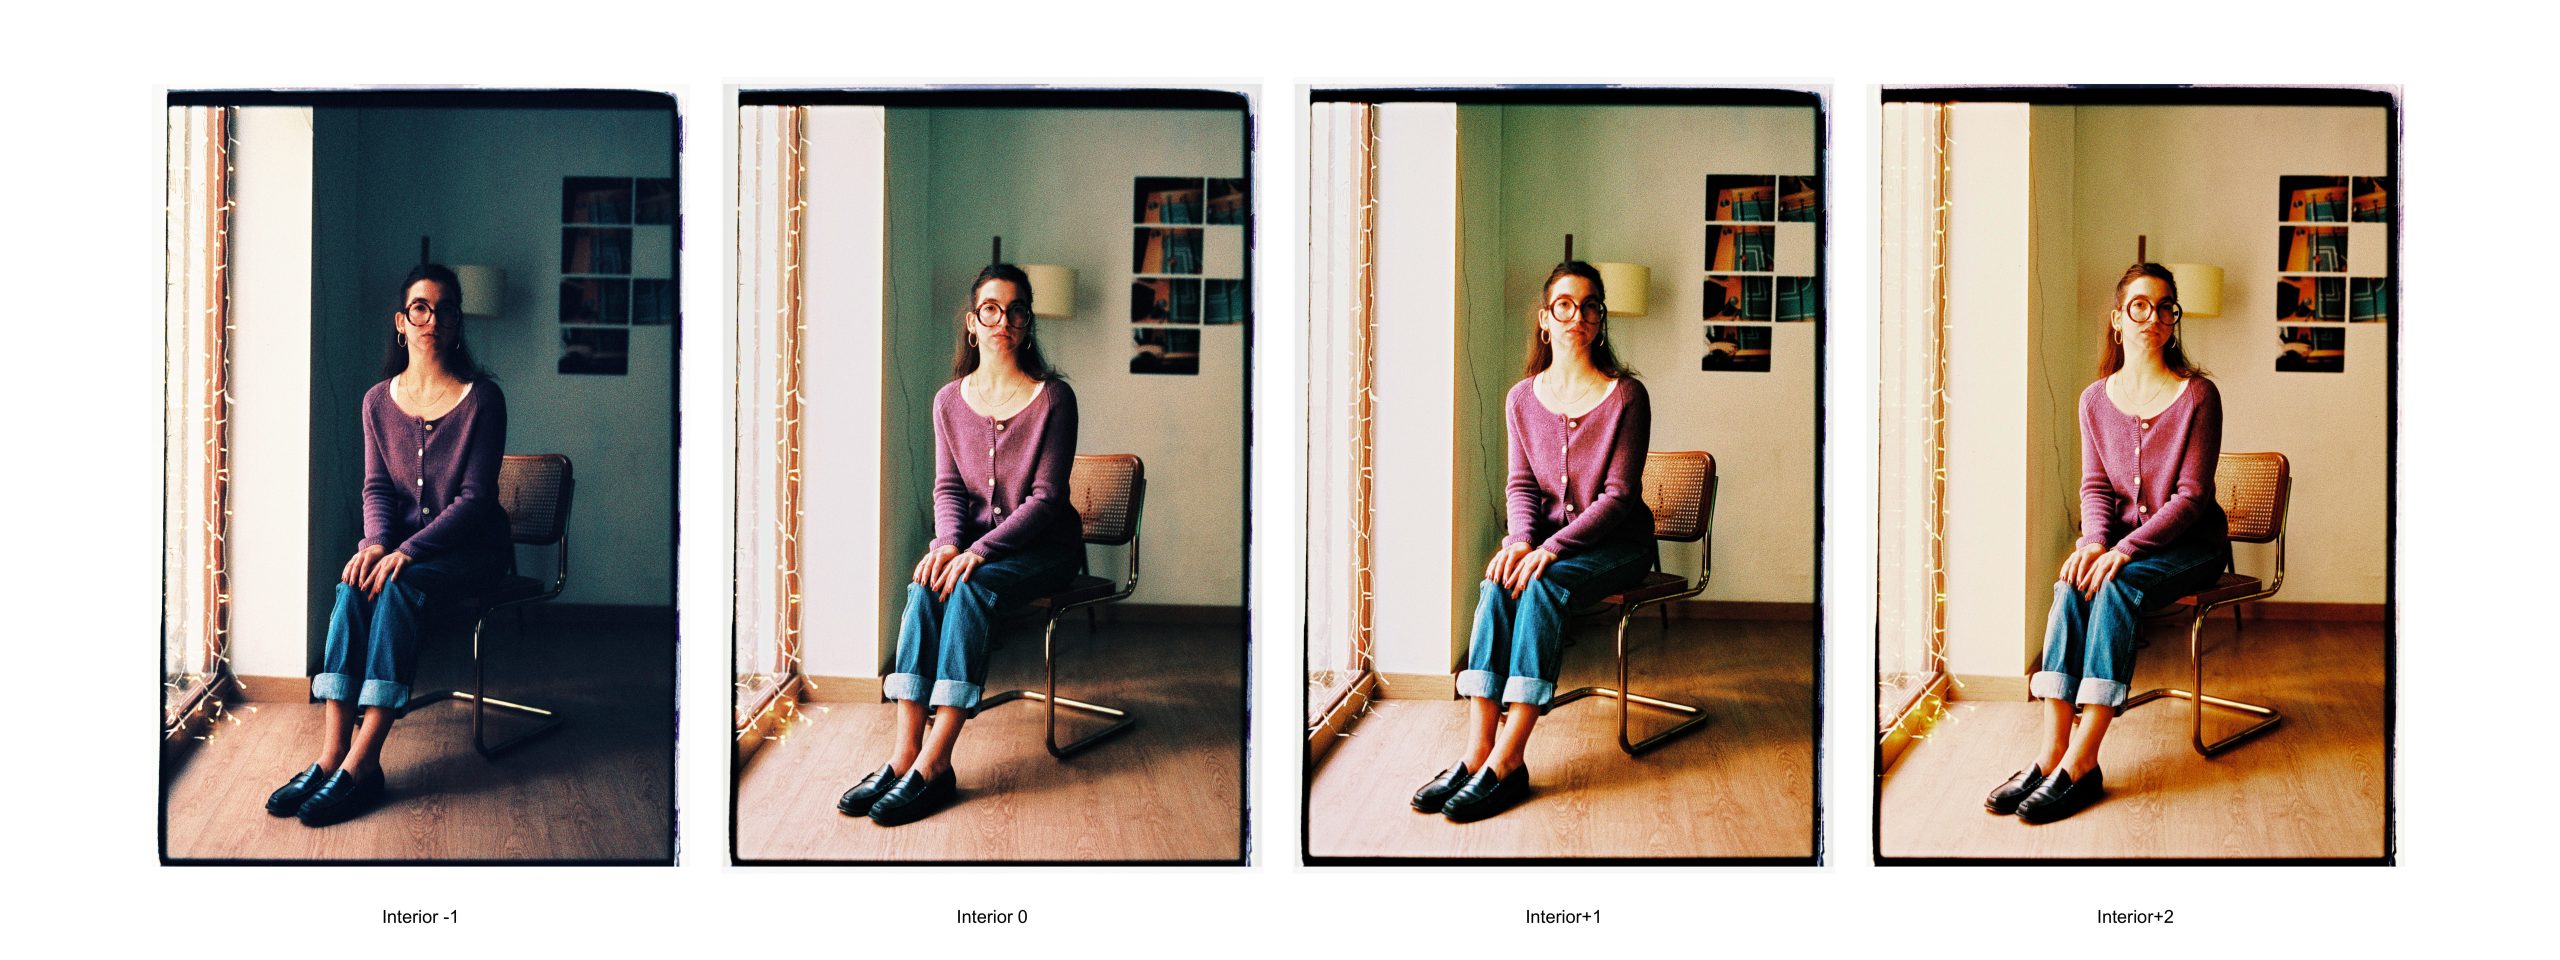
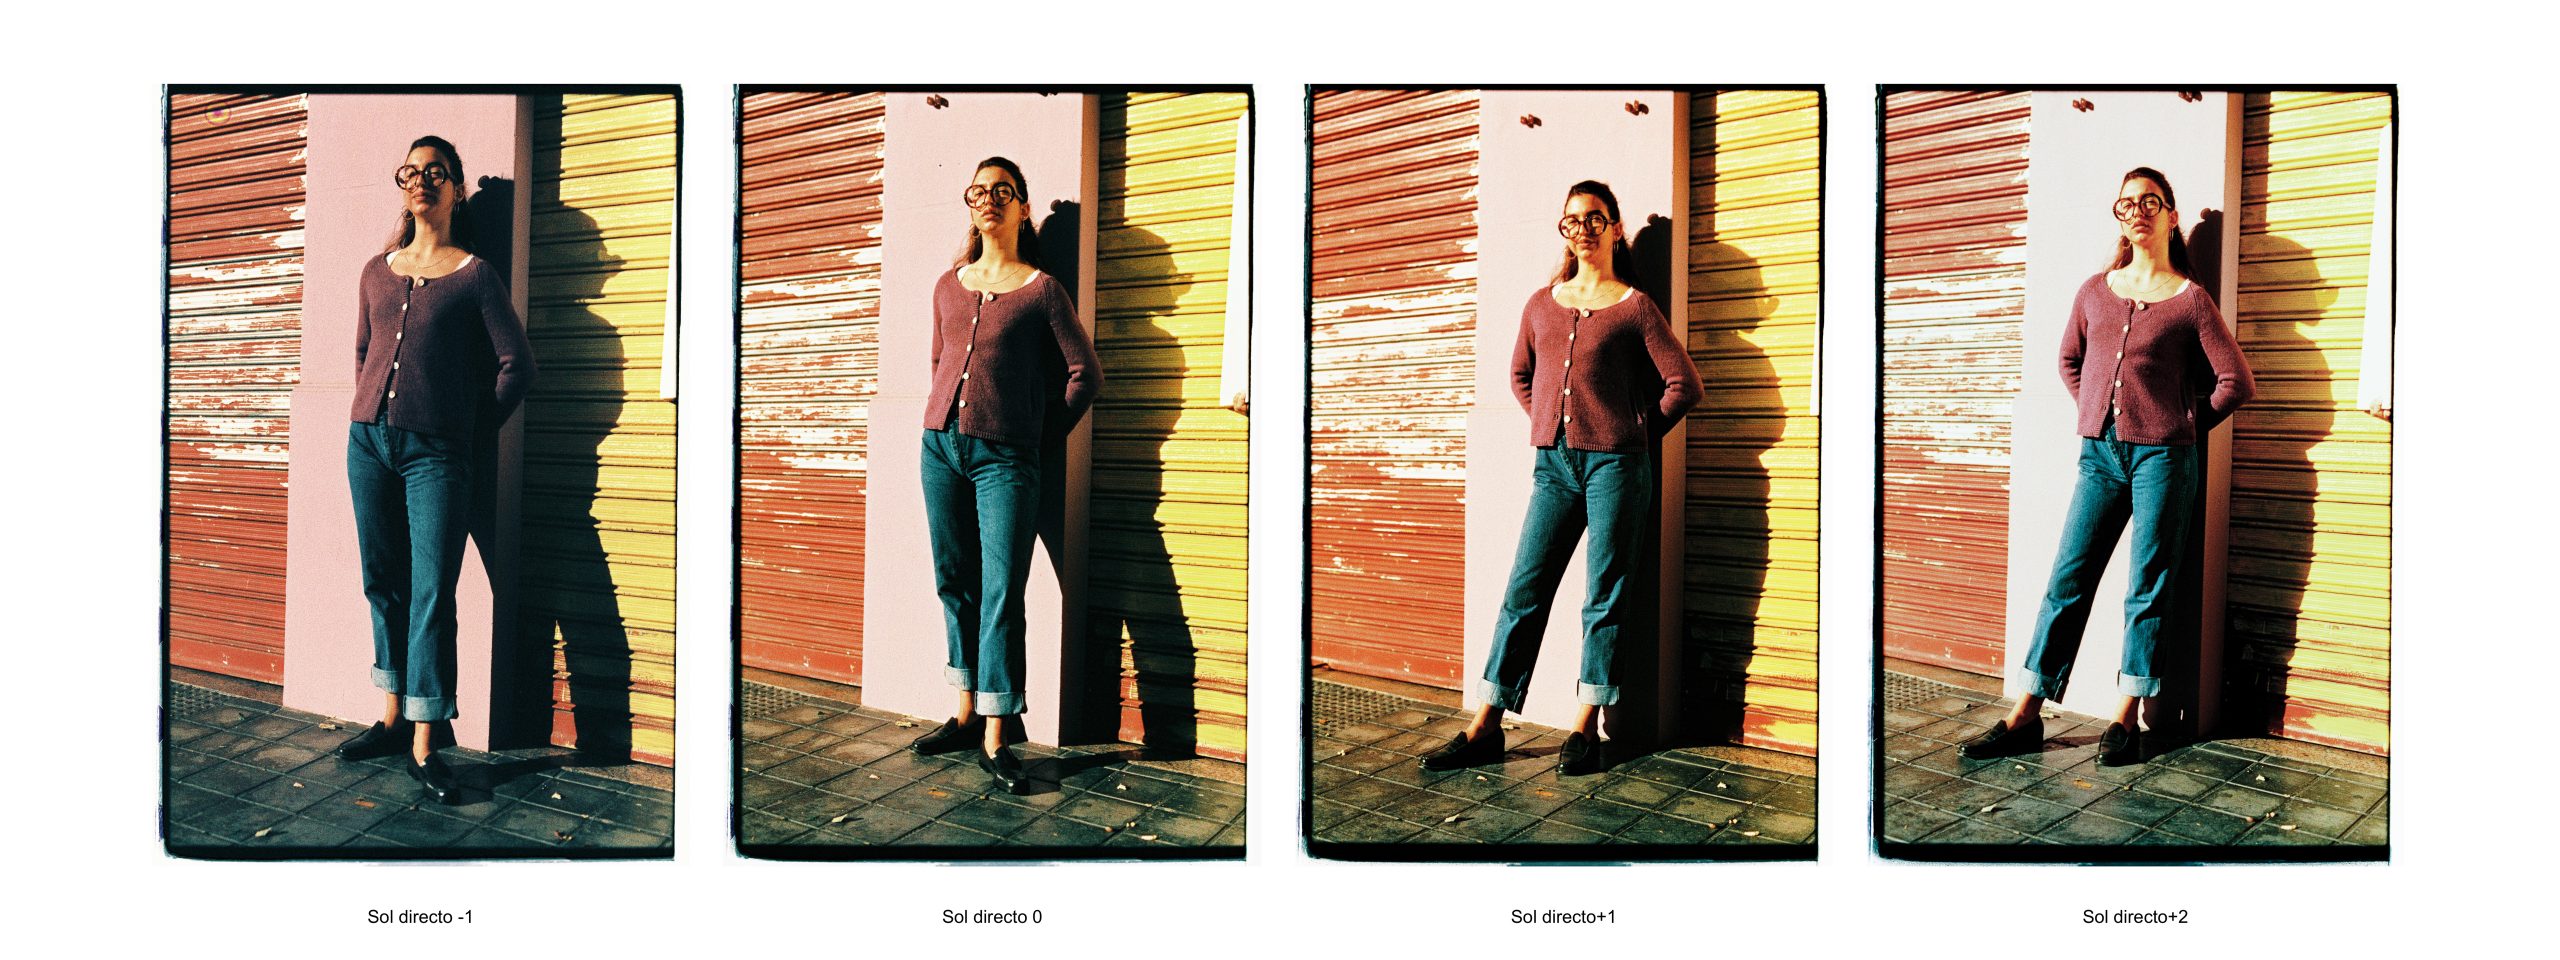
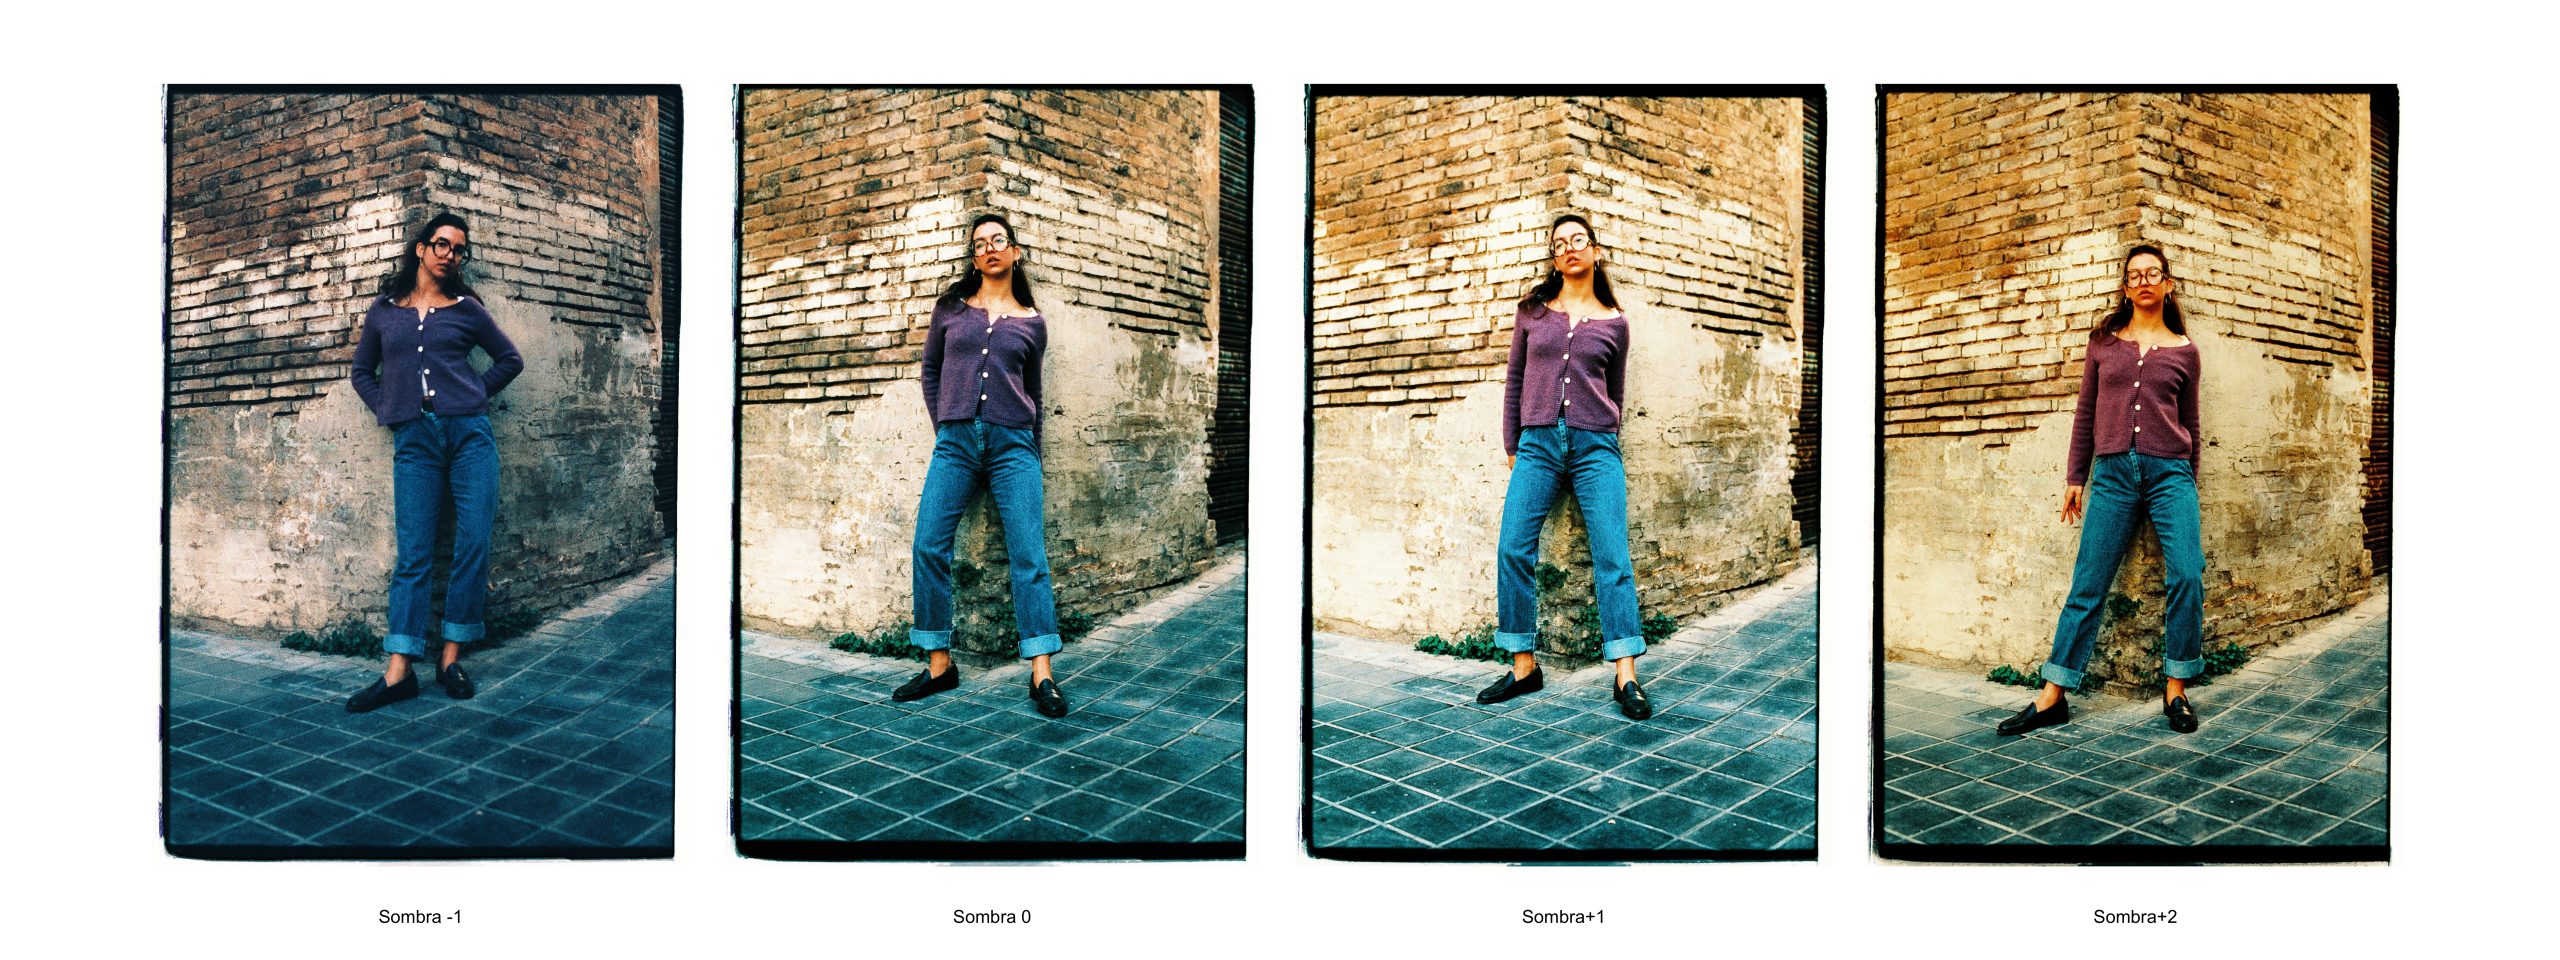
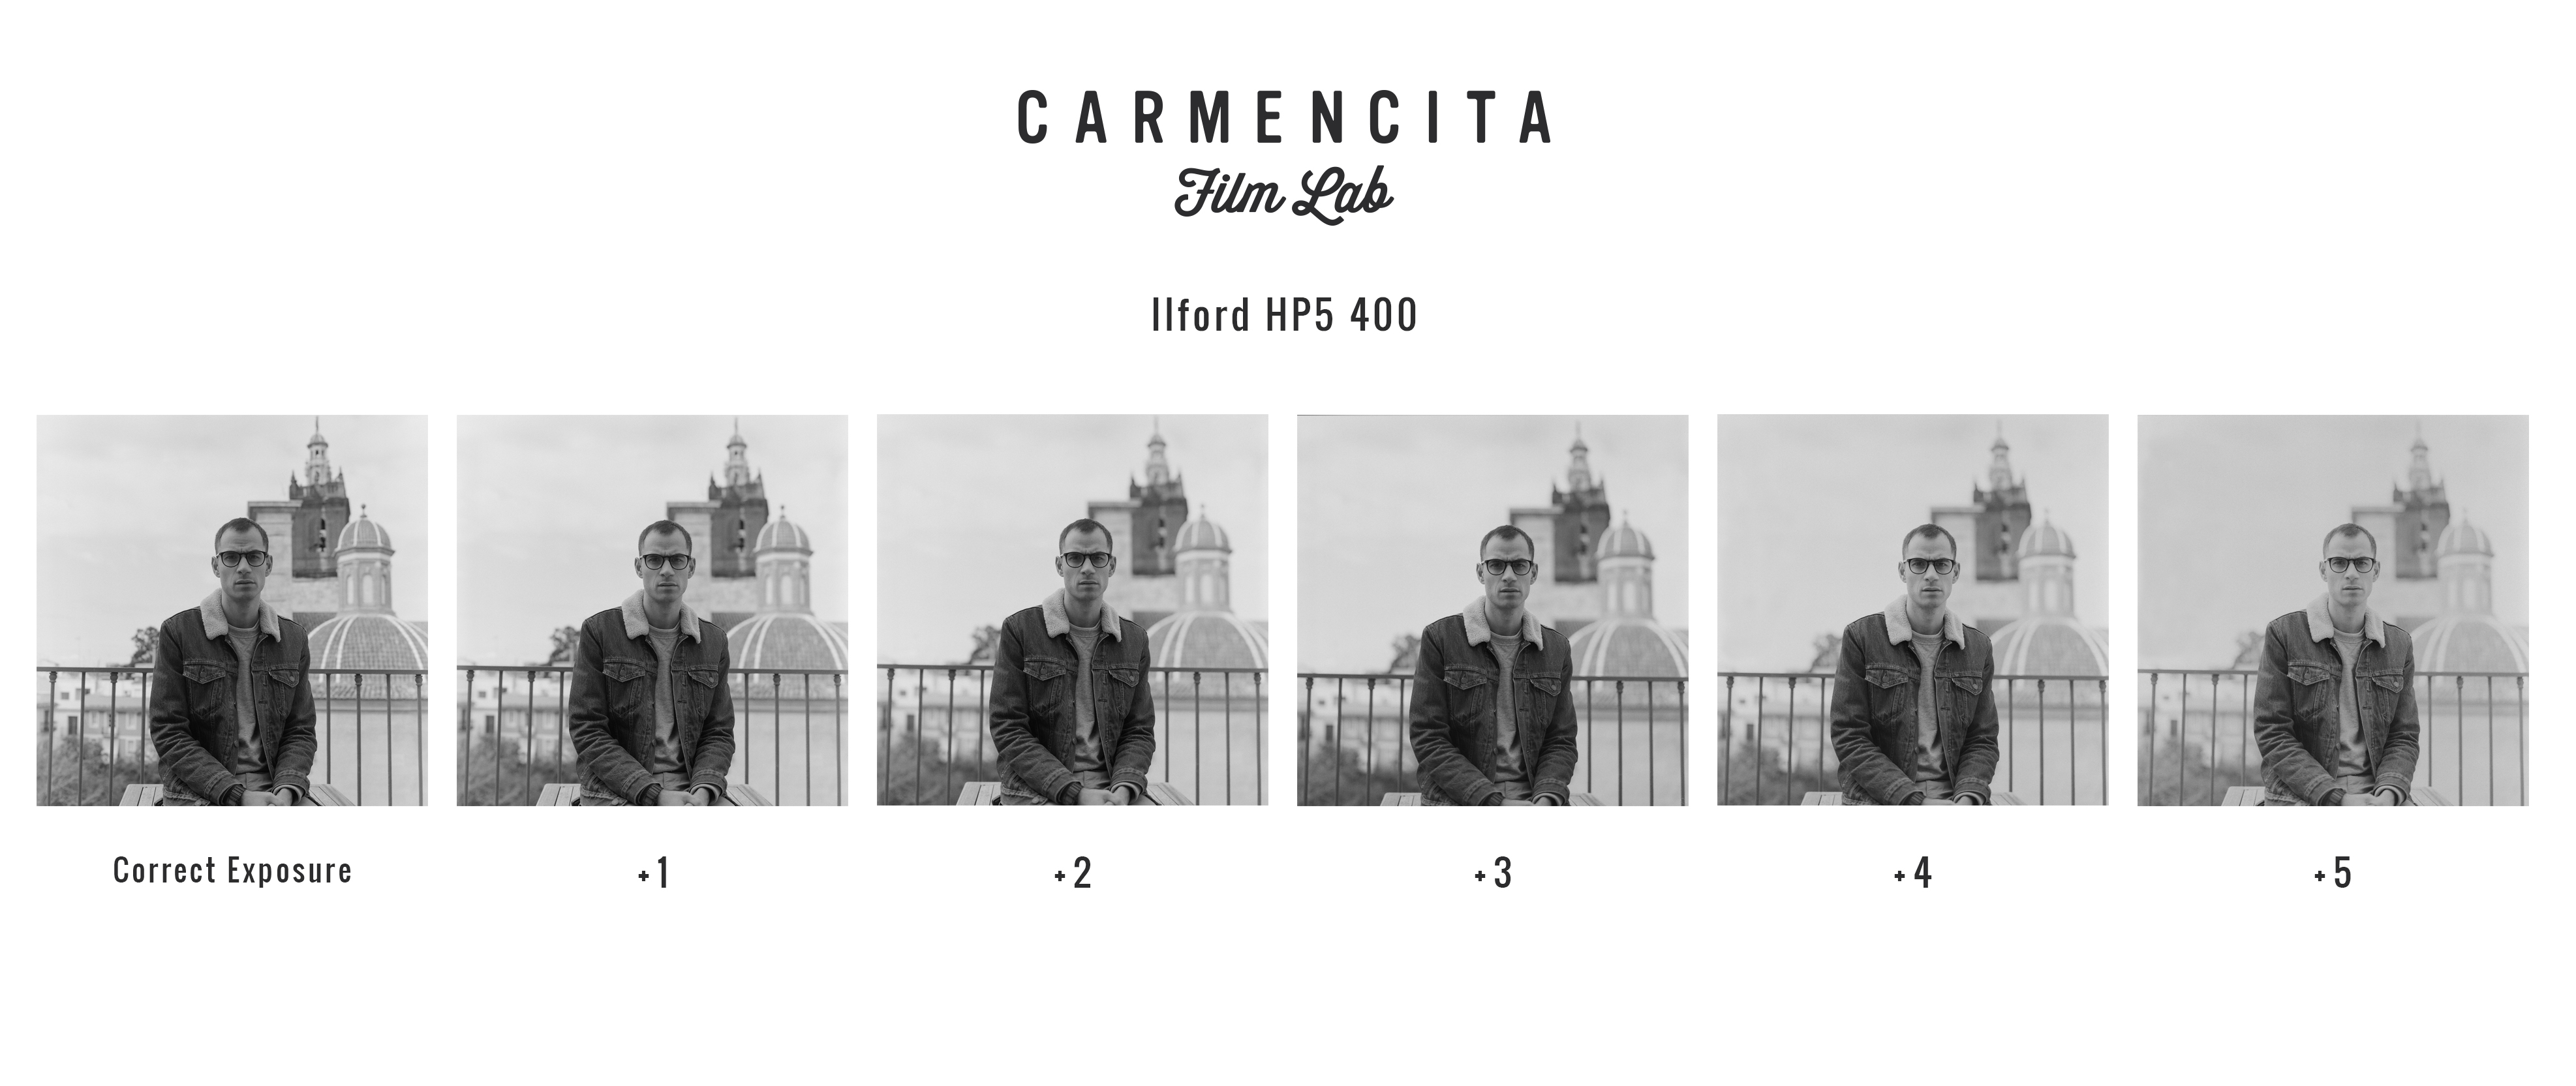
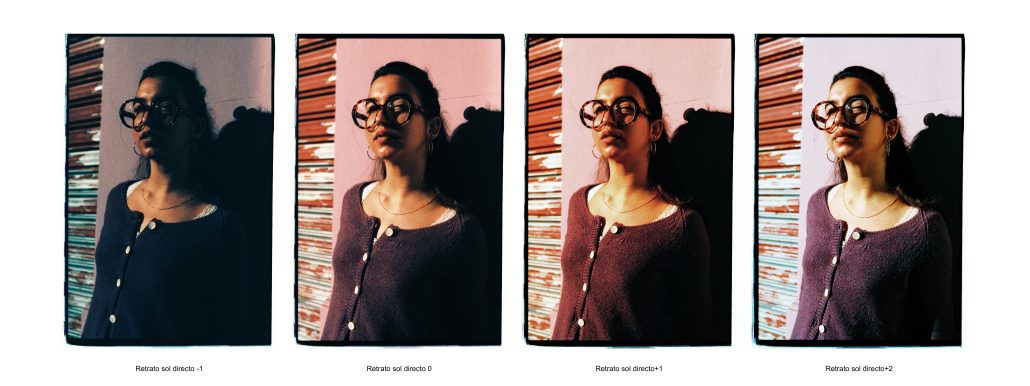
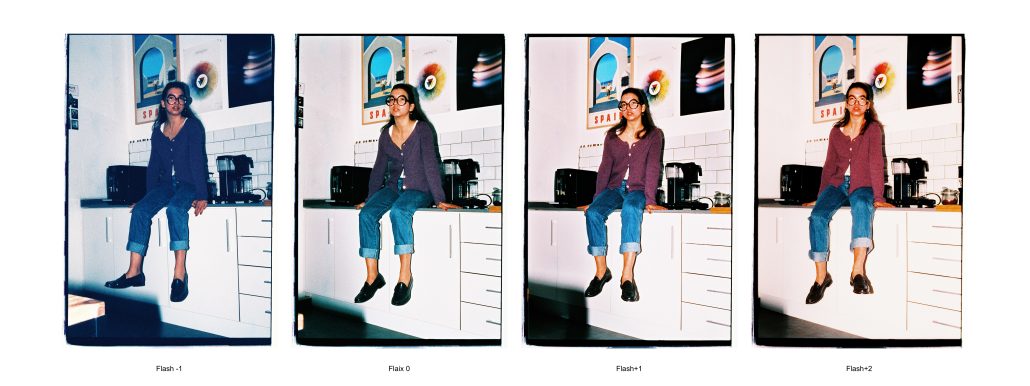
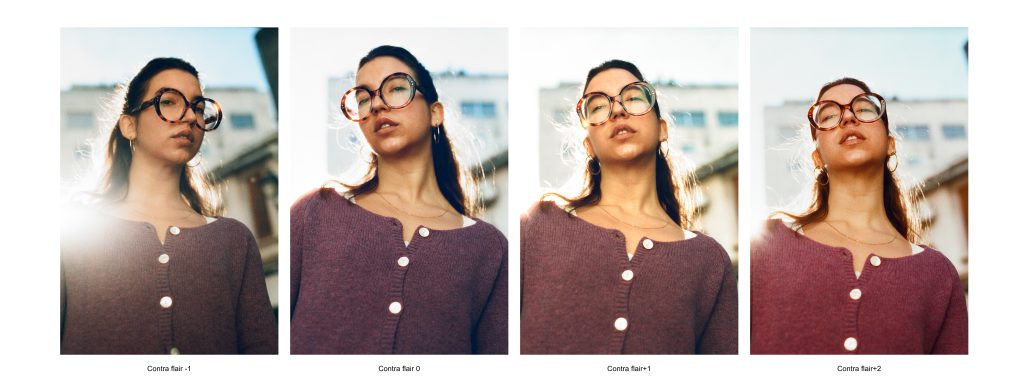
We first did the exposure test to see what was really under the hood of this emulsion when tested under different light situations. Below, you’ll see the bracketing that goes from -1 (ISO 400) to 0 (ISO 200), +1 (ISO 100) and +2 (ISO 50).
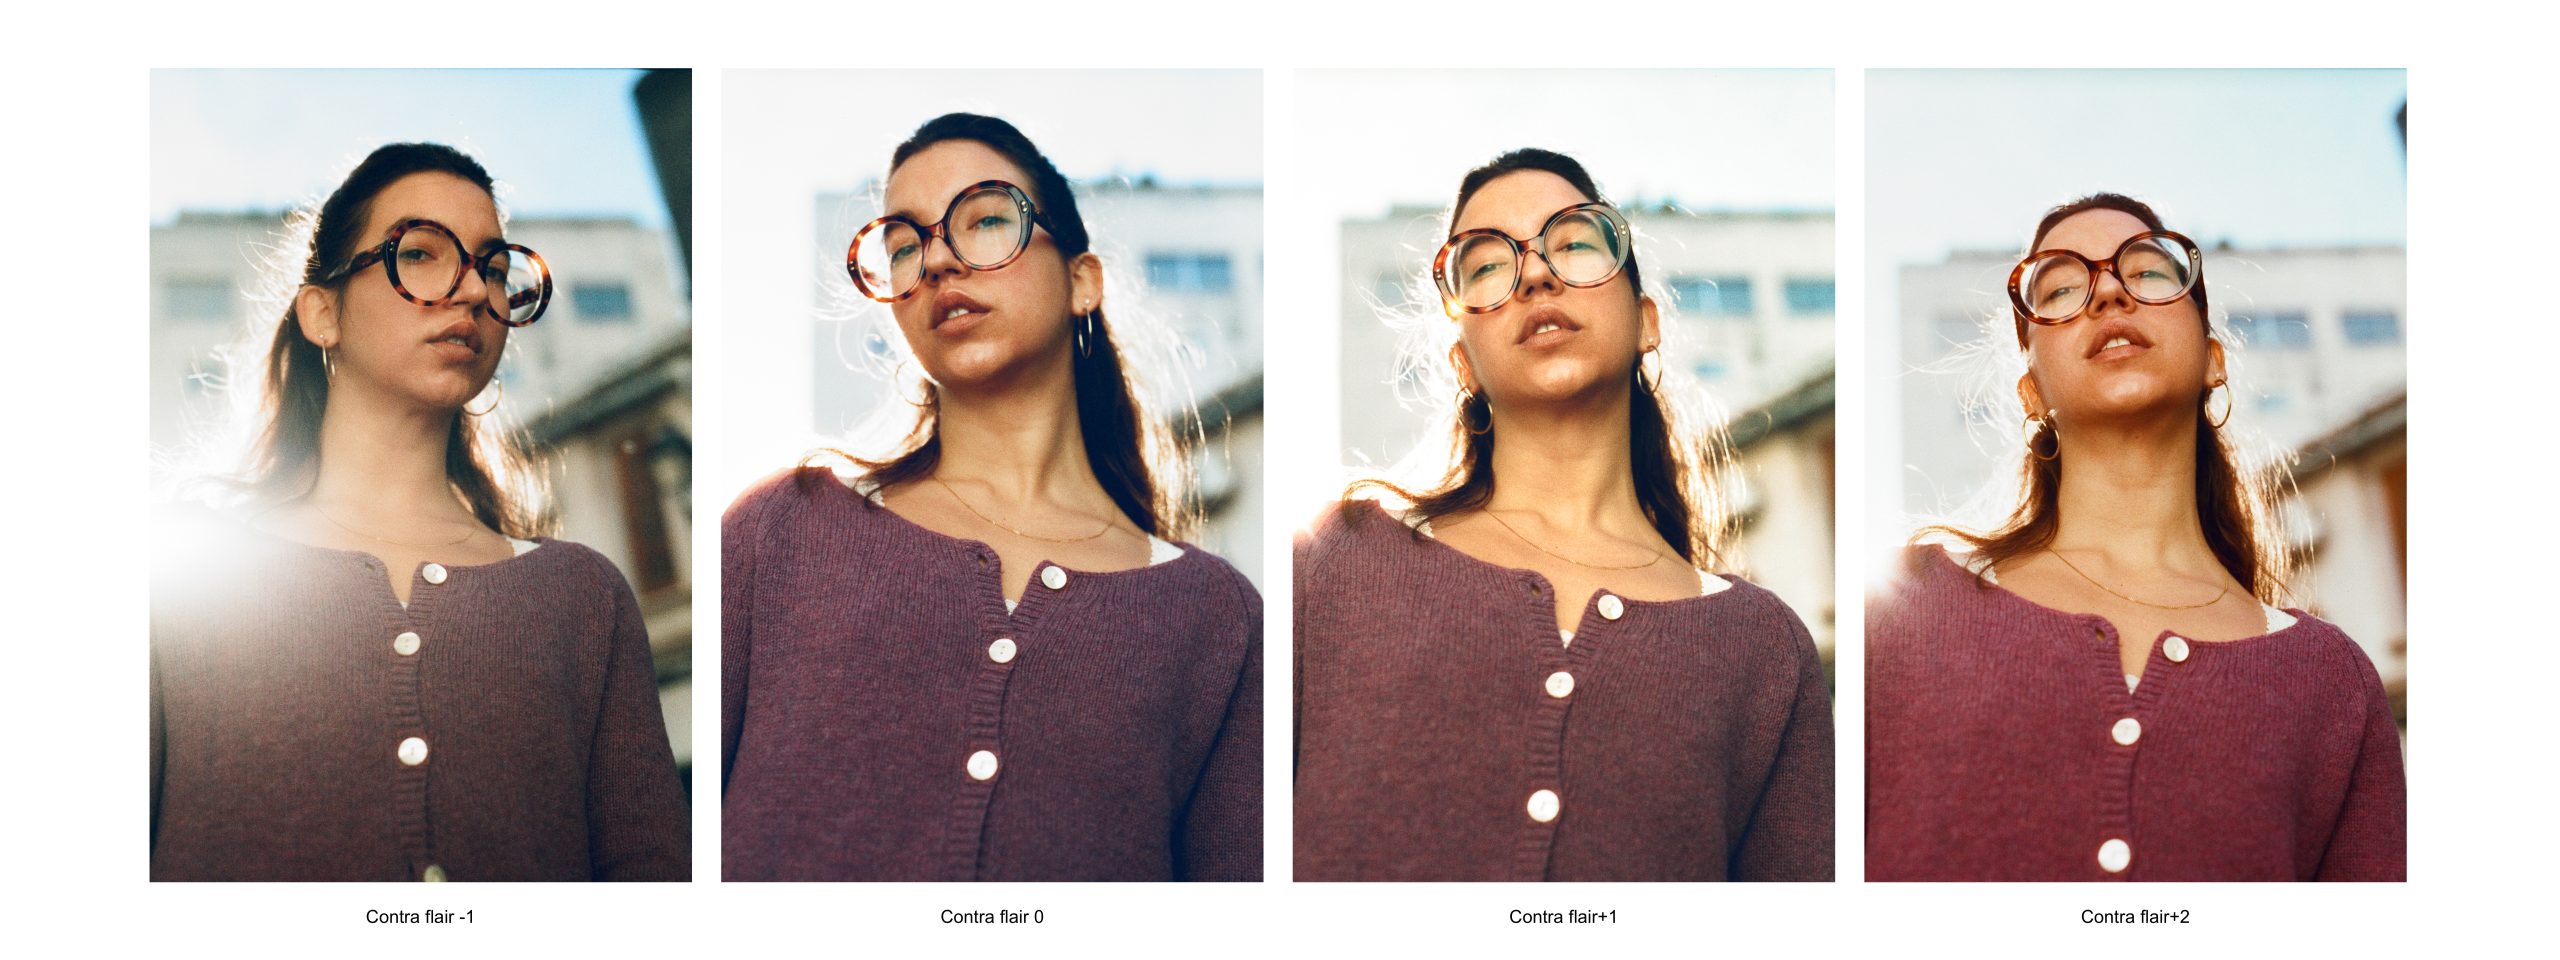
Flair / Backlit
[FRONTIER]

All of these samples come directly from the scanner, which is what most people would receive from most labs. Typically at Carmencita, we use 2-step color correction: the first is done in the scanner, and the second is done by our editors, who adjust the photos to match your preferences. These scans are raw.
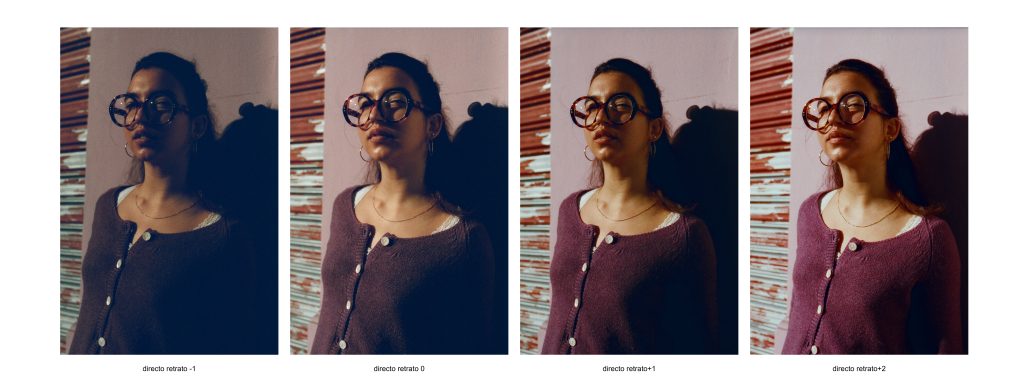
Indoors
[FRONTIER]

This is a film that adds a lot of contrast to your images. The loss of detail is significant on the -1 sample.
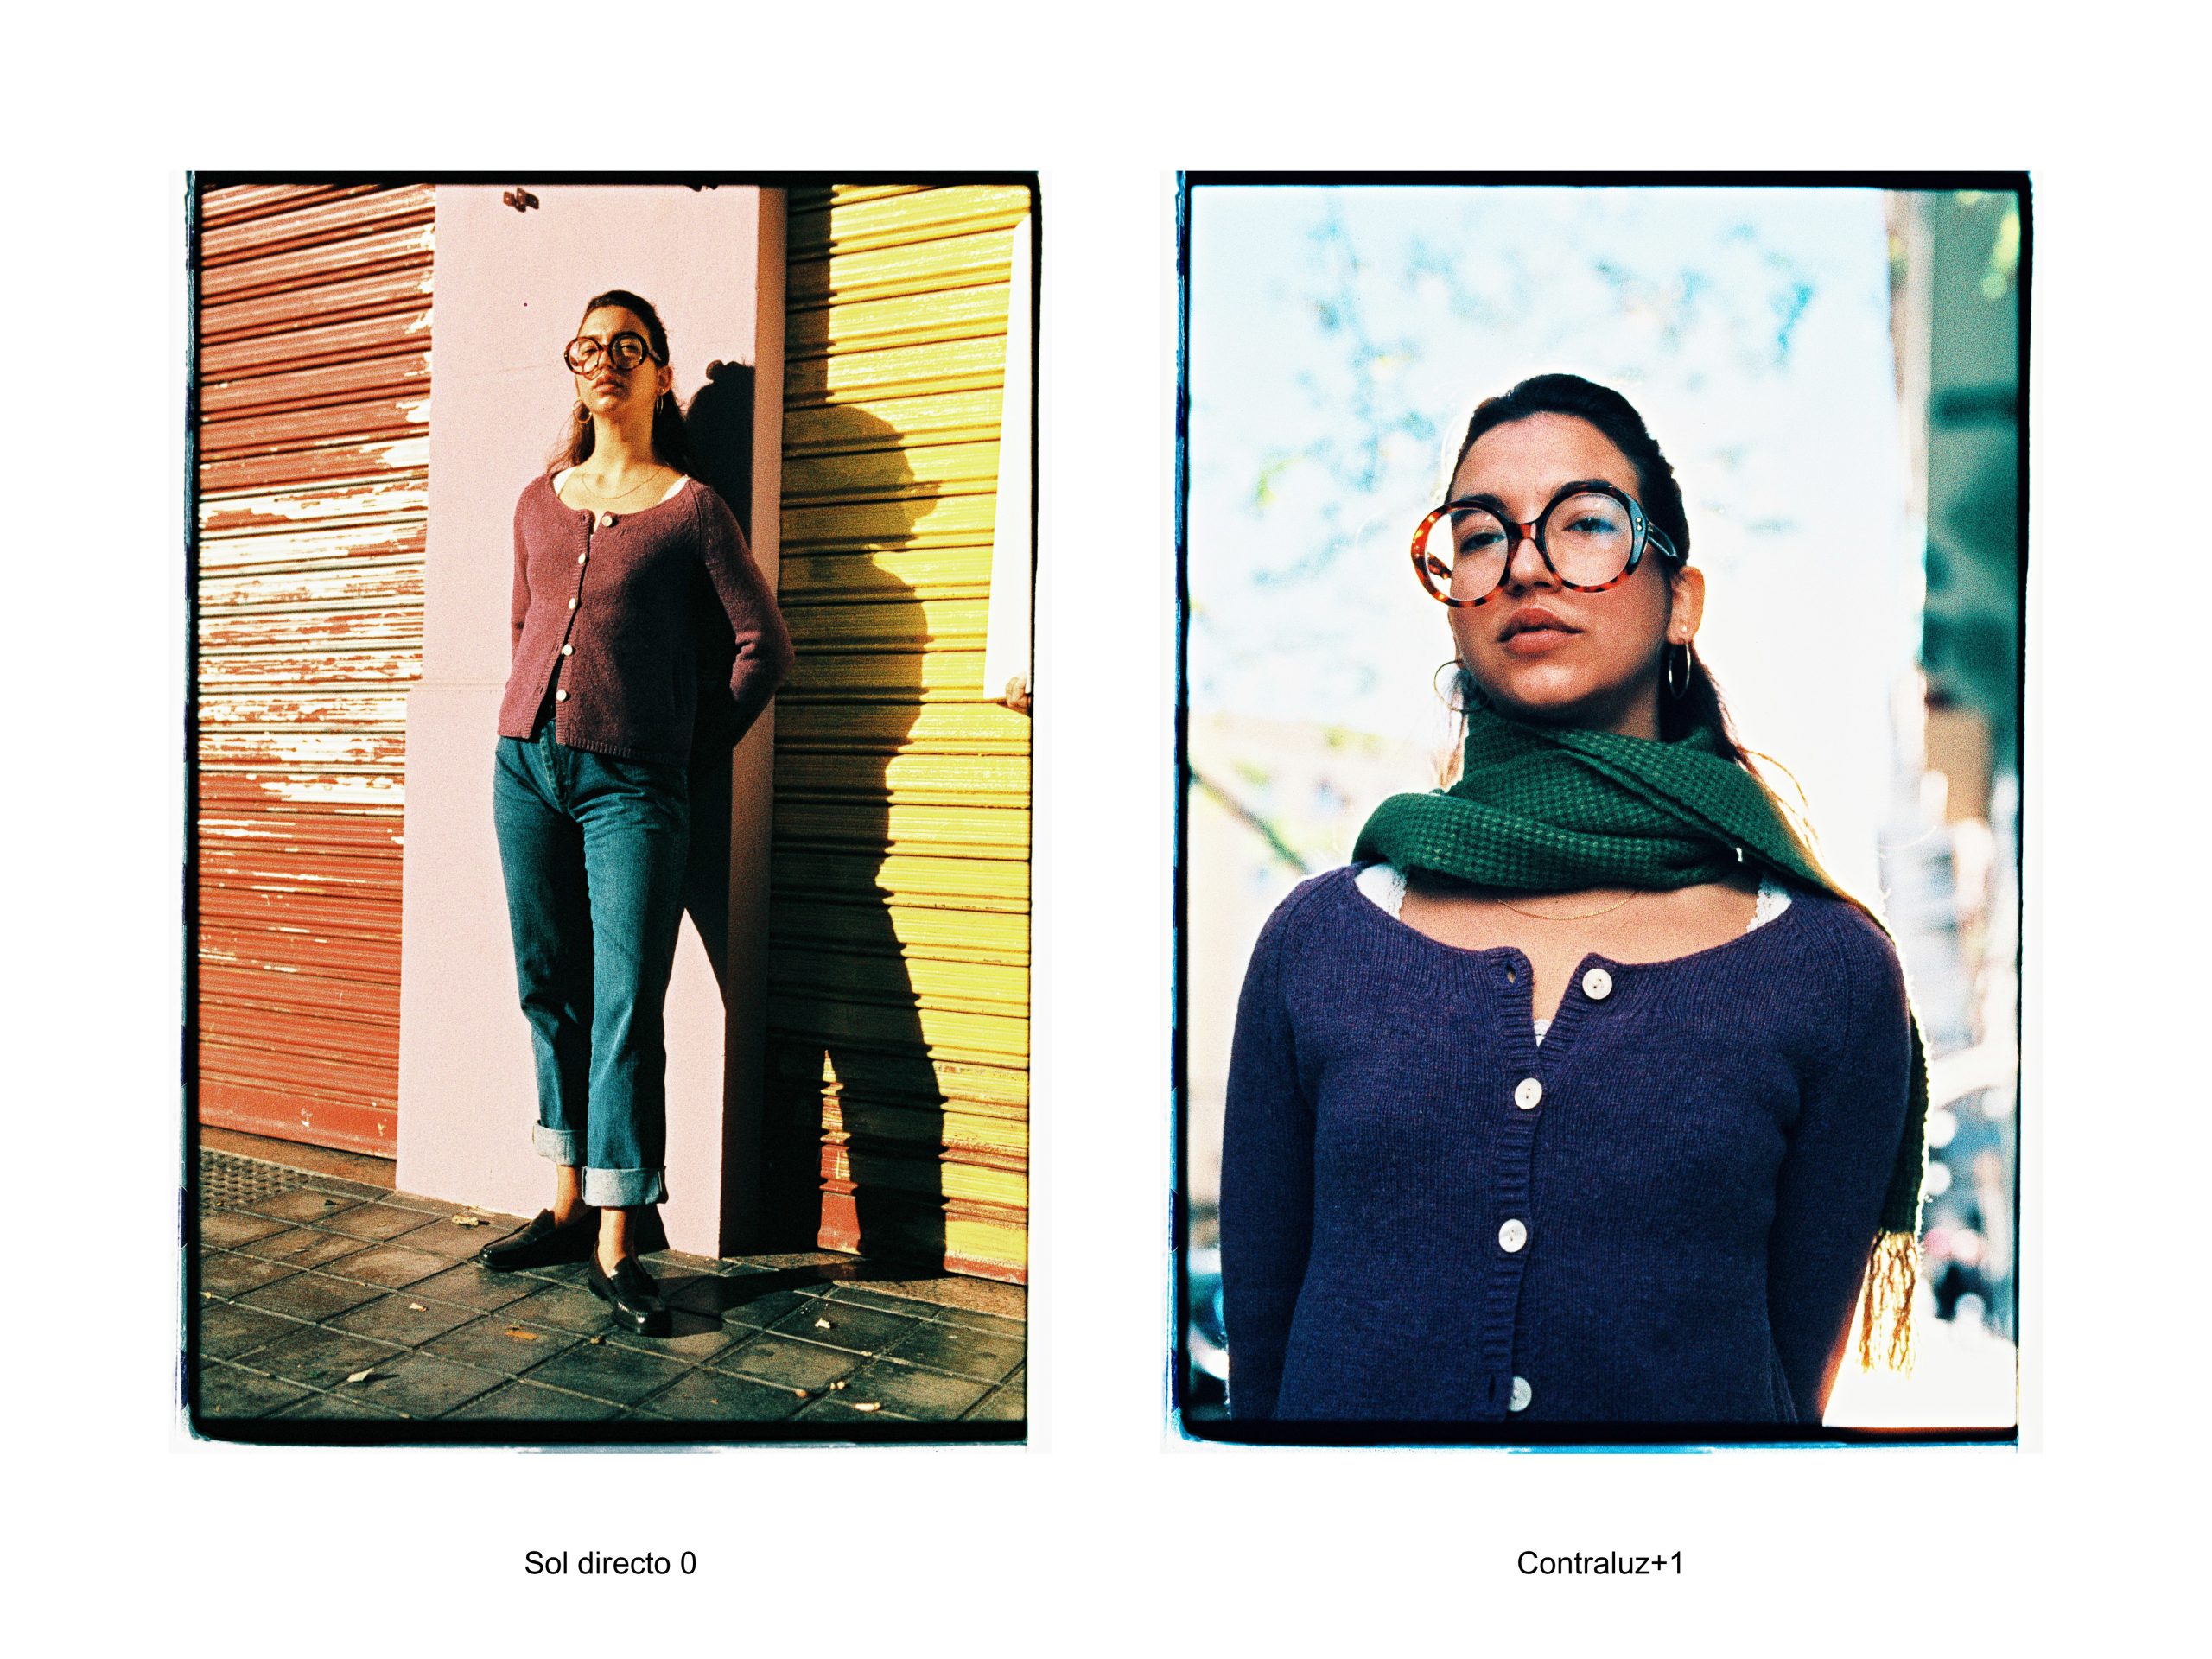
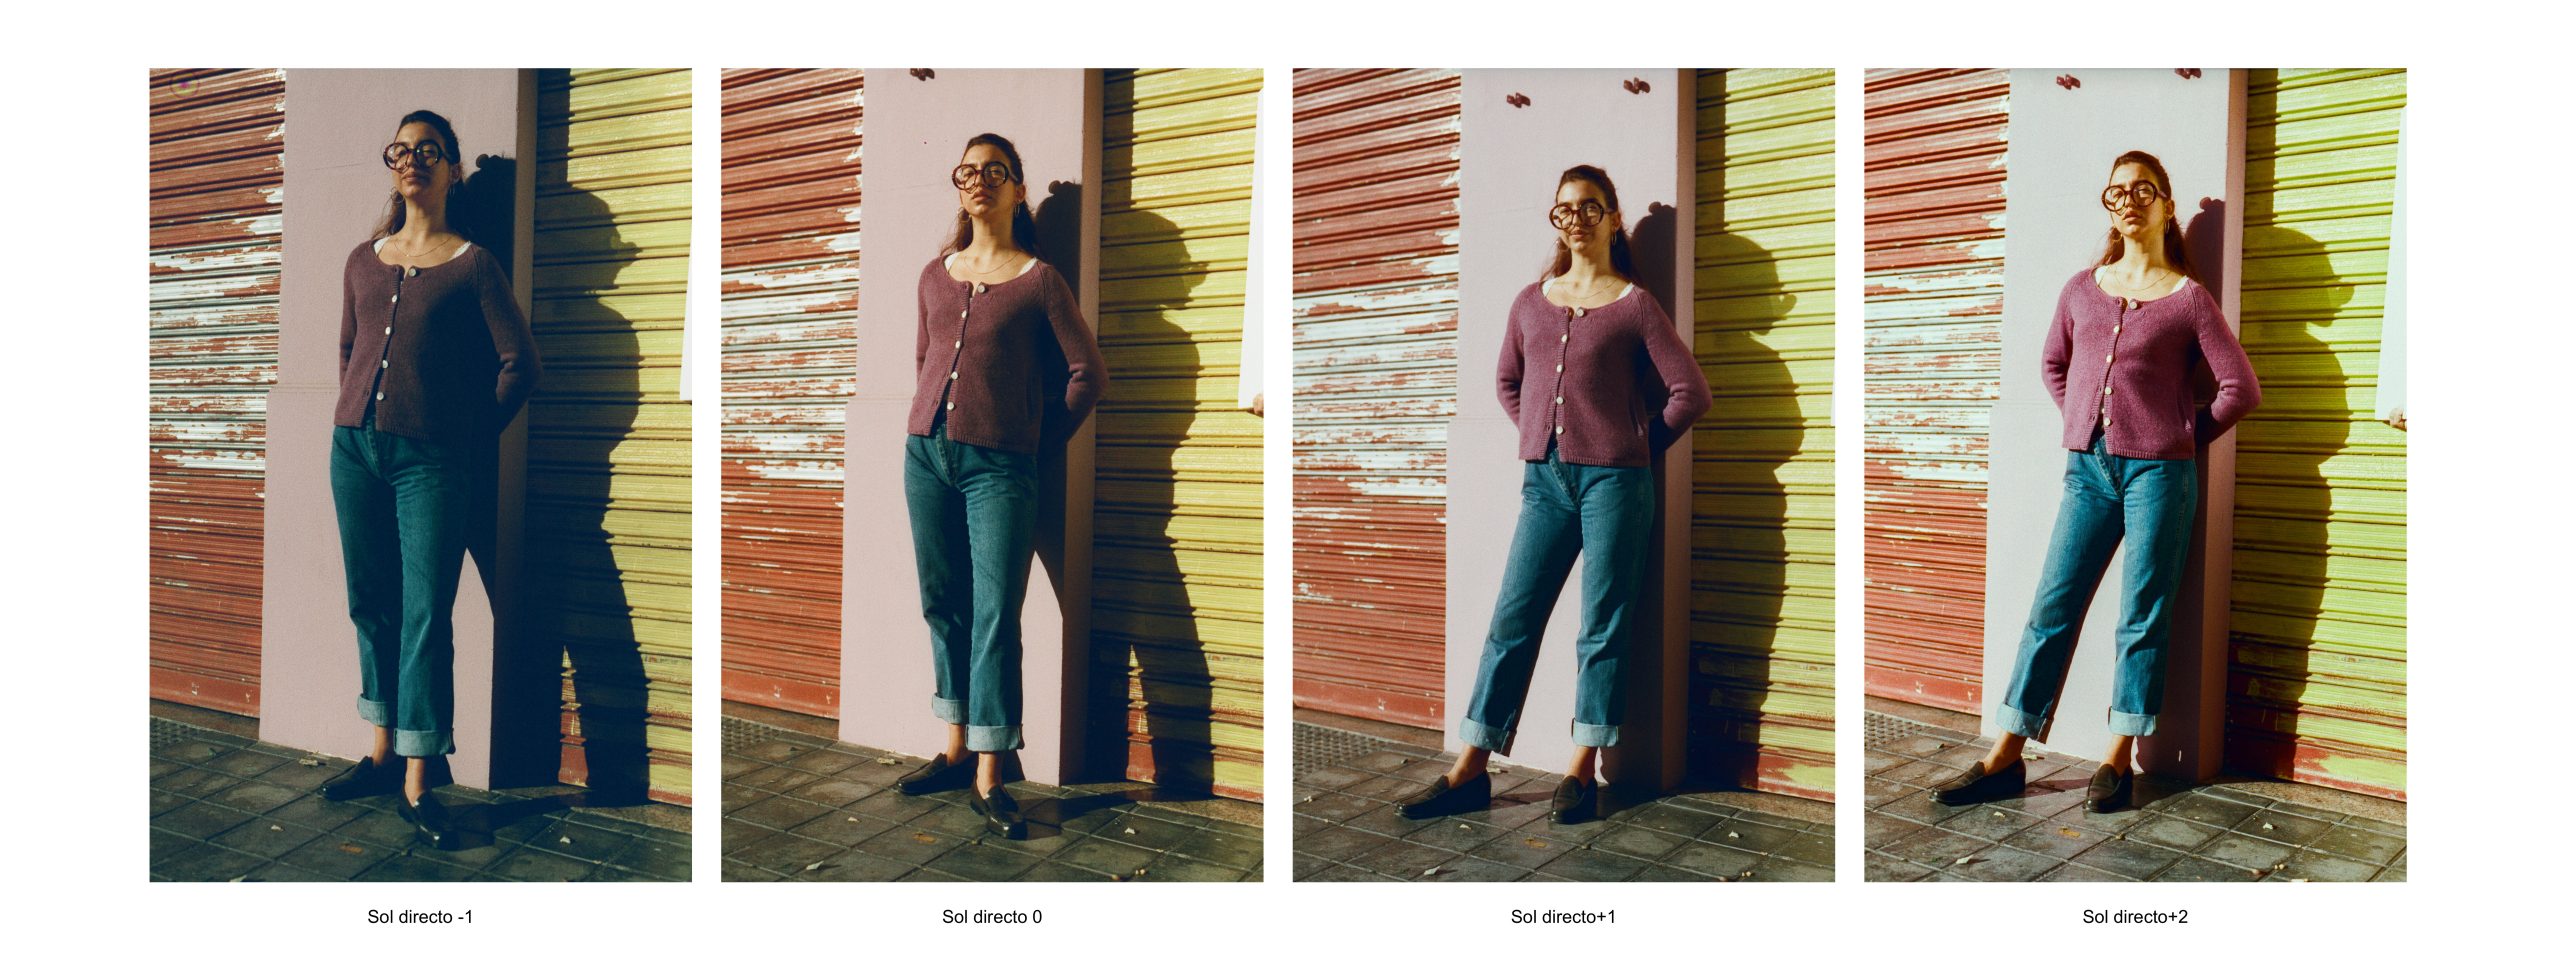
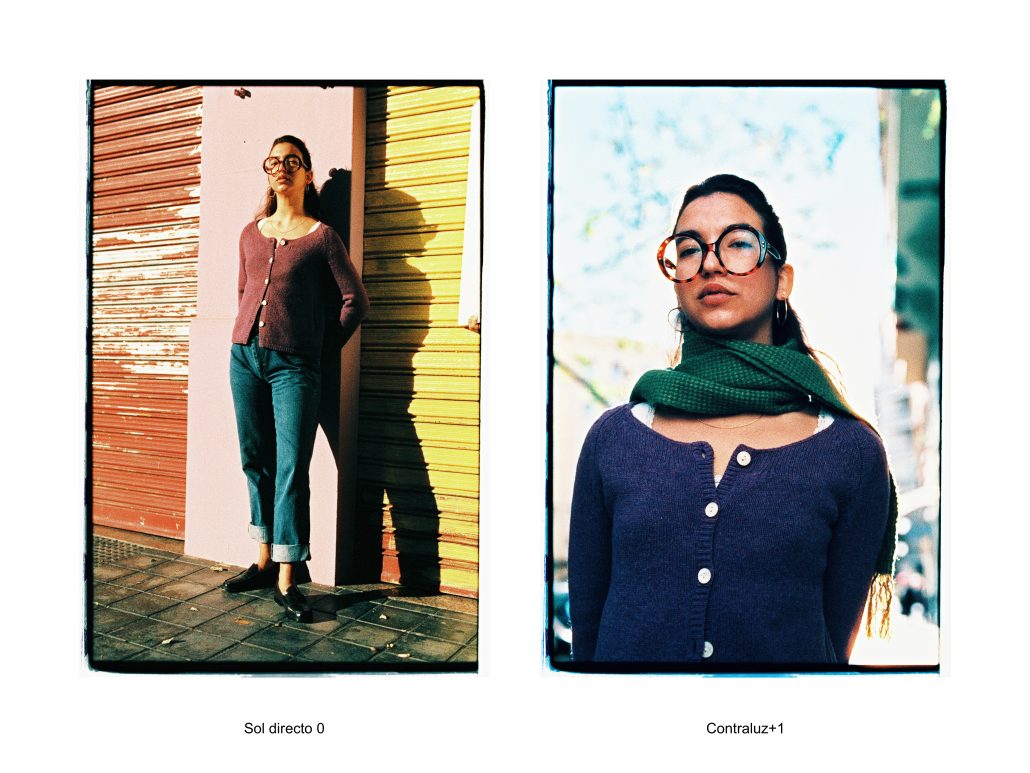
Direct sunlight
[FRONTIER]

We see these strong, vibrant, in-your-face colours on the Frontier, the scans you would typically receive in most labs (even the ones with Noritsus!). We are trying to replicate what most people will probably receive when developing and scanning this film at a lab, or at least the examples we’ve seen online from other sources.
Again, it’s not a usable result, but we believe it should be communicated more clearly somehow. Film costs today are far from cheap, so every frame counts, especially for people that is diving into a film for the first time.
In our honest opinion, Harman should have addressed this more explicitly, at least when communicating with labs/stores, without sugar-coating it as a “different look.”
Open Shade
[FRONTIER]

Flash
[FRONTIER]
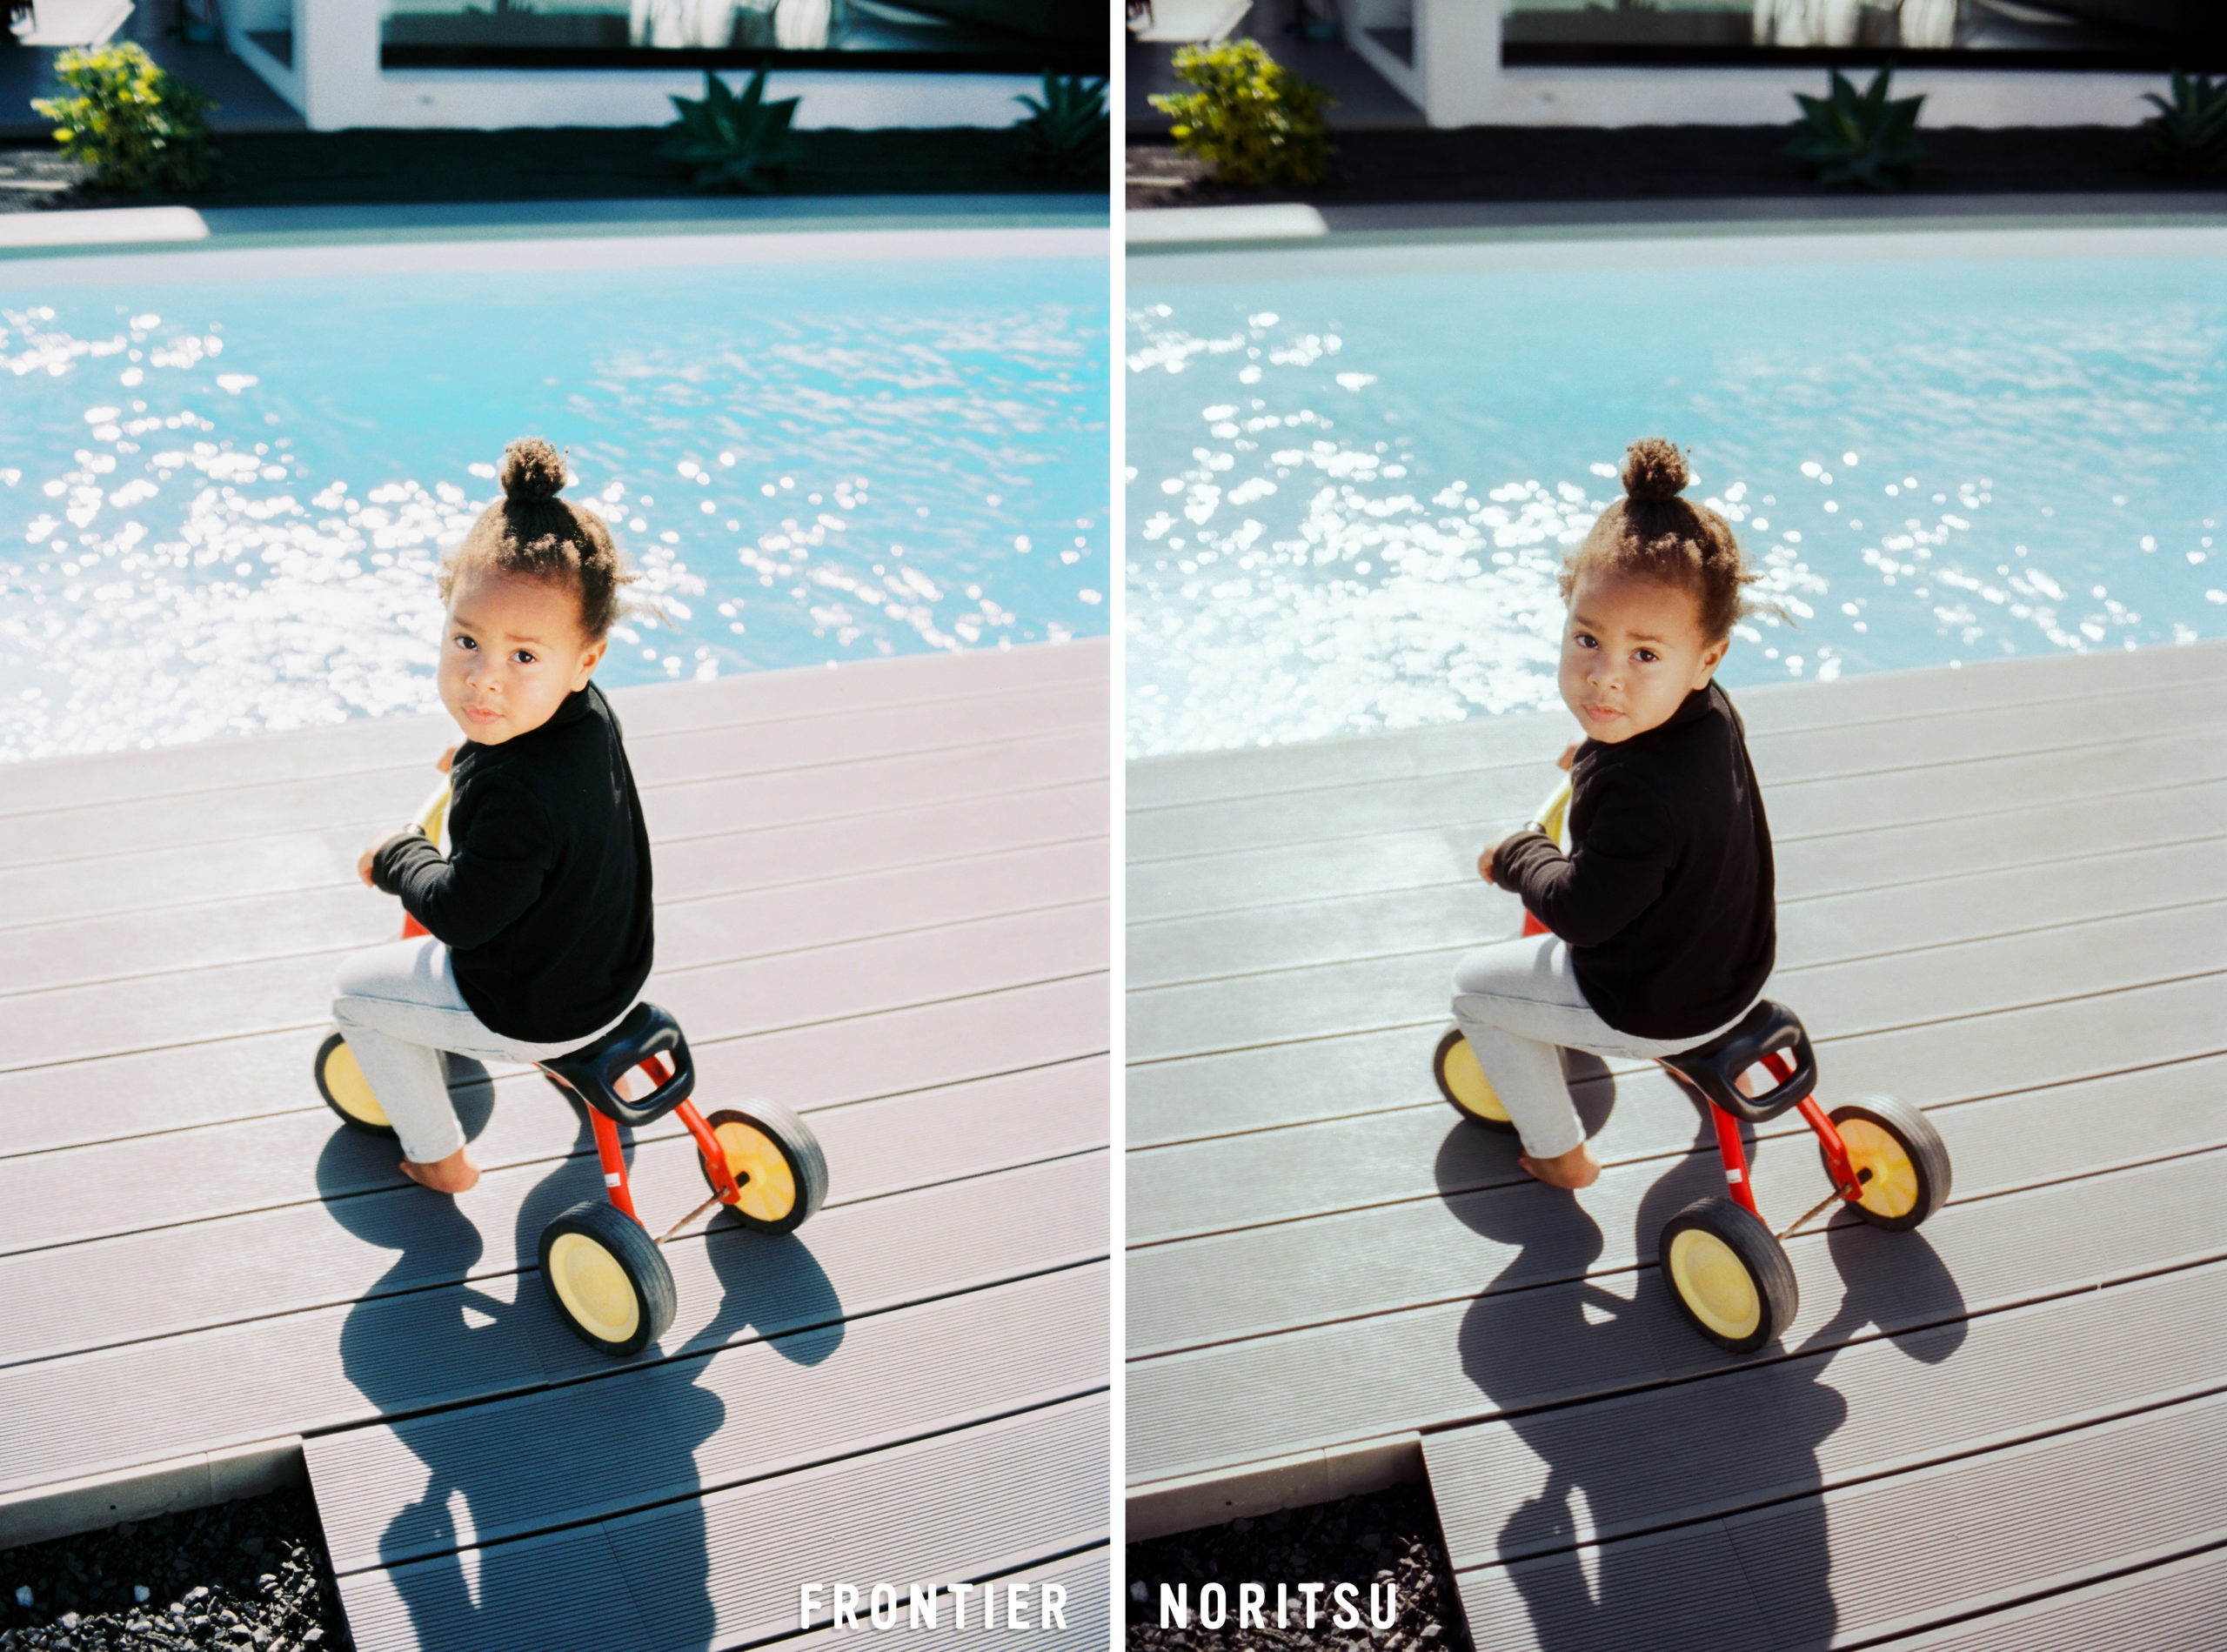
FRONTIER vs NORITSU
Besides observing the major differences in the bracketing, the most shocking part was when we compared the difference between scanning it on the Frontier and on the Noritsu. We explained in a previous article the difference between the Frontier & Noritsu and its ups & downs. Similar rules apply here but on a whole different scale.
Somehow, the Noritsu give us a bit more control when it comes to dealing with the emulsion and its wild colour curves, we could notice that already in the scanning, but after seeing the side by side on the screen is just mind blowing. And believe us; it’s no easy task to scan on the Noritsu either; you could see smoke coming out from our chief scanner’s head when dealing with each frame, correcting the colour and using all the tricks in the book to try to get something “normal”.
The following are scans from the Noritsu straight from the scanner:
Flair / Backlit
[NORITSU]
Direct Sunlight
[NORITSU]

Indoors
[NORITSU]

Open Shade
[NORITSU]

Flash
[NORITSU]

Remember, this is the exact same film; we didn’t change or edit anything. The Noritsu offers us a wider range of corrections, such as contrast, highlights, shadows, etc. So, if we wanted to adjust these images, compared to the Frontier scans, it would be much easier (or at least possible) to alter these.
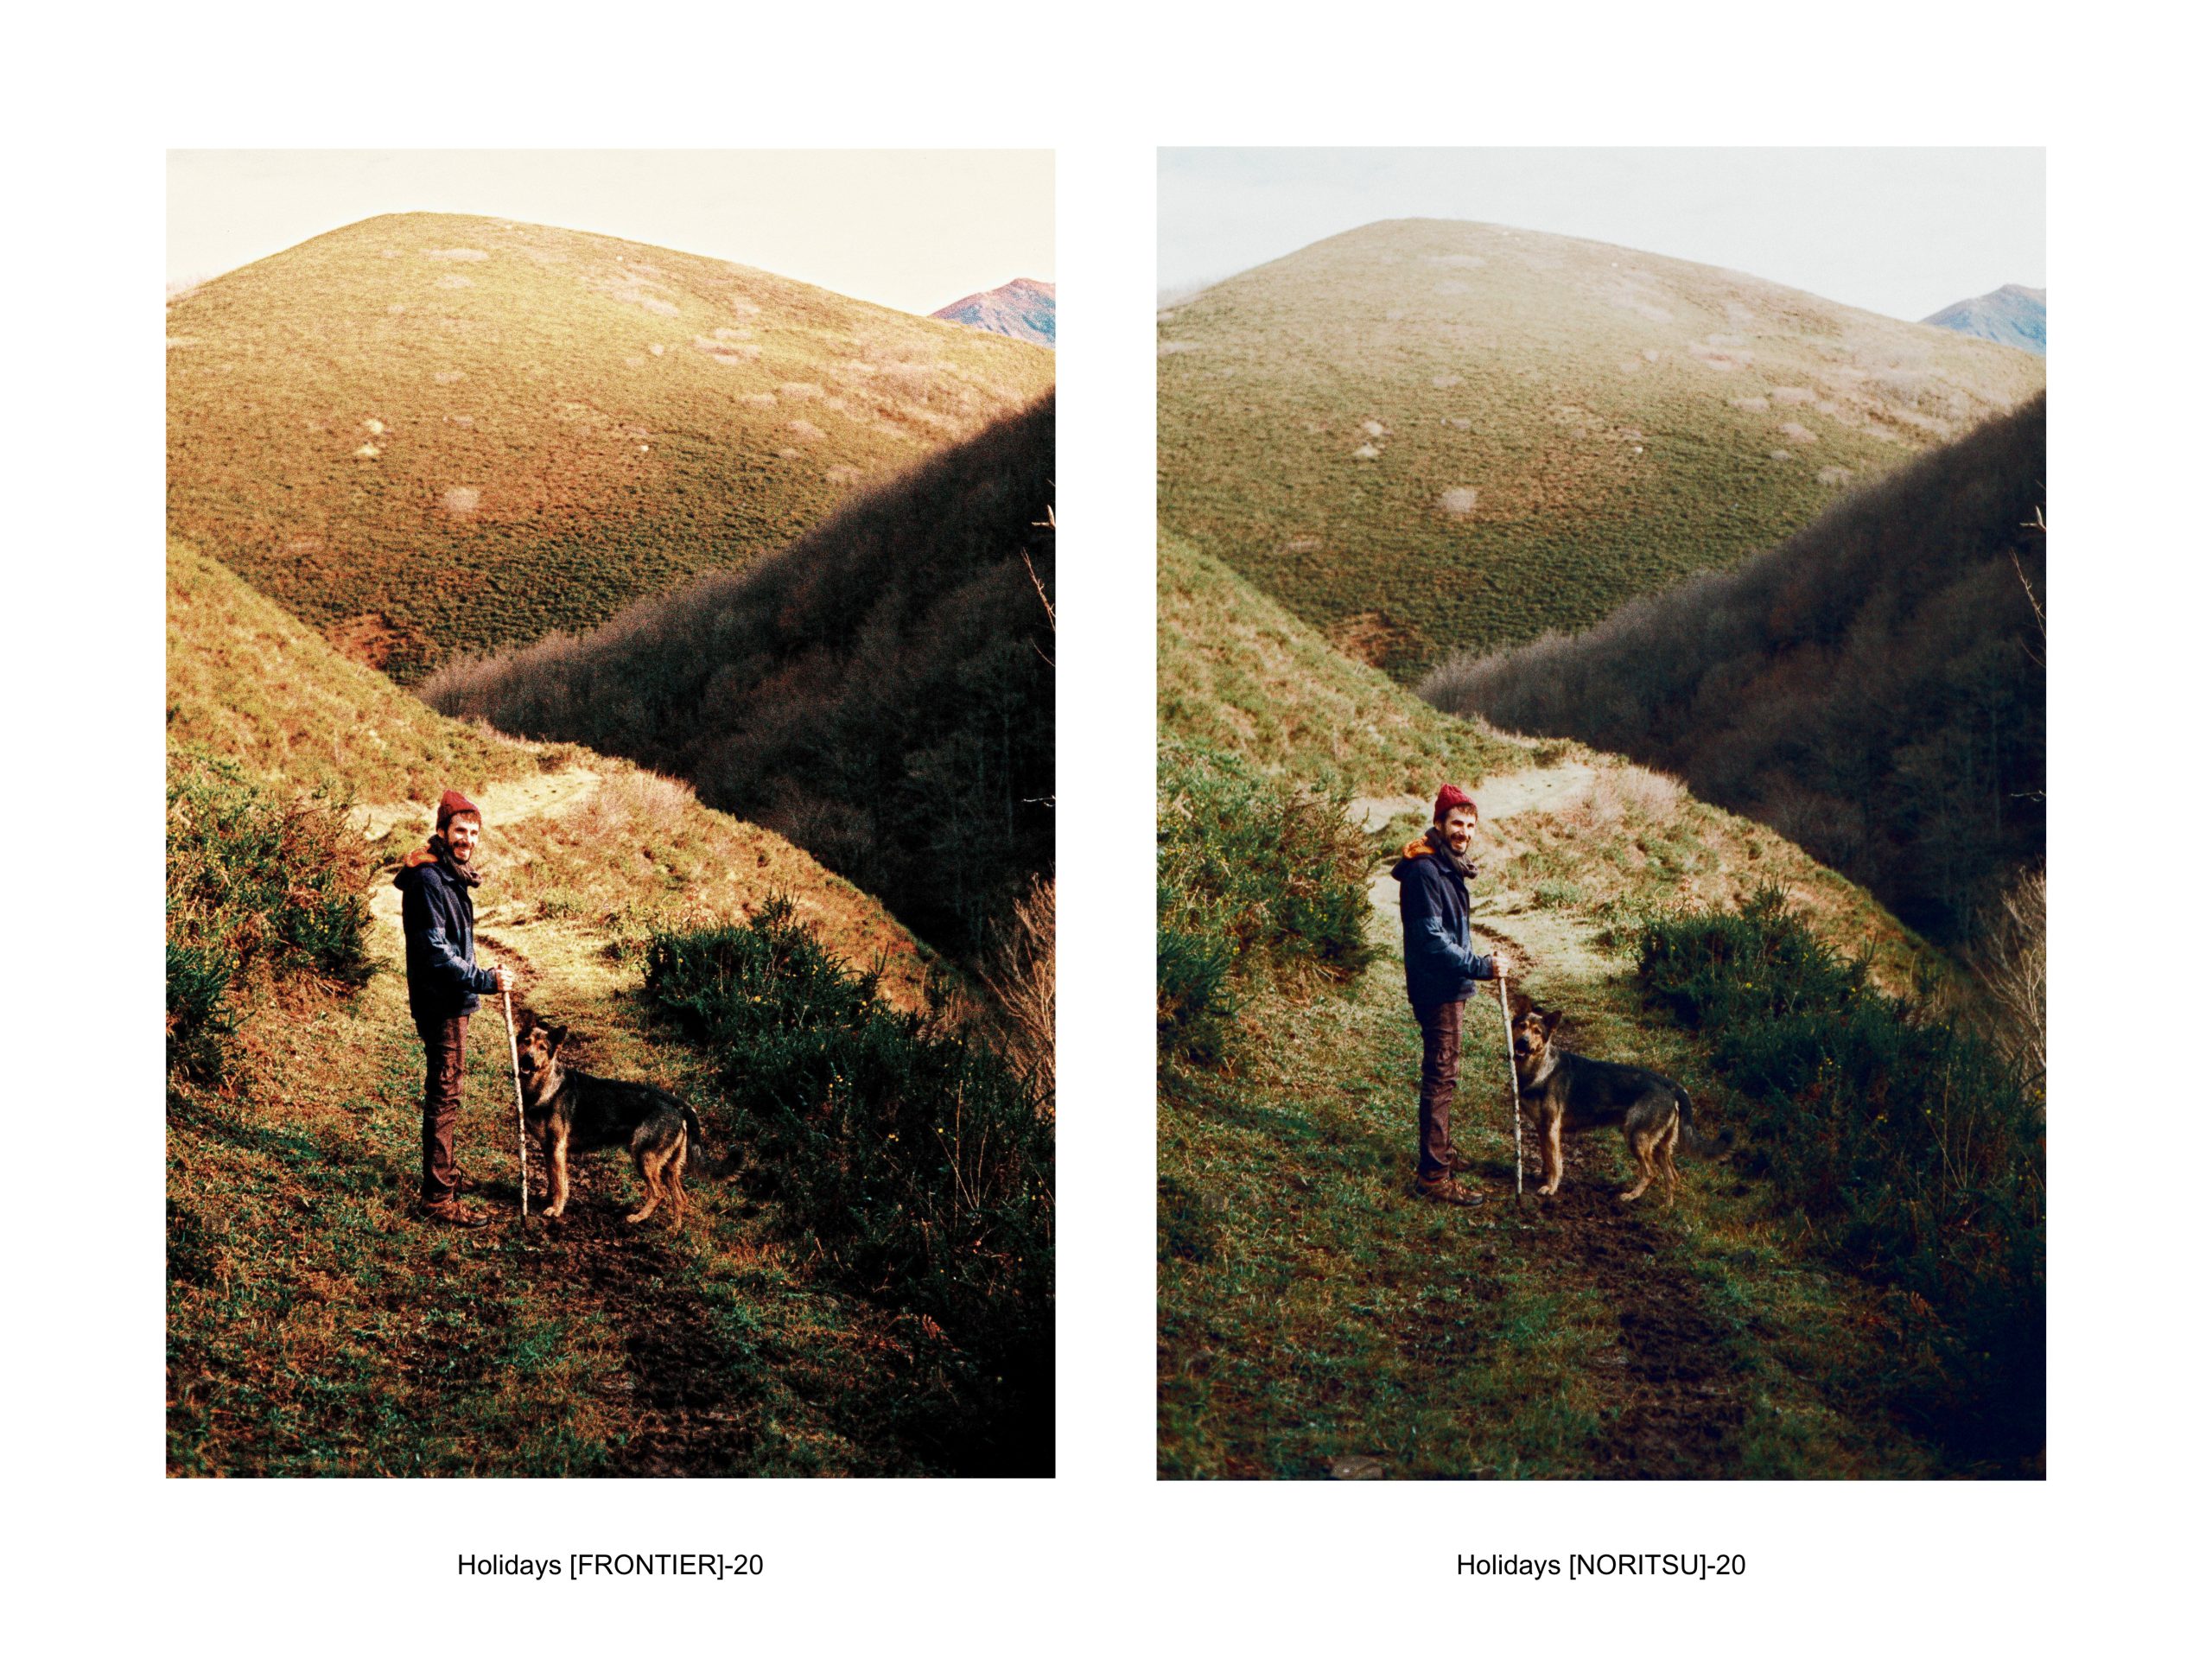
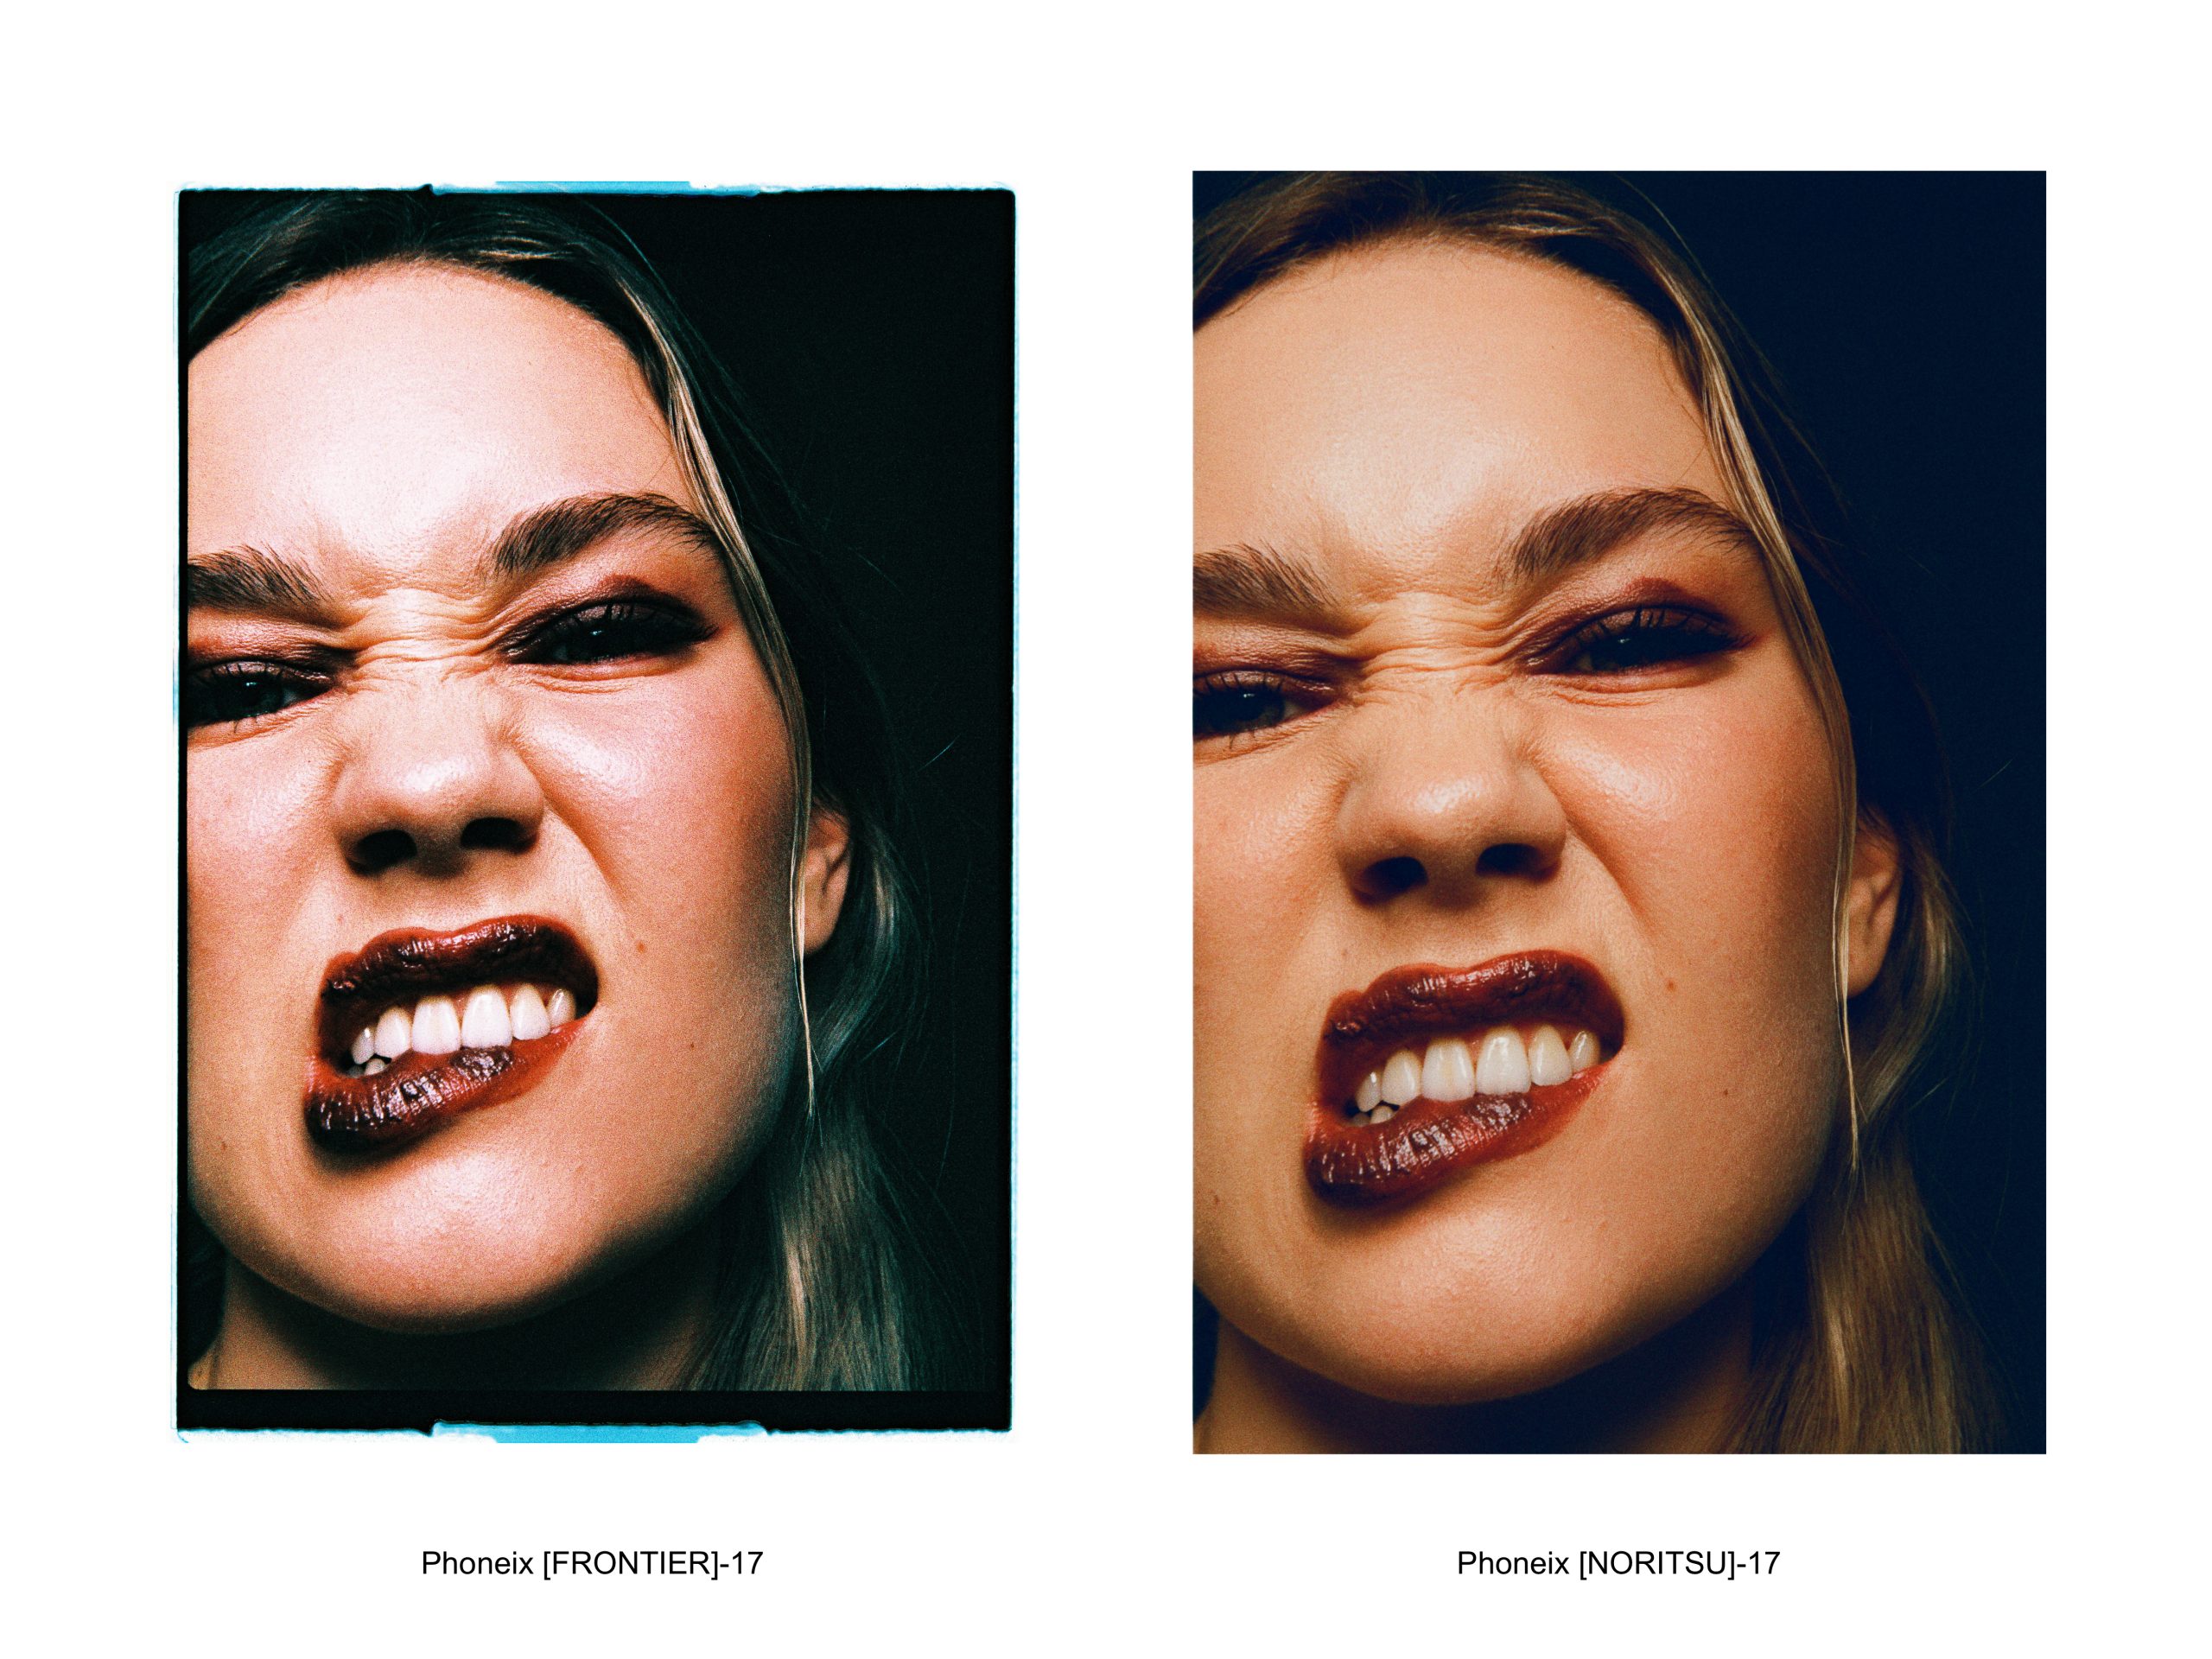
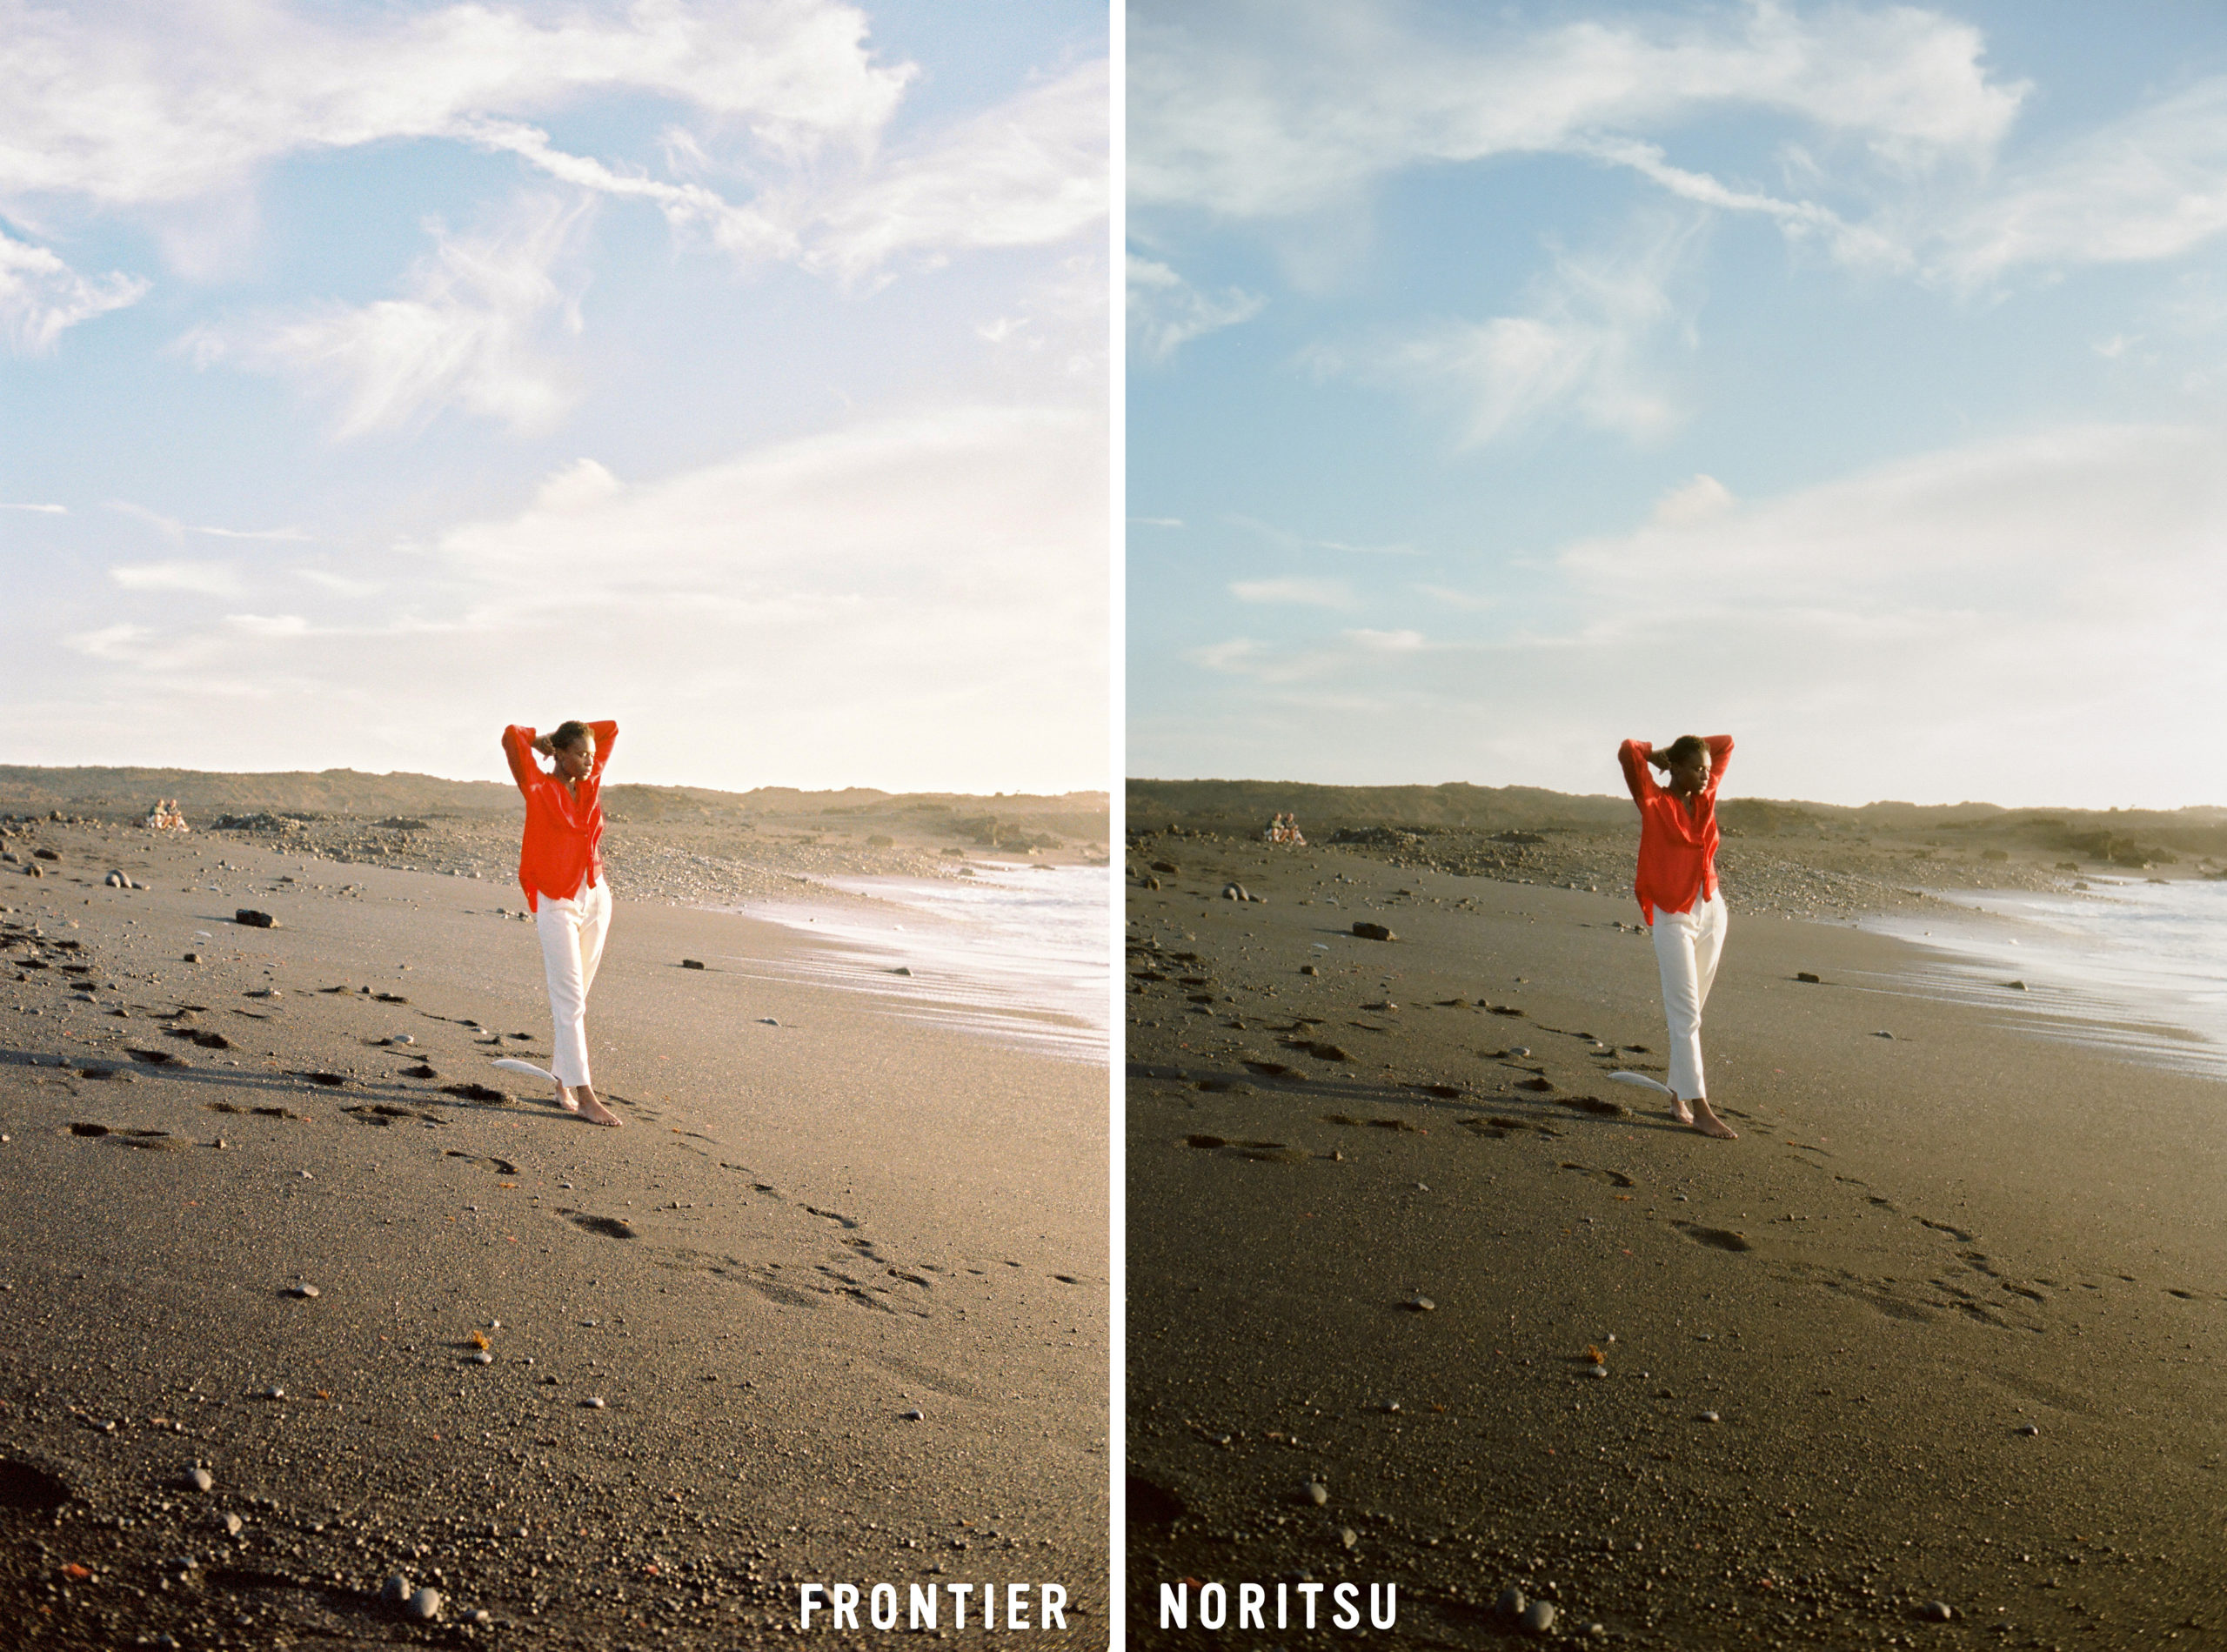
‘REAL LIFE’ TEST
The previous examples were all done in a controlled situation; we know how to light-meter and how to shoot film, but we felt this wasn’t 100% realistic. I took it on my holiday trip to test the Phoenix Harman ‘in real life’. And, to say the least, I was shocked when I saw the results.


On the Frontier, the highlights are basically gone, the grain is superhard. It has a very peculiar look, which is okay if you’re into that. But, to be honest, it’s not what I wanted for my holidays rolls. Make sure to watch our Youtube video and see what we could manage to save in post-production (spoiler: not that much).

As you can see, we noticed a significant change when we rescanned the negatives on the Noritsu. We can work with this film with these scans, experimenting with the adjustments a little more. Still, it will be challenging, but at least I can get closer to what I imagined images could look like when I was shooting it.
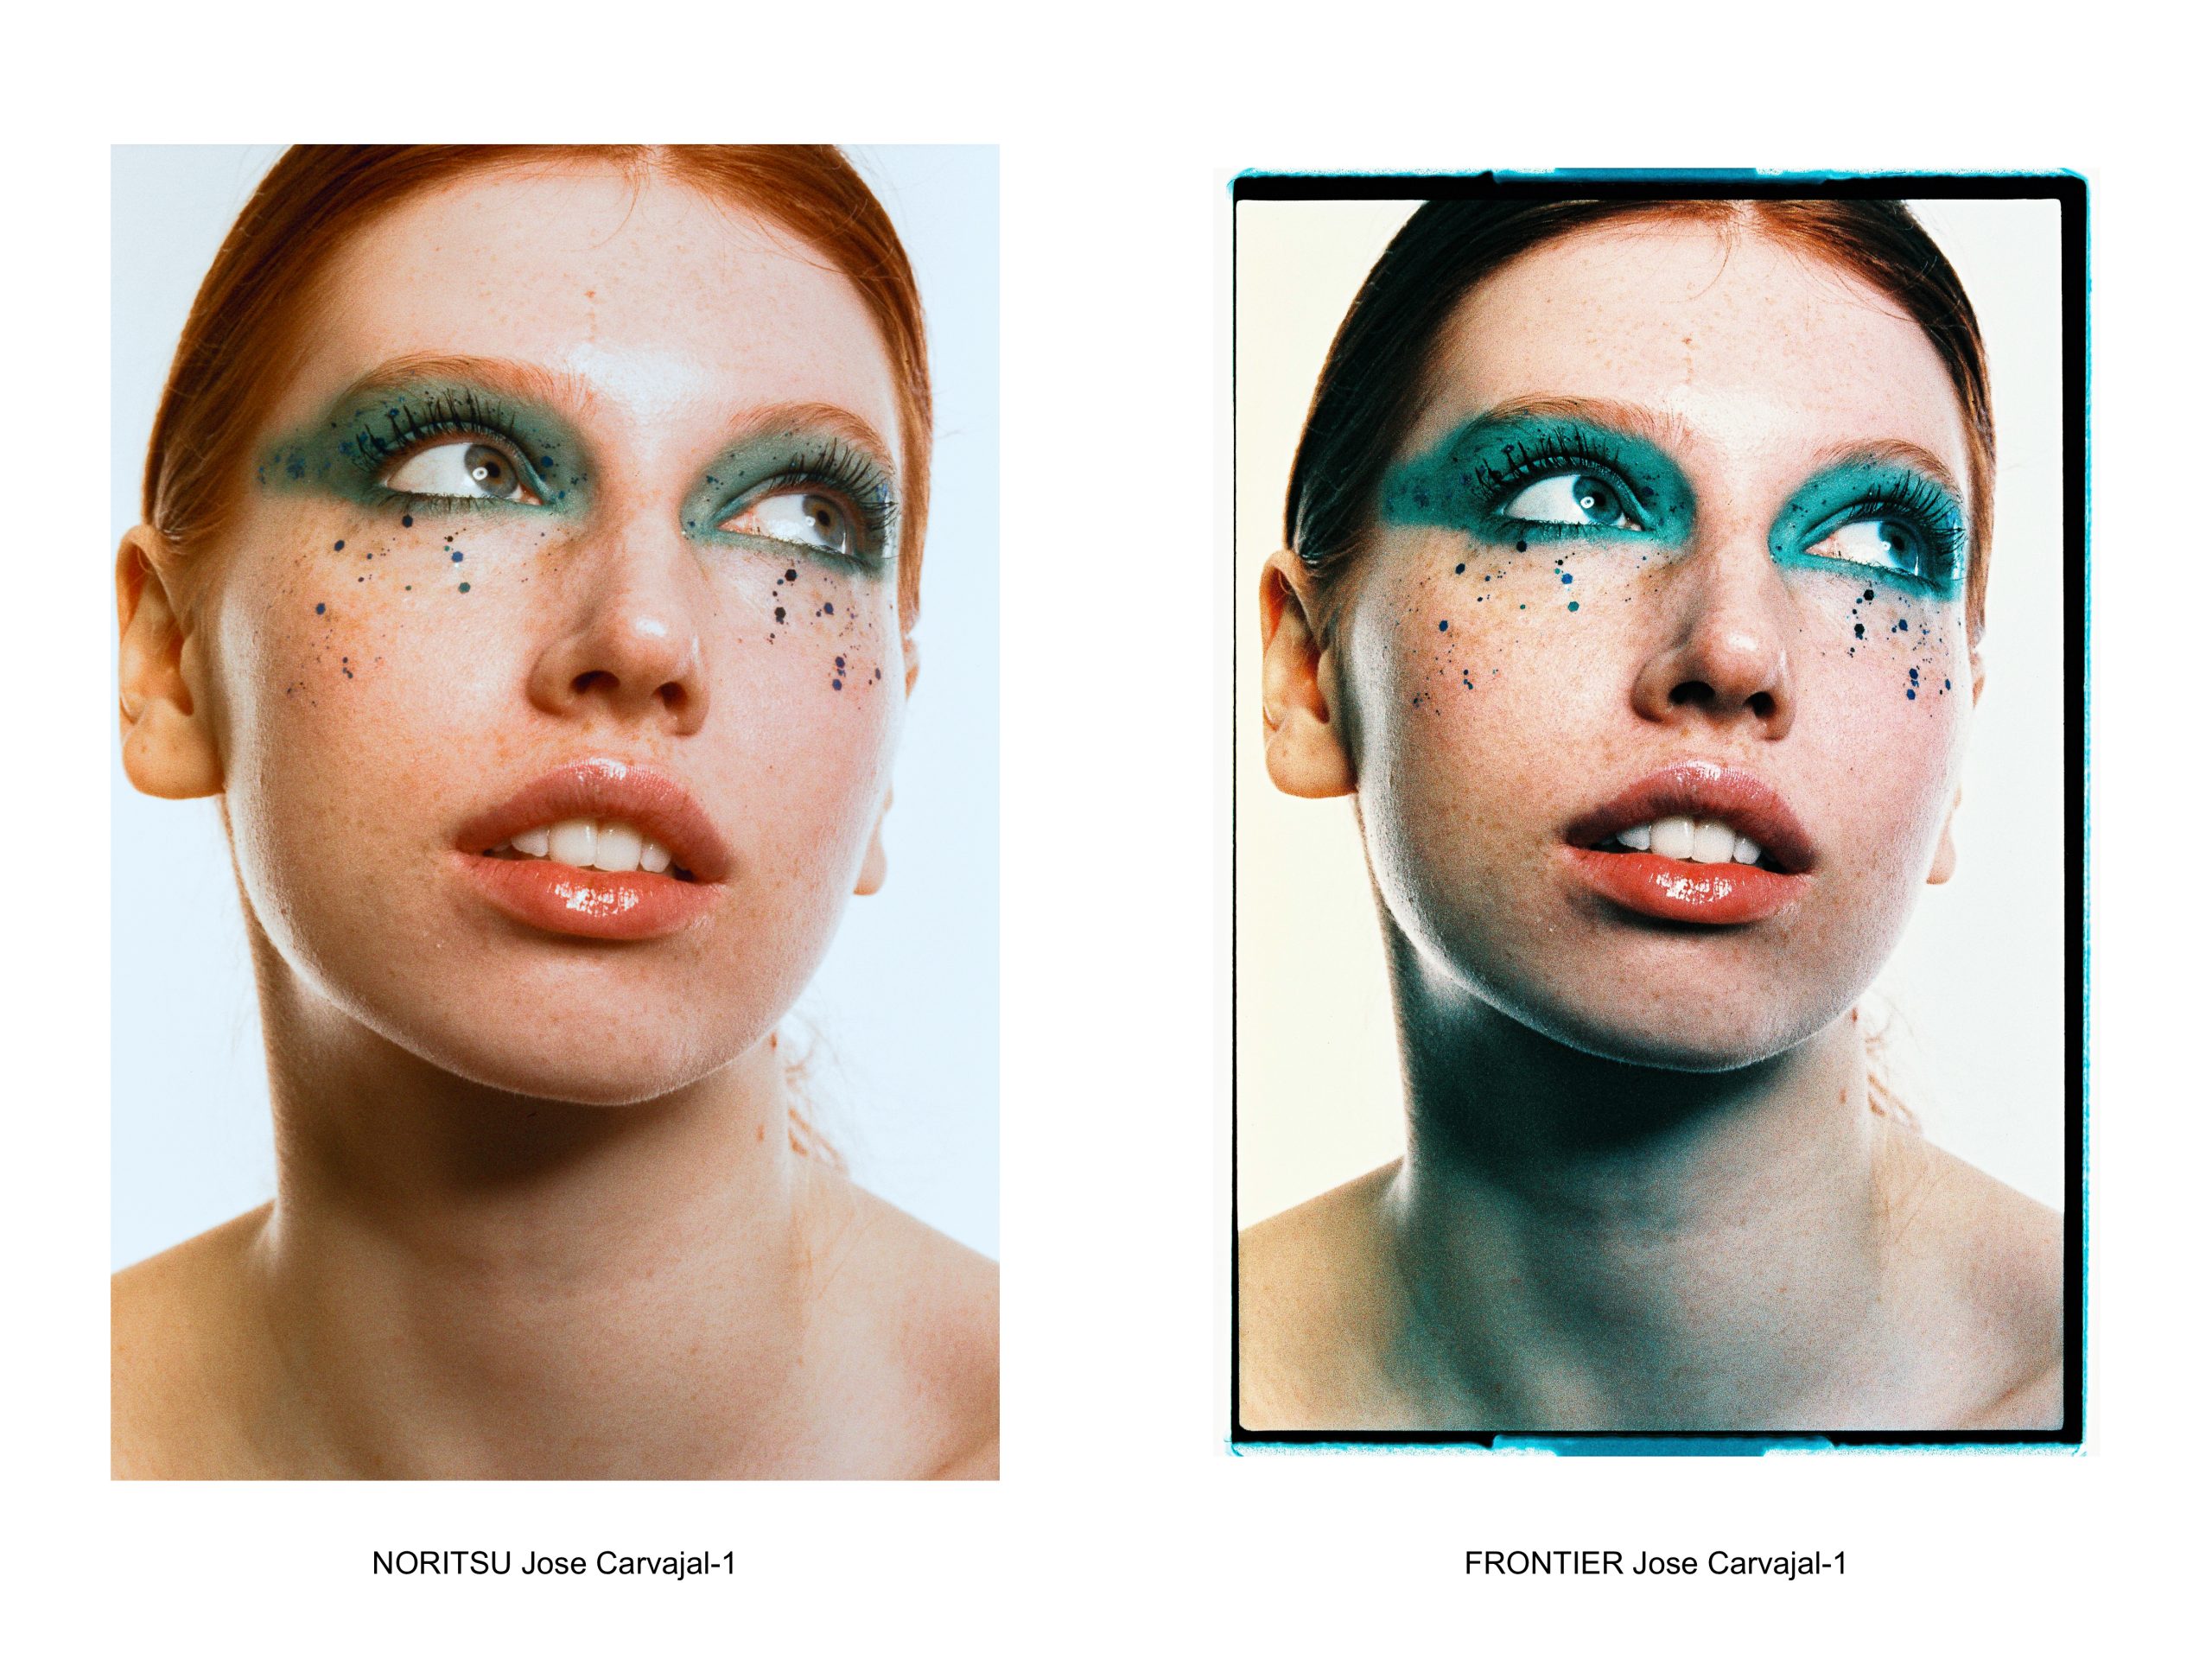
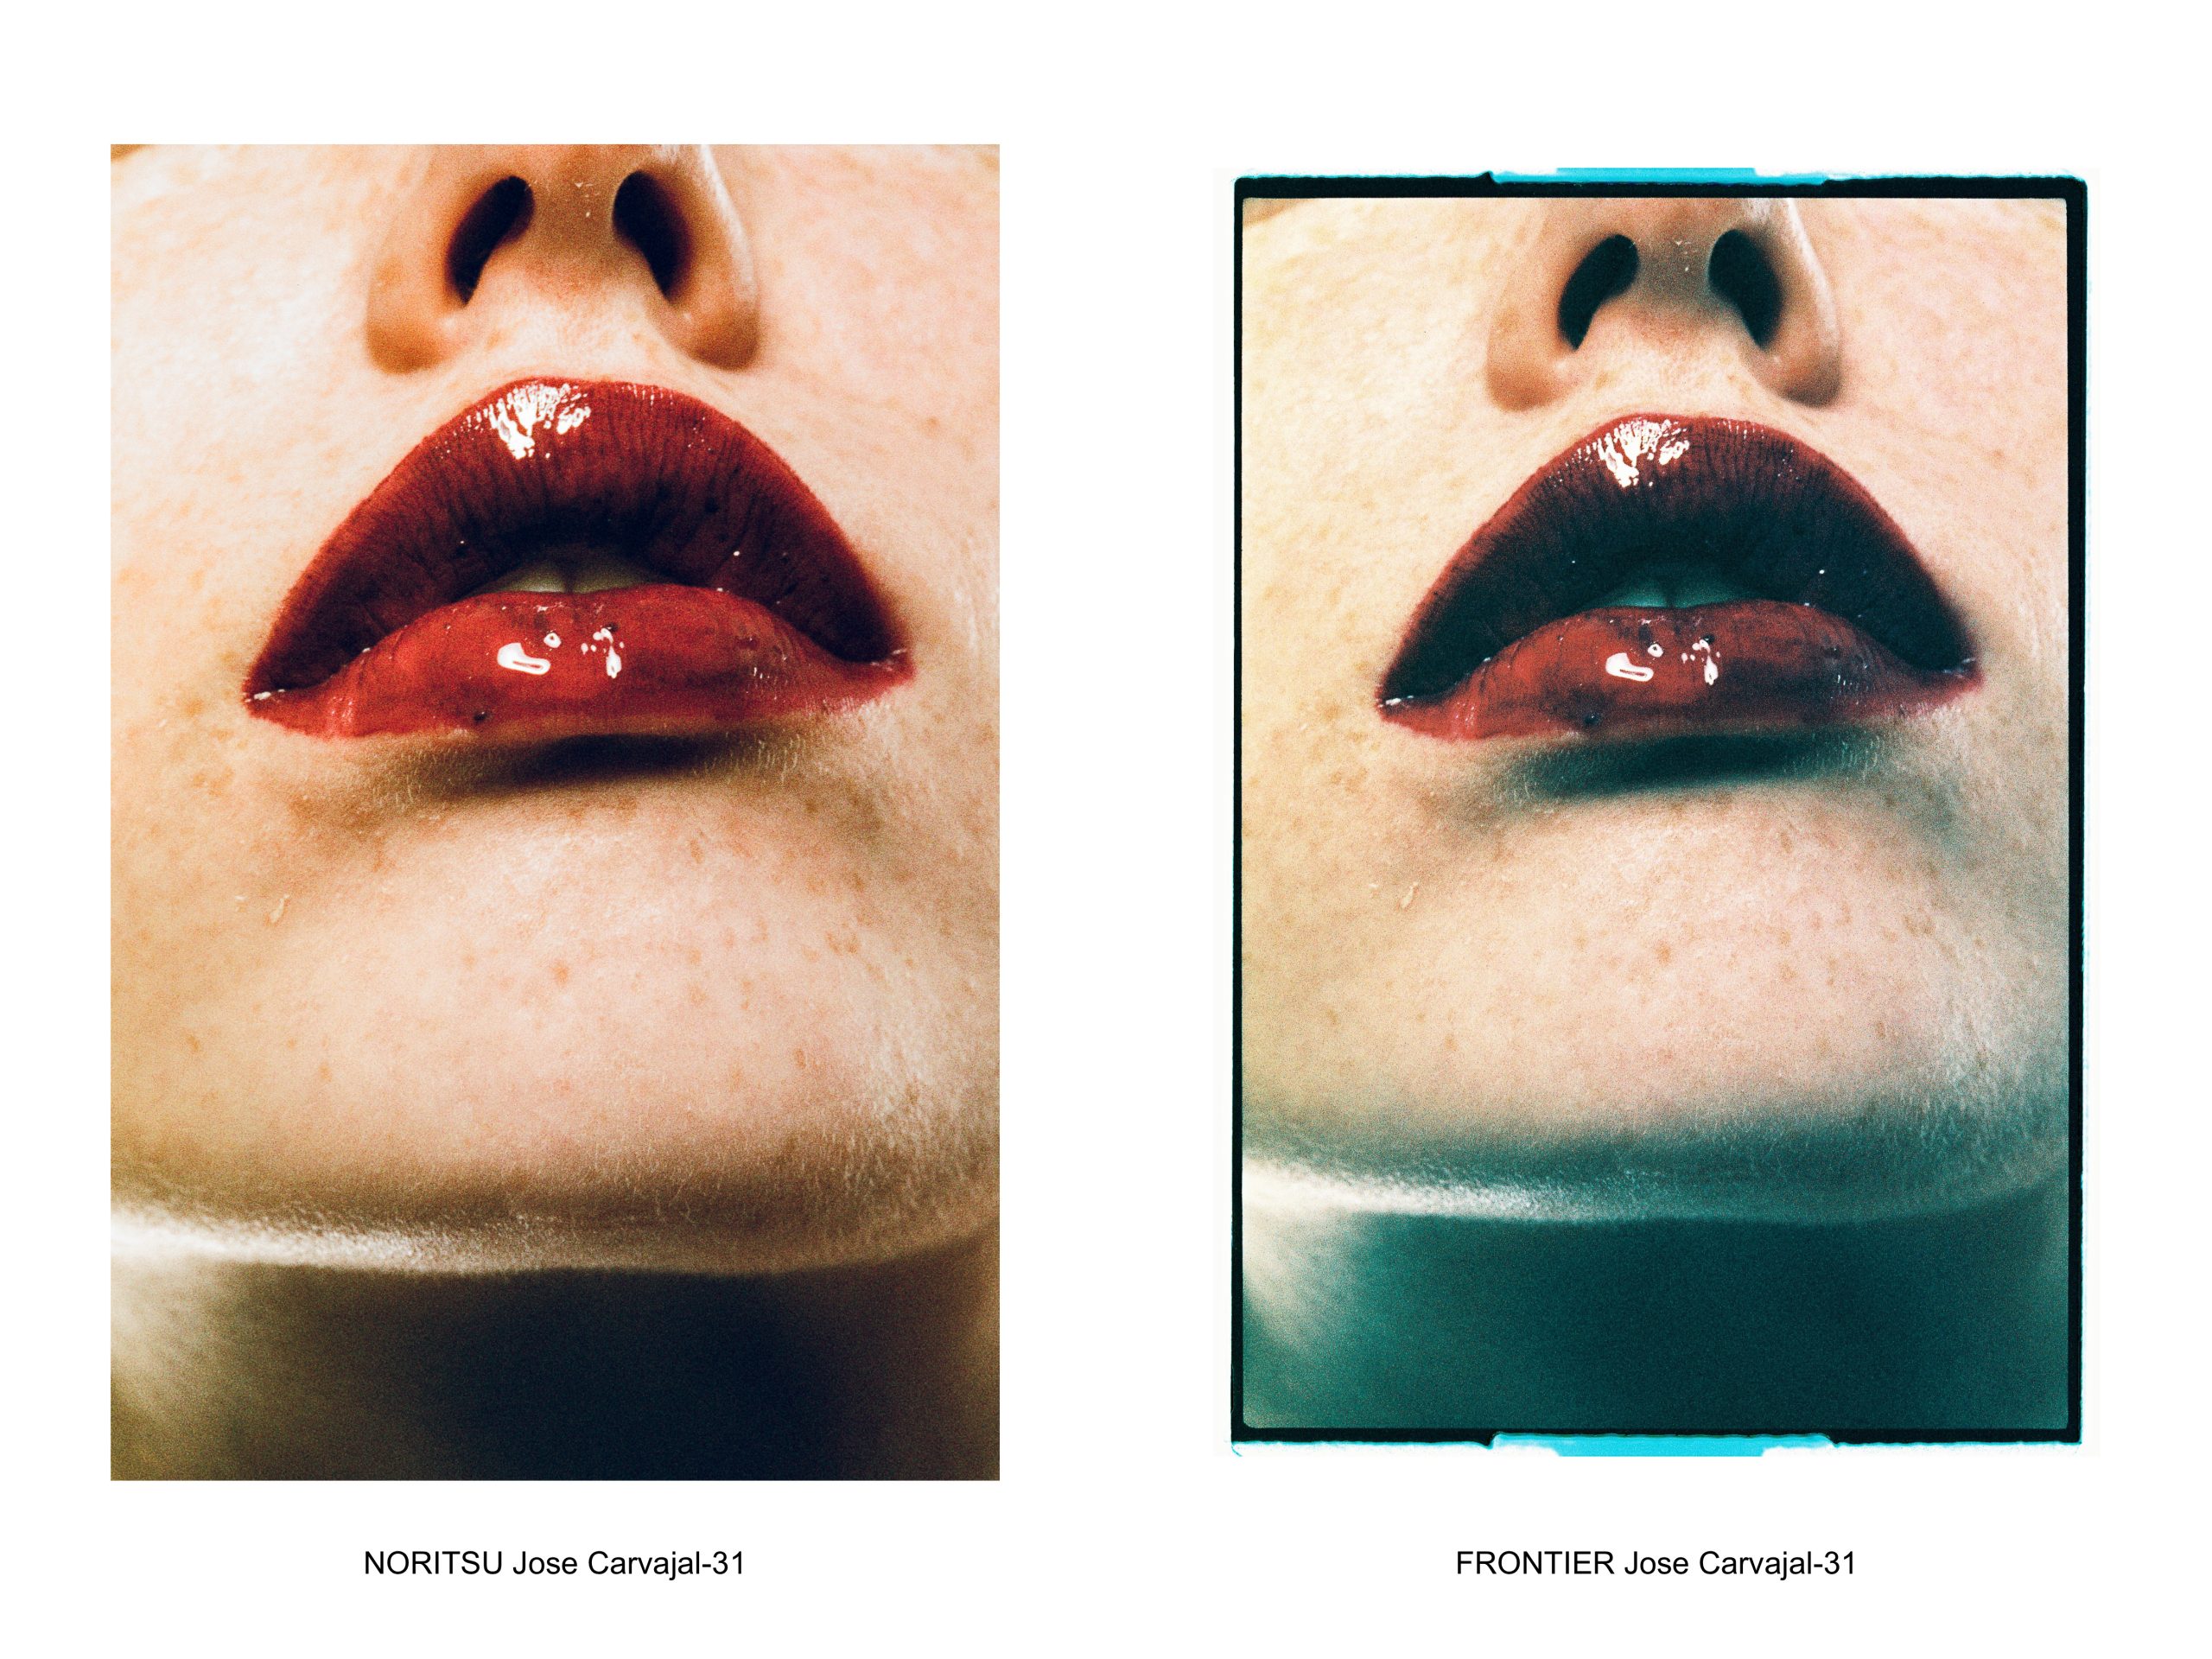
STUDIO LIGHT
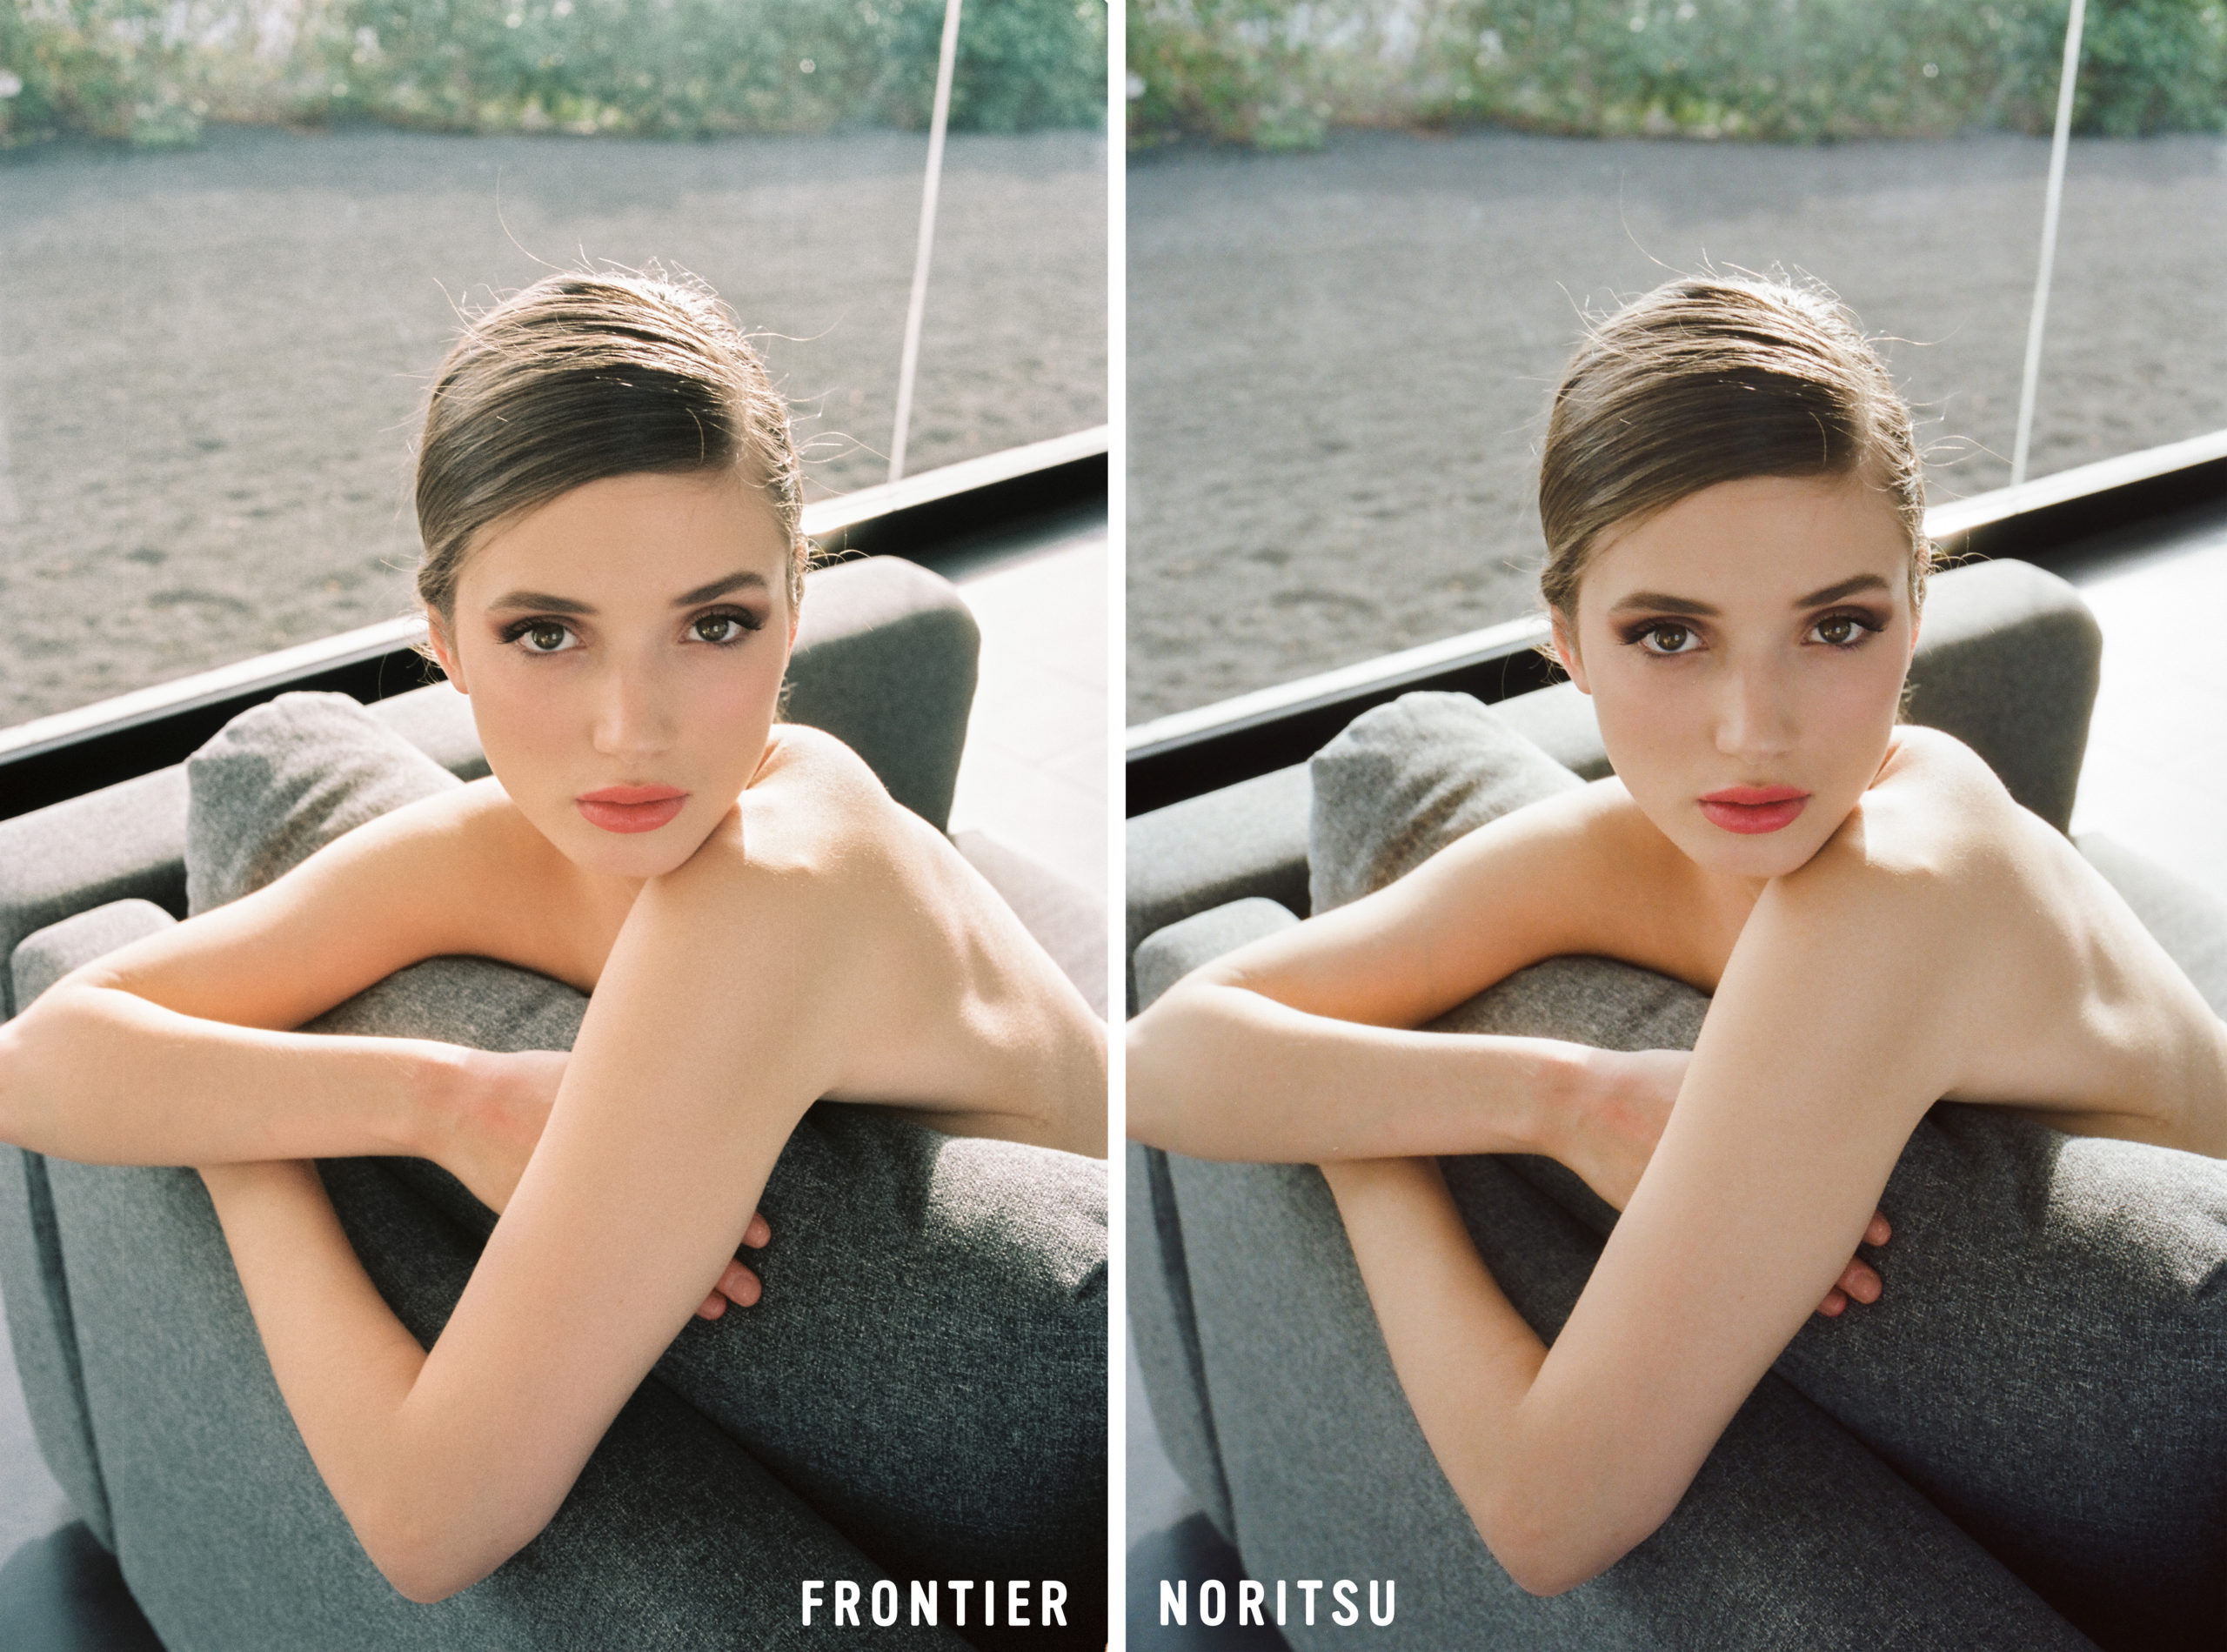
Our friend Jose Carvajal shot the Phoenix in studio light for a makeup editorial, and the results were crazy. You can clearly see the differences between the Frontier and Noritsu scans.
Needless to say, he is an experienced photographer, and he knows his drill; this took us by surprise, but it was so shocking when we saw it that we had to share it with all the labs (and to be honest, it was kind of the definitive proof that we needed to make this review post).
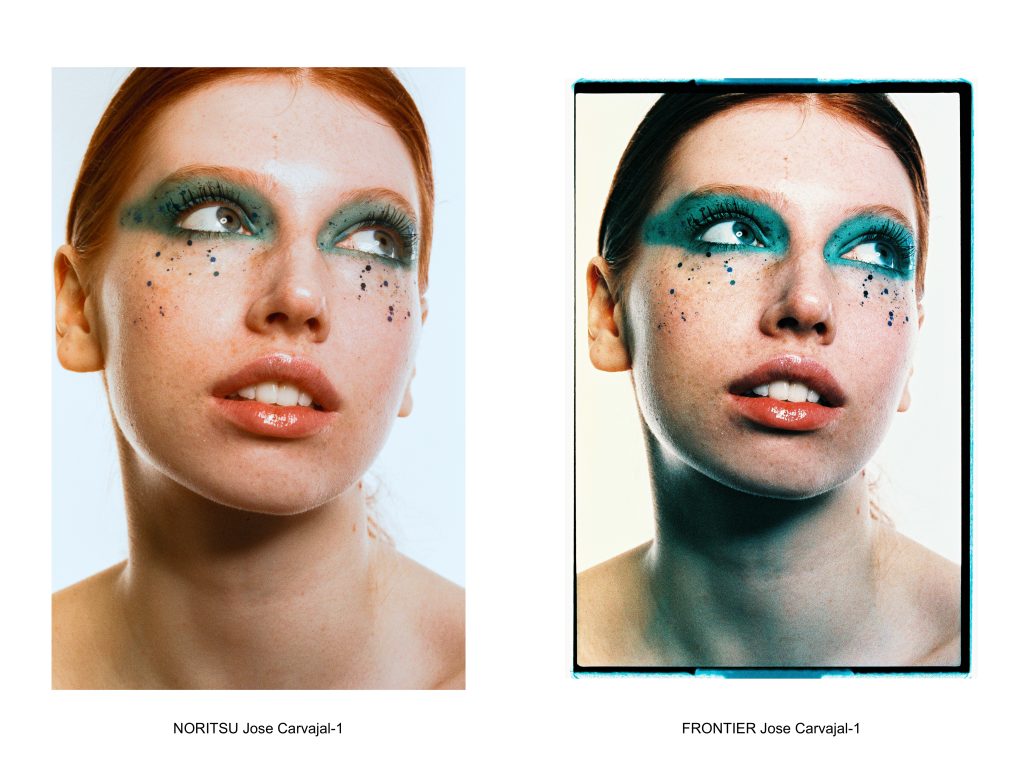
It’s the same emulsion, scanned first on the Frontier and then on the Noritsu. The shadows in the Frontier get rendered in a way that’s totally wild.
There’s a lot more texture and focus on the Frontier indeed (in part, it’s due to the fact that working around these images is hard). It’s such a different look between both scanners, and you may like one more than the other; that’s fine! But we believe this might be misleading if you don’t know what you’re getting into.
SCANNING NOTE: It is true that we could do some fine-tuning in the Frontier to adjust and mimic the Noritsu in terms of sharpness/grain; but again, we feel that is not what most labs will be doing (and not what it’s described in Harman’s scanning tips sheet), so we wanted to stick to the usual settings. If you are a lab and are curious to experiment with it yourself, please let us know! We will be happy to help you!


THE GOOD
As you can see, it’s a new color film.
We have no idea what the first colour films looked like, but we have to acknowledge that we are looking at Harman’s Chapter 1 when it comes to coating colour. When we compare it with other manufacturers like Fuji or Kodak, they are at chapter 10 on their colour emulsions since they’ve been coating colour for a long, long time. And to be honest, the emulsions we use nowadays were the pinnacle of colour emulsion technology. Not even Agfa or Konica in their hey days, were able to reach this level of color rendering with all their R&D.
So, expecting the first film from Harman to be Kodak Gold is very far from a wise thing to do.
It’s a very different look, and to be honest, it brings back memories from when I was shooting Kodak E100G cross-processed with an Holga back in 2010. Being able to replicate the look without burning through a brand new E100 film is a great option for those summer days or shooting at Primavera Sound 💃🏻.
On the bright side, I think we shouldn’t take this film for granted. Harman has been a very reliable name in the industry, and they expressed their commitment to keep refining the emulsion further and improving it on every batch. It’s easier said than done, but at least the good intentions have been enough for the film community to back it up!
THE BAD
GRAIN AND COLOR
The grain & colours are very far from ideal. We still need to see more examples from people shooting it around, but it’s the weakest point of this colour film. Again, it reminds me so much of cross-processed expired E6 film when I see the results. Can it be used creatively? Absolutely! But I believe once the hype train has passed, it will be a difficult choice for people to repeat when purchasing film for their next holiday. BUT (there is always a but) there’s a silver lining of hope, which we will explain later.

Phoenix Harman scanned in Frontier
NOT FOR BEGINNERS
Also, this might be an unbiased fear, but I can’t help but imagine someone jumping into film photography and buying this film for the first time and not being satisfied or understanding what happened to their pictures. Only if someone had advised them that this film is challenging and needs to be scanned on a Noritsu to have a decent result…
SUPPLY
We are still unsure about the continuous availability of this film. It’s early to tell, but we hope it is a solid stock that can often be found on the shelves all around the globe. I believe this would help settle the film as a valid option for those days when you will want to experiment with it (for example, double exposures at a music festival)
THE UGLY
MISLEADING INFO
Ok, this is where my film heart broke.
If you release a film that does not look incredible, we will all understand, especially as a first-off from a new project. Luckily, nowadays, there are a ton of things that can be done at the lab to work around some flaws that an emulsion might have. The problem is that when releasing this film, Harman, with all the good intentions, I assume, released a document called ‘Scanning Parameters’ telling labs how to work with this emulsion. And when doing something like this, either you are on the spot or you will mess things up even further. No other film company that I’m aware of has ever done this before, so if you are going to do it, you better do it right.
I understand the good intentions here, but any kind of action that could lead the customer to use a Frontier scanner to scan this will lead to dramatic results.

Phoenix Harman scanned in Frontier
As we mentioned before, this is a very complicated film to deal with. This shouldn’t be encouraged to be scanned on a Fujifilm Frontier scanner by any means. The reasons are many and fairly technical, which we covered on our Youtube video, but the results of this film under a Fuji scanner will be quite unusable and do not render what the film is capable of.
I understand no one wants to release a film and tell people not to scan it in labs that do have specific equipment, but the reality is you won’t be able to have a pleasant experience if you do; shouldn’t the manufacturer be able to tell you or at least advise you?

Phoenix Harman scanned in Frontier
200 ISO FOR REAL?
We have very mixed feelings about this. At the moment of writing this, I’m honestly unaware of how the sensibility/speed of a film is measured, but this does not feel like 200 ISO at all when we look at the shadow detail of this emulsion. But in our experience, this film feels closer to 100-ish ISO than 200. Why market it at 200 if we all know that underexposed film does not look any better?
Well, if you are in front of a film fridge, buying some film, and 2 films are placed in front of you, at the same price, with the same exposures, but one is 100 and the other is 200, which will you go for? 90% of photographers will get the 200 because they usually feel that 100 ISO is quite limiting in terms of light.
NOTE: Throughout the making of this article, we’ve learned that colour curves on this emulsion are not really parallel; this is causing the different colour layers to react differently through the different range of tones. We suspect you might advise 200 ISO because the colour is more uniform when exposed at that ISO, but it is also true that it feels more underexposed, “aka, less colour,” so the drifting tones might be less noticeable. We will leave this one as an open question.
IN OUR HUMBLE OPINION
I’ve admired and respected Harman products for years. Their B&W products are just part of my journey with film photography, and I plan to keep doing that. I haven’t had the pleasure of visiting the factory myself, but I’m sure there are a large number of truly dedicated people who keep film alive and kicking.
I’m not even sure I can comprehend the complexity of manufacturing a brand-new colour emulsion from scratch either, so they have my most sincere appreciation for embarking on this venture and being able to release a usable product this year. I’m sure there has been a lot of blood, sweat, and tears in the making, and, for me, this is why the film community has supported it since it launched and will keep on supporting it.
From a lab point of view, we wish there would have been a bit more research on the possibilities, talking with different labs, and especially the very experienced labs. To be able to provide more accurate information from Harman to labs around the world would help them provide better results to photographers.
To be completely honest, I think this is a problem with the industry as a whole when it comes to the development & scanning of film. Promoting the importance of proper development & scanning of a film is as important as its base emulsion or the camera it’s shot on.
THE FUTURE OF THE PHOENIX
One of the questions for me here is, after the first blow, is there more enthusiasm in the community? As with every new release, many purchases were made because of the initial release, but would people who have shot it a couple times keep buying it or recommending it in the future?
Unless there is a significant upgrade, people might be quite reluctant to re-buy it. It would also be interesting to label it differently, like Phoenix 2.0 to differentiate it for people willing to purchase it. I think the hype from the community will follow if there are newer versions or upgrades, which will keep sales steady once everyone has tried the first version already.
Harman mentioned they will be reinvesting the profits made from this batch into the next one. This sounds really good, but it can also lead to nowhere… (Sorry, we have to be realistic here!) We truly hope it happens and finally, the film community will have the answer to it’s prayers after so many years :_)
CONCLUSIONS
At the end of the day, we do this out of love for this analog medium that brings in us something more than what meets the eye.
Film photography is a very bonding medium within the community, if you find someone shooting film around the globe is hard not to pay attention to the camera they are using or the film loaded. Somehow you know that if you both would be able to spend quite a long time discussing about your passion, the gear and what you discovered in film photography.
That’s why, anything that helps support this amazing community is a positive for us. But when we feel there are products that take for granted this passionate community and their love for film (and let’s not forget, we put our irreplaceable memories into it), we should be very careful with the information we put out, and that’s why we feel we should publish our opinion on this.
If you made it all the way here, we hope our point of view made some sense. We really hope this project from Harman is a success, and in a few years we can laugh about what the first runs of the emulsion looked like! But it’s true that there have been several projects already that eventually failed when it comes to film, and we can’t help but hold our enthusiasm a bit on this one 🥲
P.D.: I forgot to mention, we’ve seen some results from Kyle Mcdougal scanned with a DSLR which I believe are the best examples we’ve seen so far. I think paradoxically, compared to other films, by scanning Phoenix with a DSLR, you might be able to obtain better results than most labs can offer!
Head of the lab since 2013 and currently managing the team, developing new projects and trying to bond the international film photography community. These are only my personal thoughts; you may or may not find them relevant, I believe there is nothing healthier than a good debate!
– Albert Roig, Manager at the Lab