How To Archive Your Negatives

This is a bit of a different one. We’ve been working on Wesley Verhoeve film for a while and we couldn’t be happier to be part of his Newsletter.

If you are a photographer, and especially a film photographer, we can’t stress enough how valuable the PROCESS Newsletter is. To be honest, it’s really hard to find individuals who share & post valuable information about film photography these days and Wesley’s newsletter got us literally hooked since the first time we read it.

(PLUS there is always a giveaway in every PROCESS issue!)

One of his later topics was how to properly archive your negatives we found it to be so interesting that we asked him if it was okay to share it with everyone.

So here it is! We hope you enjoy it as much as we did!

How To Archive Your Negatives And Honor Your Work

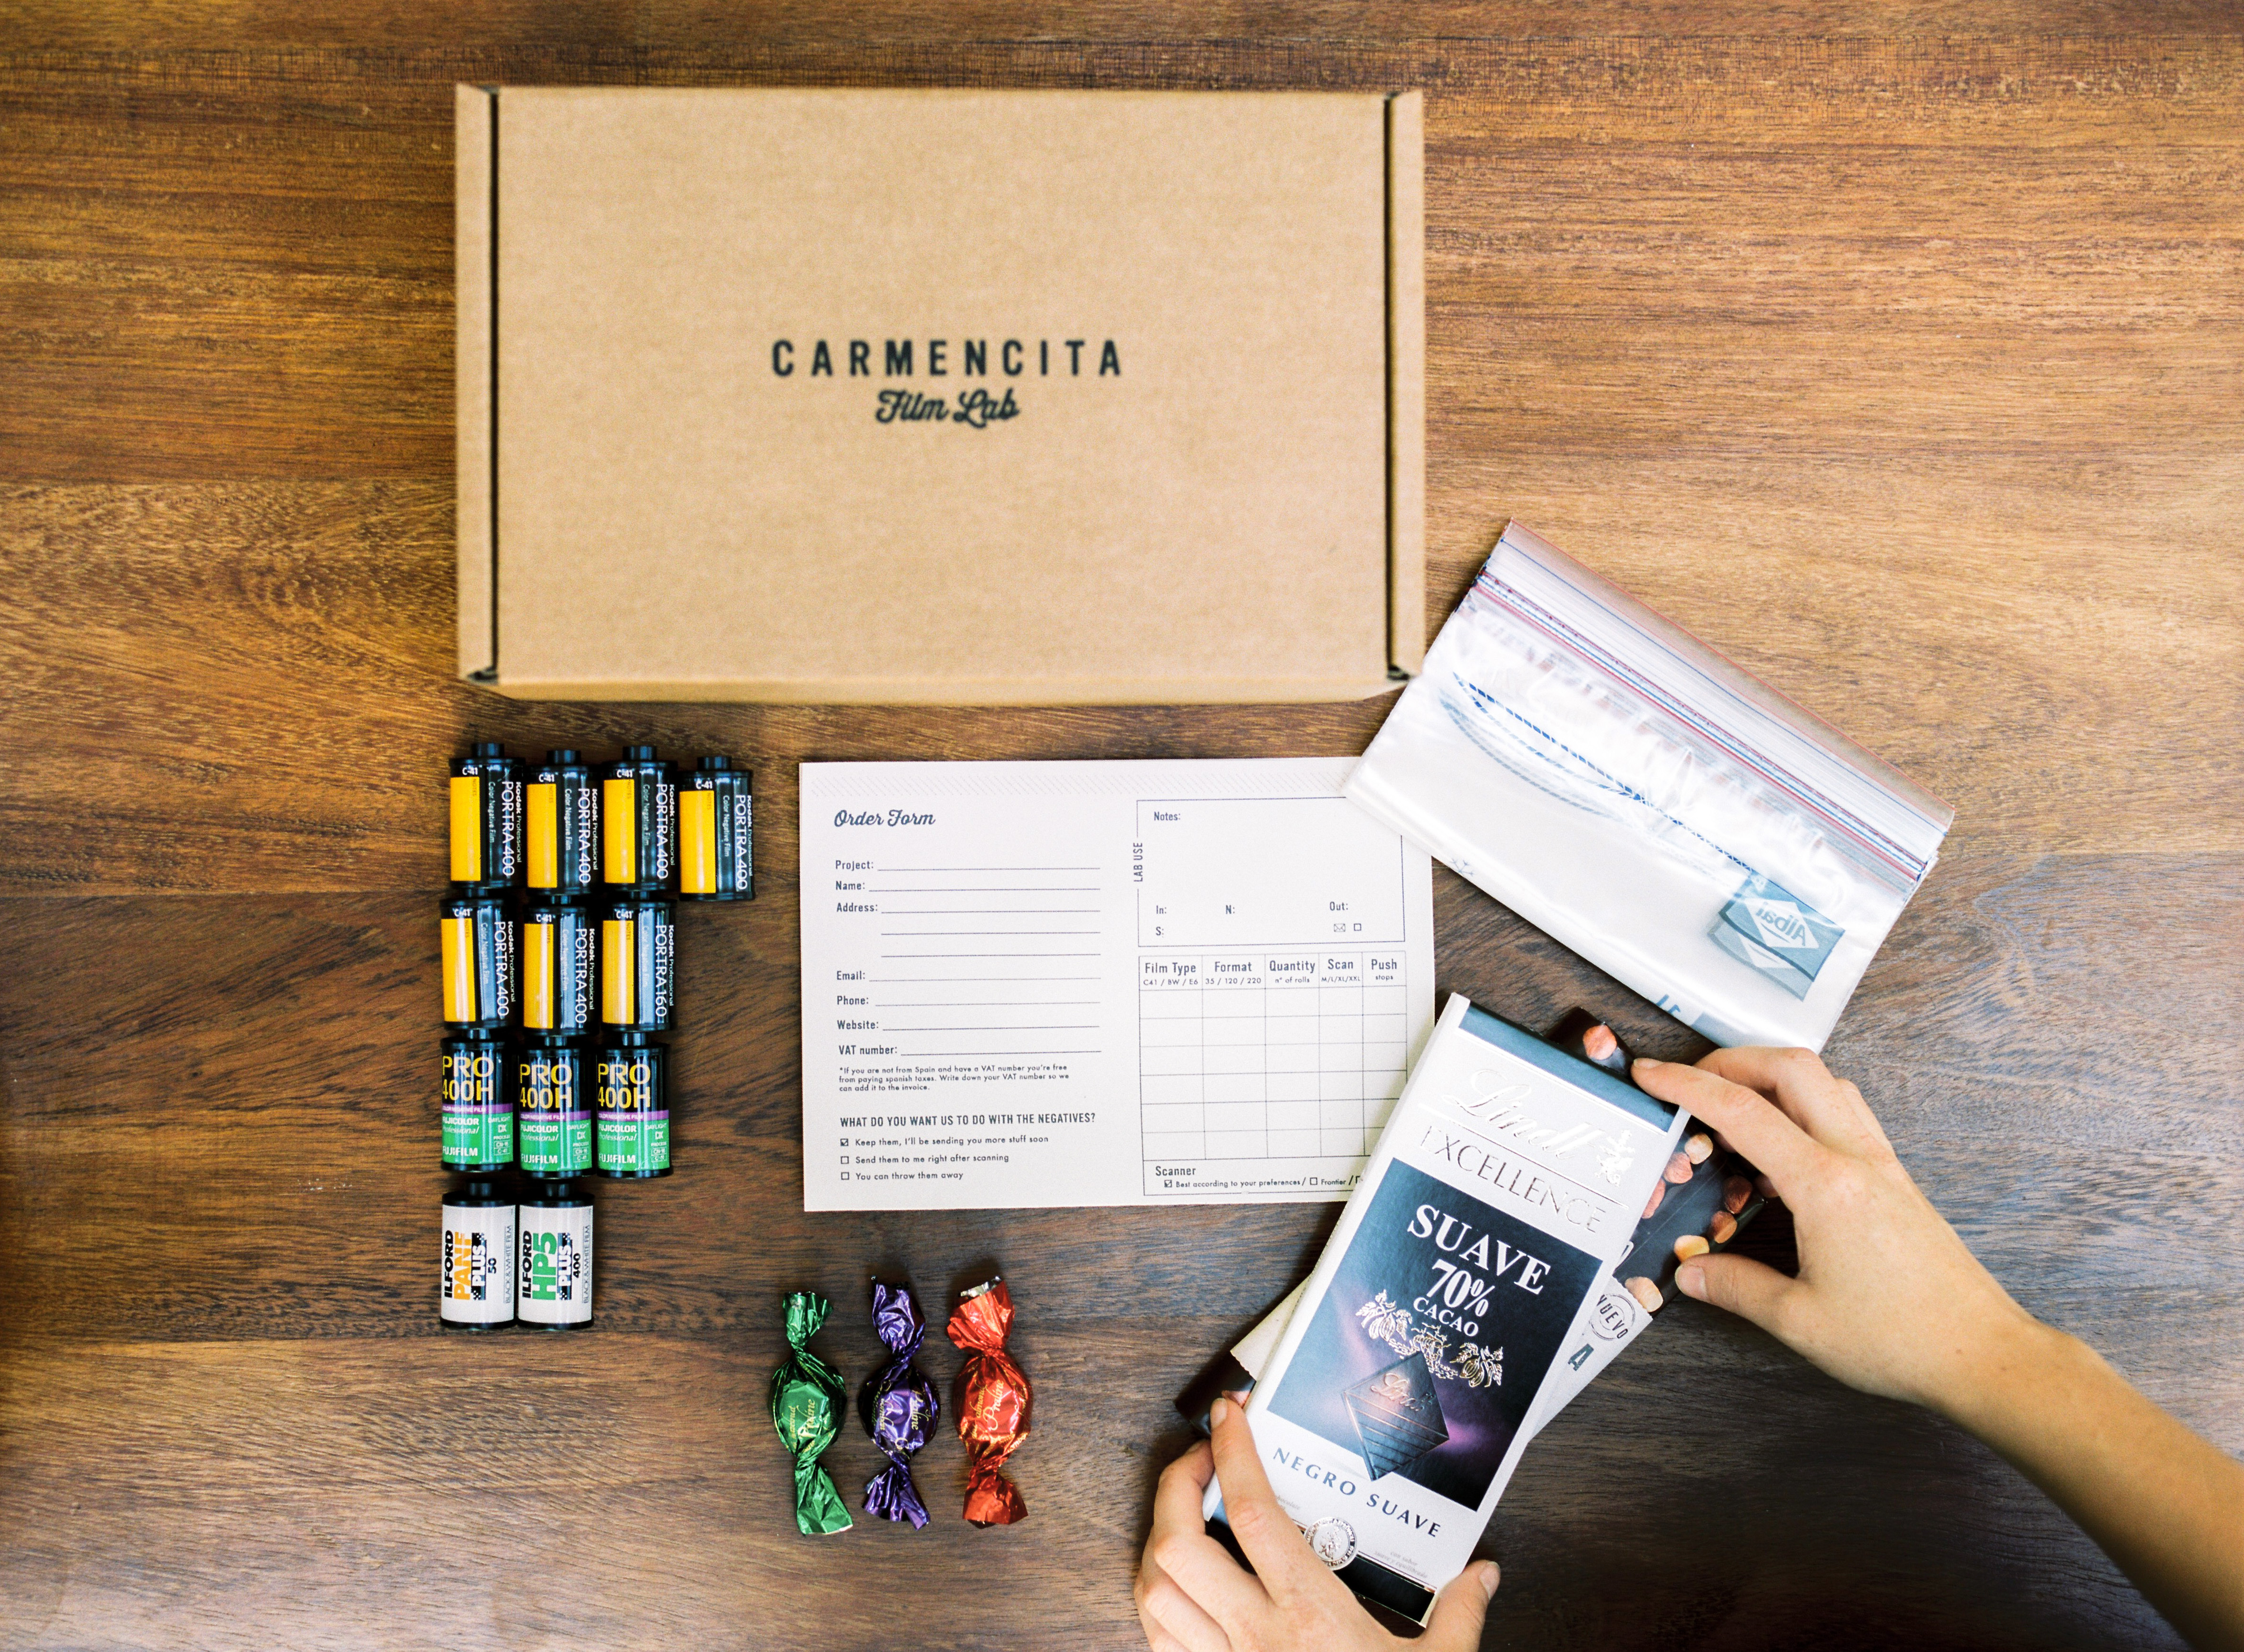
In the past few weeks, I’ve gotten a lot of requests to share my process for organizing and archiving negatives and your timing was perfect because a big batch just arrived from my friends at Carmencita Film Lab. Look at this sweet sight of fresh negatives!


There are many reasons to keep your negatives organized and at the center of all of them is the belief that your photos matter. Whether you’re a professional or a hobbyist, your work is important. It doesn’t matter whether it’s important to the entire planet or only to your partner or your future child or your family.

Keeping a tidy archive is like making your bed in the morning. It’s a little bit of work upfront but it pays off tremendously if you do it consistently. A calm mind, an easily found photo, a chronological timeline of your life and photography skills, and a bunch of other things that Future You would be grateful to Today You for.

Sure, you can keep your negatives in the envelope and throw them in a shoebox and you could probably find something if you dig through it for a while, but once again: your work matters, treat it as such.

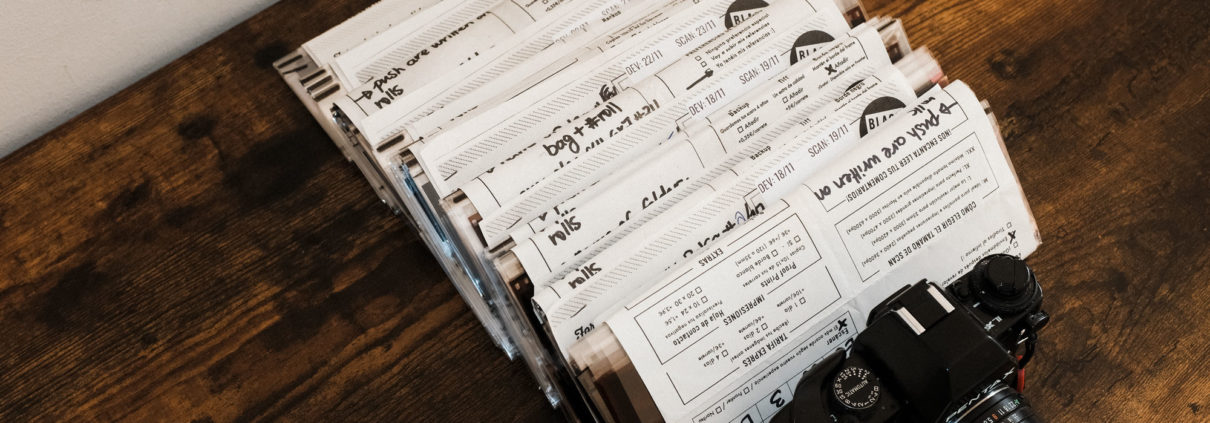
Let’s get started! Here’s everything we need. A pen, negative binders, and sleeves.


I recently switched from polyethylene sleeves by Printfile to glassine sleeves by Hama. The polyethylene sleeves are transparent which makes it easier to see the negatives, but they’re significantly more expensive and it’s 2022 so I switched.

Hama has been around for nearly 100 years and all my dad’s negatives from the 80’s and 90’s have been stored in these for decades. They’re also a bit lighter in weight, and they have a satisfying sound when you’re leafing through your binder.

For storage, I use Ars-Imago ring box binders, which keep away dust and look great on my shelves. My pals at Retro Camera sell them and they fit 100 rolls of film. There are many other options that are fine too. All you really need is any three-ring binder.

I mark the spine with the name of the camera used since that is the top level of my organization. I add dots to indicate which rolls are in that binder. If the spine has one dot, that means it contains rolls 1 through 100. The top binder in the picture above says “67ii ••••” which means it has rolls 300 through 400 shot on the Pentax 67ii.

Let’s grab our first roll from the batch of fresh negatives and get started!


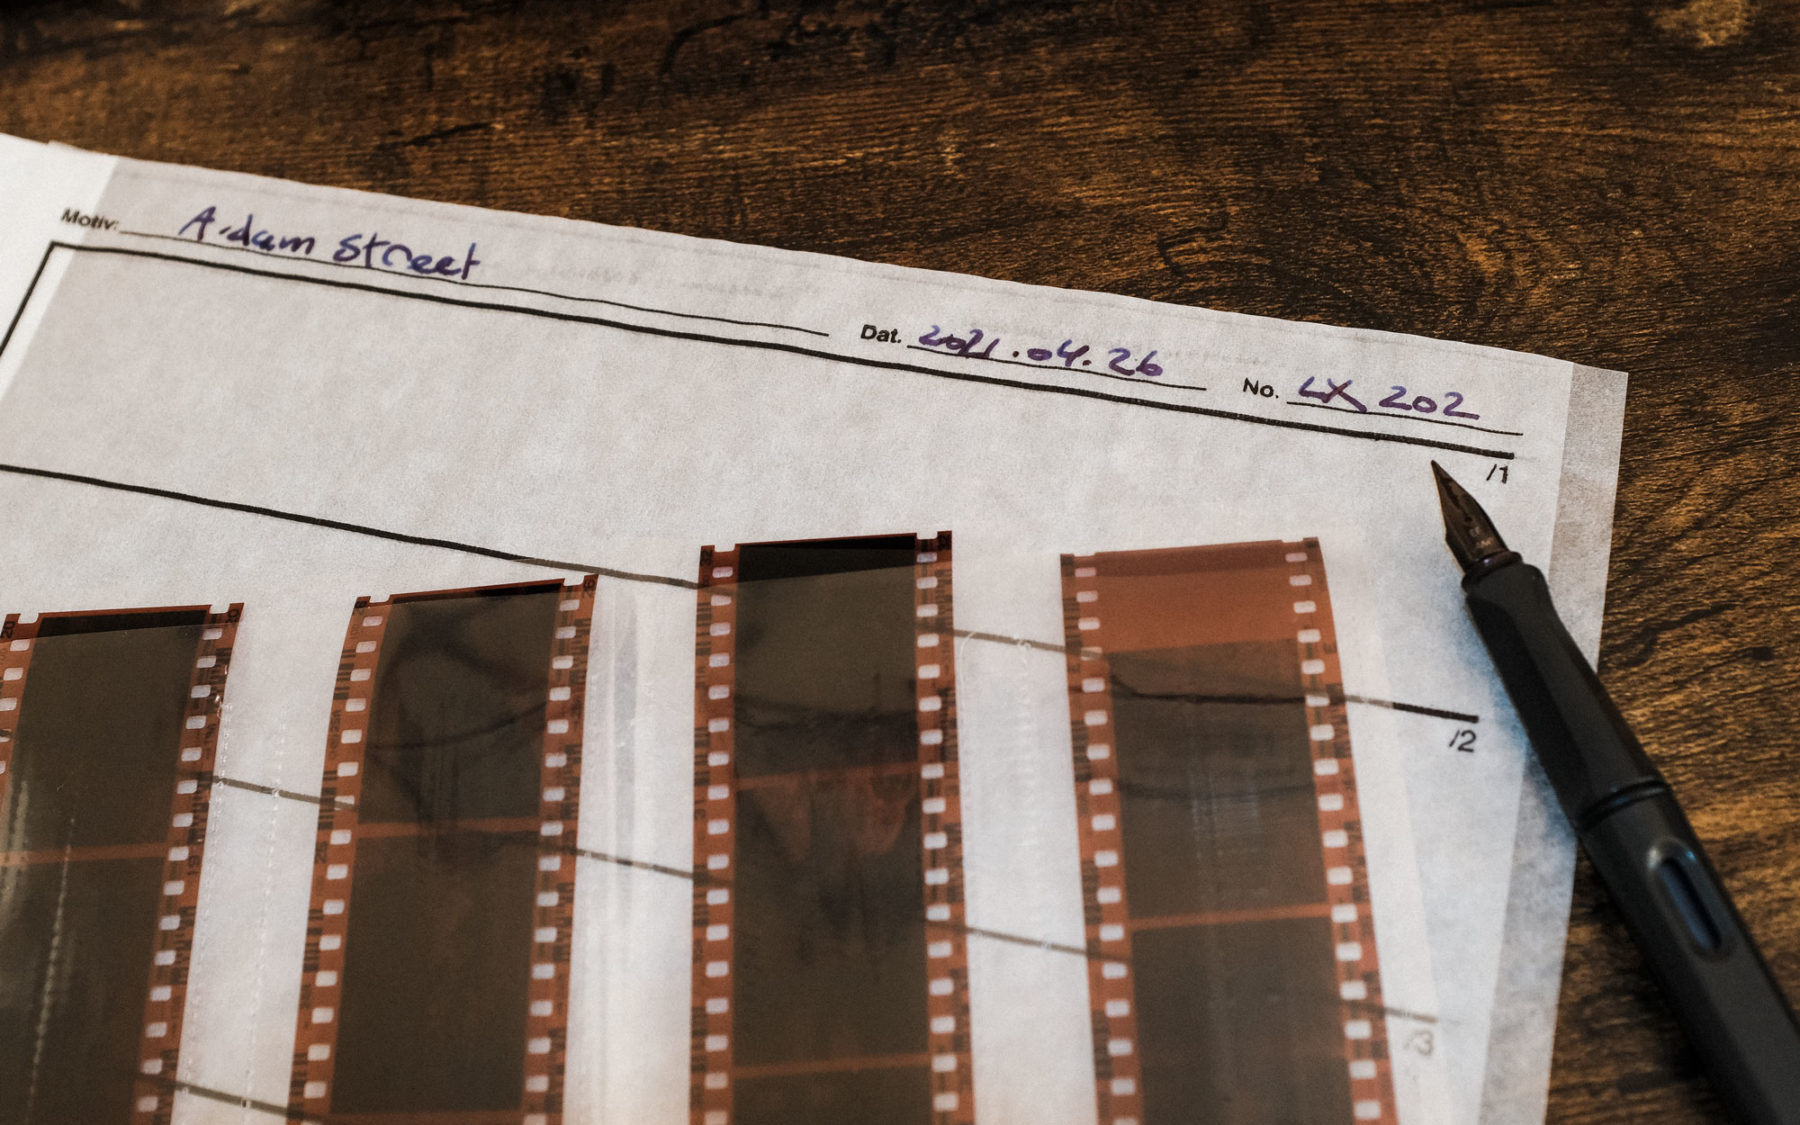
First I take a quick look to see what’s on this roll (see above). Then I consult my roll notes (see the phone screen below) to confirm it was roll 202 shot on the Pentax LX.


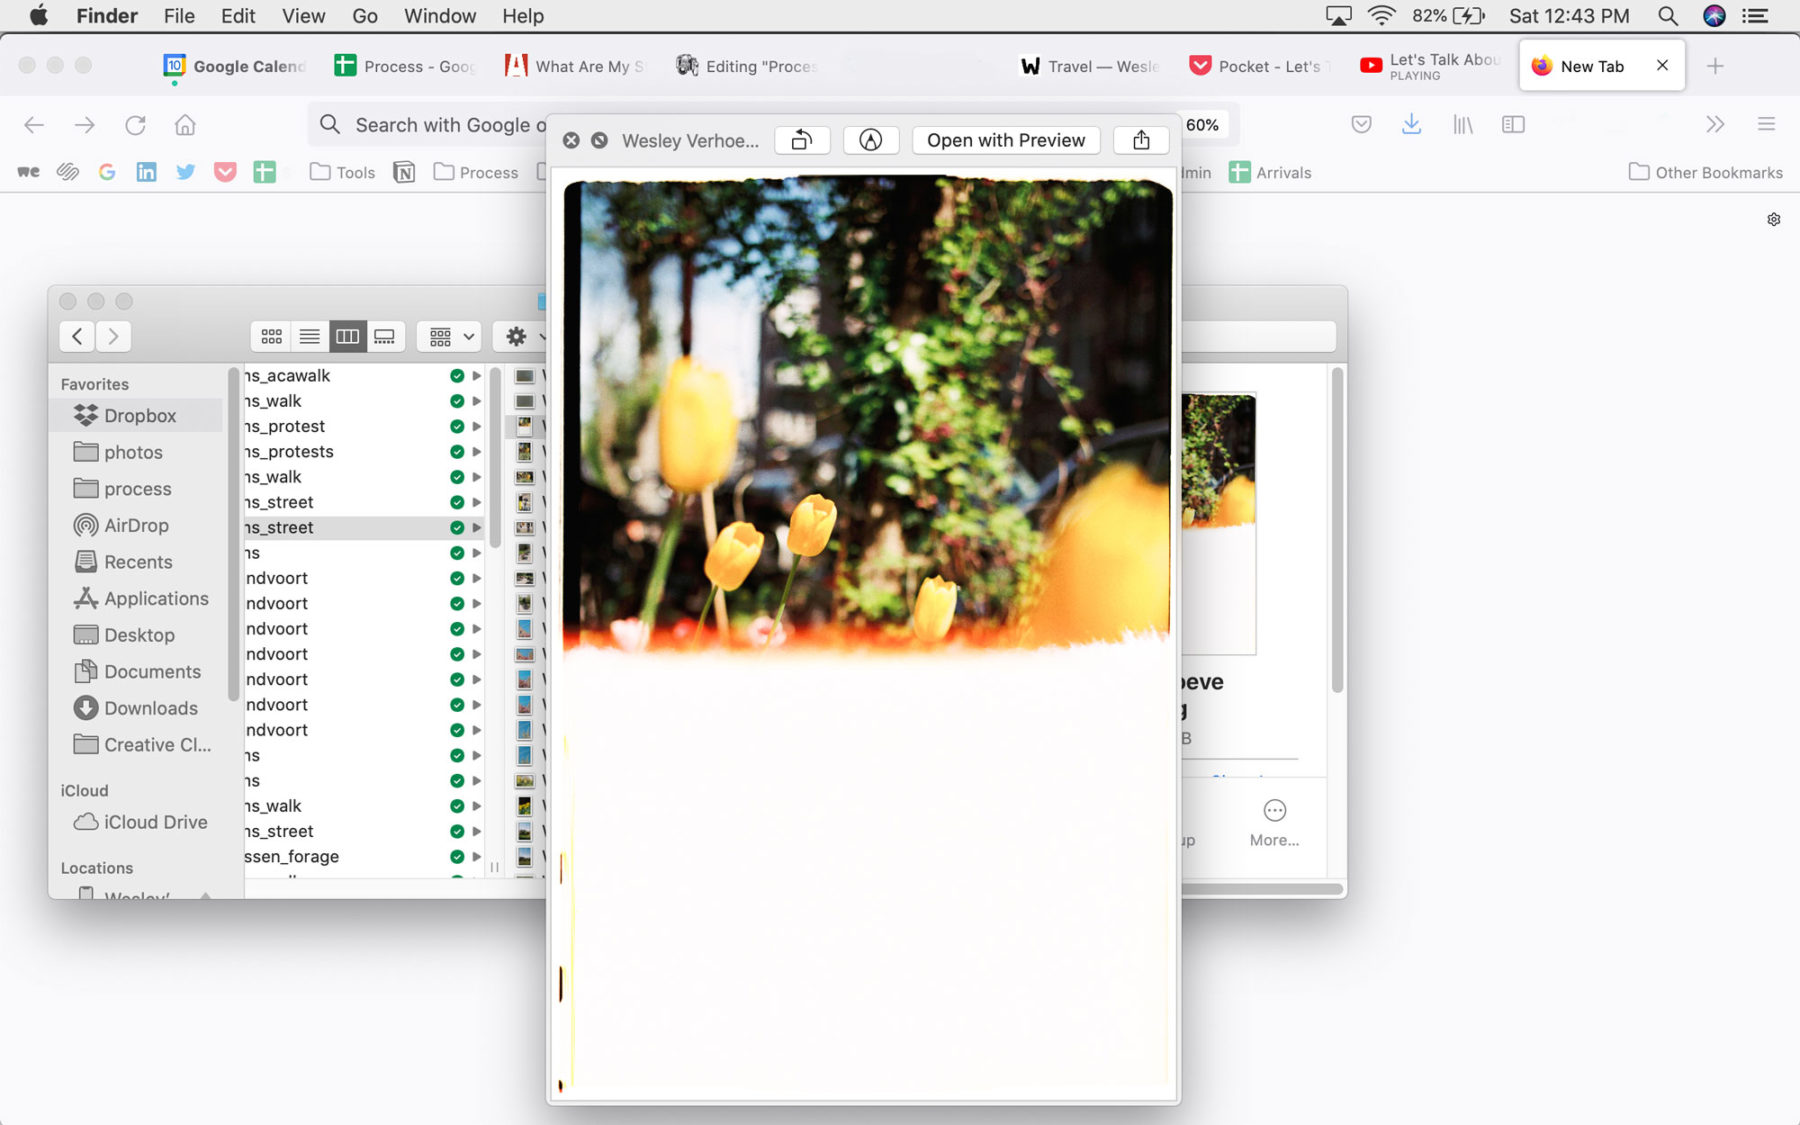
Next I cross-reference what I see on the negative with what is in the scan folder for roll 202 to make sure no mistakes were made (see below). These first three steps take maybe one minute combined once you’re well-practiced.


As you may remember from Process issue 012, I am a big proponent of keeping notes for each roll of film, which I do on Apple Notes. These notes are play a key role in an organized archive. If I ever need to find a portrait of a specific person all I have to do is search my roll notes for their name with the Apple search function and it shows me which roll it’s on, which in turn tells me which binder to grab. It’s super fast and easy.

Back to archiving: Now that I’ve determined which roll this sleeve is, I transpose the key information from my roll notes onto the new sleeve (see below). Each sleeve has, from right to left, the shorthand code for the camera (LX = Pentax LX), the roll number (202), the date (2021.04.26), and the theme of the shoot (Amsterdam street photography).


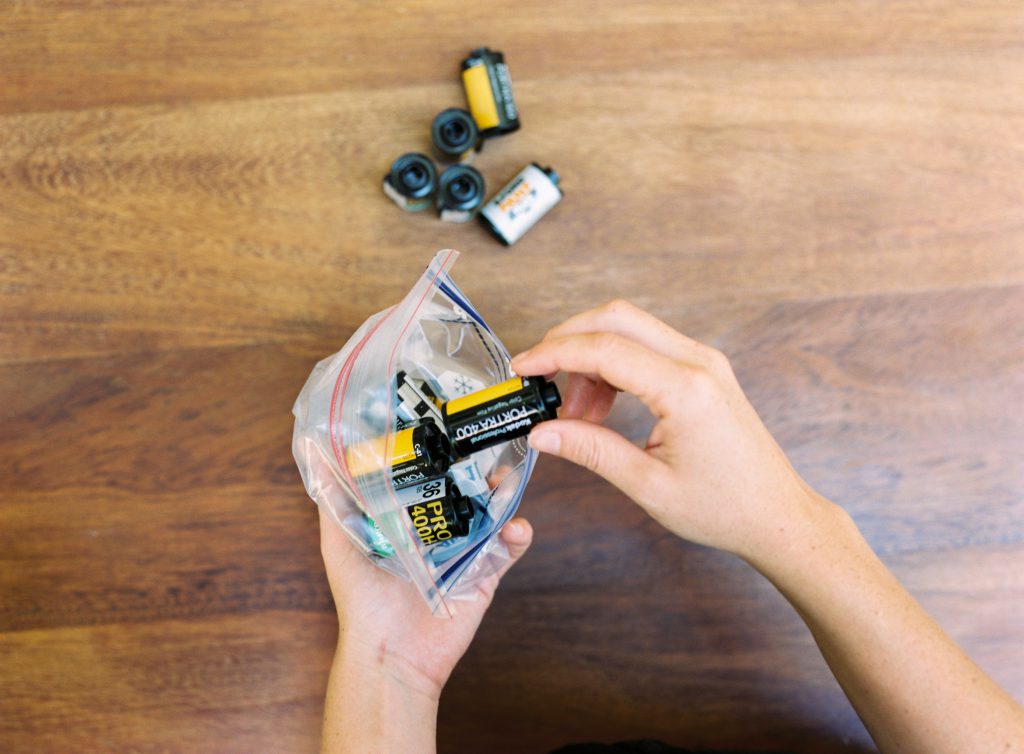
Now we know which roll we’re archiving and we’ve marked up the sleeve it’s time to move the negatives from of their temporary non-archival plastic sleeves into their new forever home (see below).


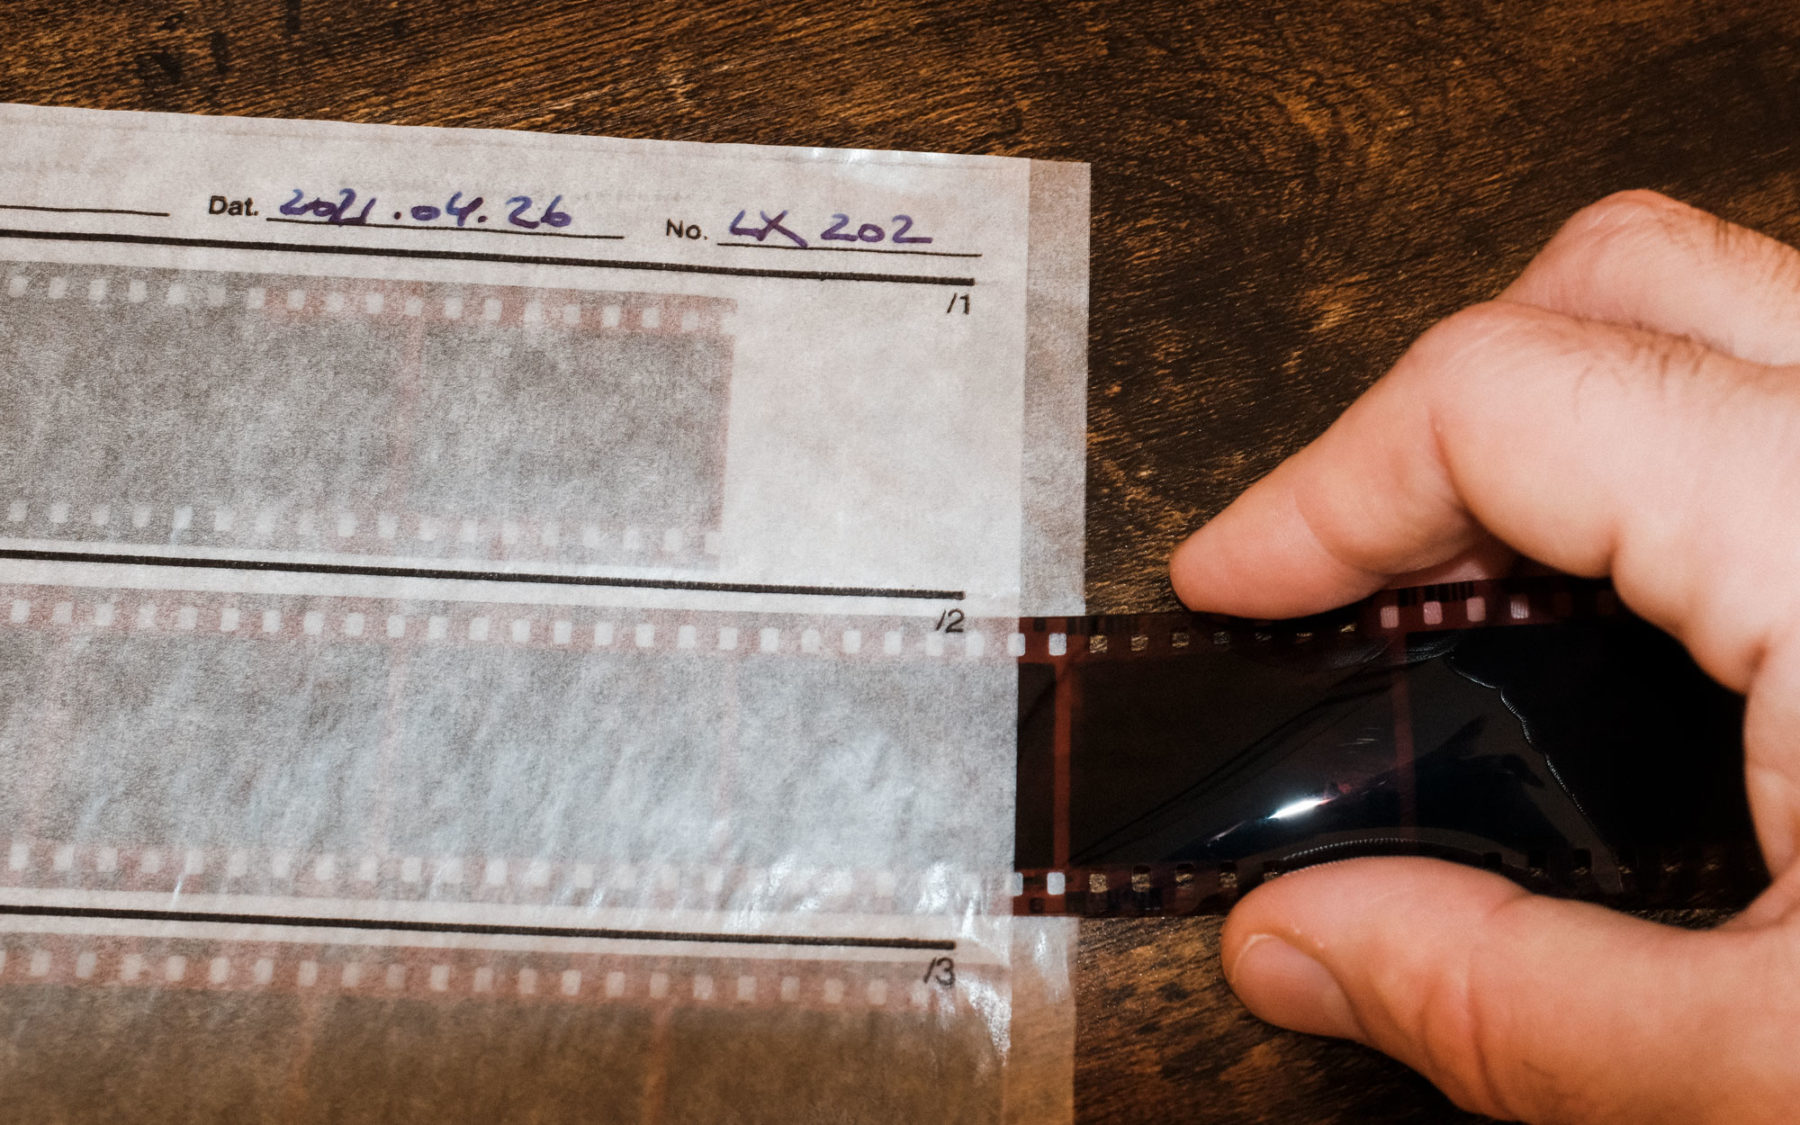
I am careful to only touch the sides of the negative so I don’t get harmful finger prints all over the negatives. The super legit way is to wear white gloves.


Now it’s time to grab the correct folder, which in this case would be the one marked LX •• since roll 202 lives in the 200-300 range. Once the sleeve is in the binder at the right spot chronologically I put the binder back on my shelf and let out a yelp of happiness.


I don’t know about you, but seeing my 2018-2022 negatives organized like this brings me a lot of joy. Almost as much joy as when a client or friend asks for a specific photo and I know for sure I can find it in under one minute. The relief! The calm!

That’s it! Seven easy steps to organize and archive your negatives, and honor your work. Let me repeat one more time that regardless of where you’re at in your photography journey, regardless if you’re doing it just for fun or with a career in mind:


Your photos matter.


Archiving is care-taking and honoring. If you don’t treat your work like it matters and has value, why would anyone else?

If you already have two shoeboxes full of negatives and feel too overwhelmed to get started I understand, but I promise once you get in the groove it moves pretty fast. If you can set aside an hour after eating dinner or a few hours on a weekend you’ll be done before you know it. I love watching photography YouTube videos while I archive. It’s my version of knitting a scarf while watching a movie.

Before you get started make sure to also read the following two issues from the Process archives to get the benefit of this system.


I work with a wide range of editorial and commercial clients interested in telling timeless stories that move people.
Fo
unding curator of the ongoing Projected exhibit at the International Center of Photography, which has featured work by over 300 photographers from nearly 50 countries.


Wesley Verhoeve, Photographer and Curator


NEW 400TX Point & Shoot – A surprise from Kodak


This is a special one! This time, we got to test this little big camera before it was released to the market, and we were honestly surprised by the result and not something we expected to see at the end of the year.

From what we could know from Kodak, they had been cooking this behind the scenes since late 2019! But due to obvious everything had to be delayed until today! So we truly appreciate that they put an extra effort into the supply chain only to release the camera once it was available for shops and resellers to order and be able to have it at the stores asap after the release!

We know the world is a bit upsidedown these days and things like this help us believe in a bright future (especially if they have a proper flash built-in!)


THE CAMERA

The 400TX Single Use Camera is based on its color sister (Kodak Power Flash HD), and boy, it is a powerful flash indeed. 

A few weeks ago, we talked about the Ilford Retro color on our blog, and one of the main things we noticed was the lack of power of its flash, 3 meters away, nothing would be captured by it. However, this time we didn’t have to worry, in our tests, subjects were much better well lit under similar circumstances!


One exceptional thing about this camera is that it has a Dual Lens System, 99,9% of single-use cameras or point & shoots are based on a single lens element that is pretty basic. We were surprised by it, and you will notice that it offers a bit of a depth of field sometimes.

In our experience, it felt the camera’s best results are achieved when shooting a subject at 1,5 ~ 4 meters distance; there, the camera feels extra sharp and “blurs” a bit the background. Maybe for landscape is not ideal, but we don’t think that’s the main subject this camera will have 🙂


TONES

Well, what else to say about TX that hasn’t been written already. A truly classic film, the film of the classics. Indeed, it does not shine at its best in a plastic lens, obviously, but TX is a much more flexible film than TMax, for example, which helps ease the exposure mistakes that can be made by such a simple camera system.

We recommend that you apply a bit of extra contrast to make your pictures pop, depending on how your lab works on it.

Expect images to have grain, black & white films are often more grainy than color films, specially when it’s not super well exposed.

Also important! TX is a very pushable film! So feel free to give it a go and push this film +2 stops to make a 1600 ISO point & shoot!


PROS
  • Sharp in the center
  • Timesless feeling of the 400TX
  • Powerful Flash
  • Perfect for subjects between 1-5 meters
  • Pushable up to 1600 ISO
CONS
  • A bit bulky
  • Grainer than color film
  • Not super sharp for landscapes
  • Make sure your lab recycles the parts of the camera! We don’t want to add plastic to the enviorment.


OUR CONCLUSION


Definitely something unexpected for 2021. It is really nice to see upcoming new alternatives for film shooters, especially these types of cameras that help a lot of entry-level users to lose fear from film photography!

The design is wicked cool and the dual-lens system, even if it’s plasticky definitely makes a difference when compared to other single-use cameras. But don’t take our word for it. You should try it for yourself!


ENVIRONMENT

That being said, of course, having a plastic body and lens is not ideal if we think about the environment. At the moment there is no alternative for these camera formats and we are surprised to see how much they have grown into popularity in the last 3 years!

We do our best to split the cameras and recycle all the parts separately (electronics/batteries/plastics) so they can be processed individually.


BONUS: We got featured in @kodakprofessional_europe ! Check their post to see more amazing photographers that got the chance to test the camera!


ILFORD COLOR RETRO Disposable Camera Review – Is this real life?


One of the most unexpected things of this 2021 was Ilford (well, “Ilford”) releasing a point & shoot dressed as Retro and filled with color film. Ilford? Color? Mmmm… suspicious.

We had to look into this combo and understand what is really under the hood of this new little plastic guy. Is Ilford doing a color film now? Is this real life?

We wanted to test the Ilford Retro Color in a natural environment and see how it would react in one of the most popular use cases. A simple trip to somewhere and taking silly snaps. Of course, we can’t help to aim at having good light, but we also felt like we needed to test how the flash reacts. 

We headed to some of our favorite camera fleamarkets in Europe with Alfredo and took some shots along the way with the person behind Carmencita Cameras!


THE CAMERA


The camera behaves as expected. It’s a plastic body with a single-element plastic lens. So expect plenty of vignetting and (some) sharpness only in the center of the frame. It’s similar to the XP2 and HP5 cameras, but it feels cheaper for some reason, and almost sure the same Ilford behind those cameras is not behind this one…

For some reason, it feels incredibly light, which is very convenient for traveling, but at the same time, it feels a little flimsy.

We must confess the flash system is a bit odd. It gets activated by a sliding element that pops out of the camera frame. Not super convenient since you might slide it in by accident if you want to take a picture with flash and forget about it, but it’s okay.


THE COLOR


Of course, color! This is what we were most interested in. We wanted to see if the film inside was legit or some experiment in the fashion of Lomo Metropolis or Silberra Color Film.

We have to admit, we are pretty impressed with the result; the color feels like it leaning more towards the Kodak color palette rather than the Fujifilm one for some reason, so expect warmer tones and rich contrast.

We have to admit that deep blacks tend to go blue in contrast to the golden of the highlights depending on the light situation.

And also, it’s a very saturated film, colors are thick and will stick to your screen or prints for sure. Personally, we would like them a bit less saturated, and it’s something you can constantly adjust on post if you like.


Note: For those film geeks like us, the film is labeled as “400-3” on the side of the film, very similar to how Lomo films appeared to be back in the day. What this film really is we can’t say, but google may or may not hold the answer.


PROS
  • Lightweight
  • Saturated tones
  • Warm and contrasty
  • The looks (aesthetics) of the camera are pretty sweet
CONS
  • Very soft focus (even in the center)
  • Weak flash, at 3m the flash is basically gone
  • Sometimes tones are too saturated
  • It would be nice to have a bit more depth of field, close objects are impossible to shoot.
  • If you get a bit of lens flare against the sun, your image is gone.


OUR CONCLUSION


This is probably a perfect gift to anyone that wants to have fun and shoot for a trip or a party. Of course, our first option for Point & Shoot cameras will always be the Kodak FunSaver or the Aquatic options, but if they are out of stock at your favorite store, this could be a solid 2nd option.

People will definitely stare at the looks of it, and if you are careful with the flash (remember to stay close to the subject!), you can get some cool snaps indoors too this winter, but the camera shines outdoors with a good blaze of sun. 

The “bad” combo with the flash is that the camera already has a very soft focus, if you get closer is even smoother, but there is no way of exposing something decently without the flash if you don’t get close. What a wonderful paradox.


BONUS: While doing some research for this article we came across this video which compares the 3 most popular point and shoot in the same conditions. Check it out if you are curious!


How to pack your film CARMENCITA 9

How To Pack Your Film

As you can imagine we get quite a bit of mail coming through our doors (in fact we may or may not be best friends with our local postman). And during the five years that Carmencita Film Lab has had its doors open we have seen a lot of wrong ways to mail film to your local lab. So we thought we would put together a post on the do’s and don’ts of preparing, packaging, and sending your film off to your lab. So here goes!


  • First off, fill out the Order FormThis step is crucial for us in order to know who sent it, what was sent, what your scan preferences are, and any and all comments you may have about your project (seriously, lay it all out, we want to hear it = )


How to pack your film CARMENCITA 17


  • Secondly, we highly recommend placing those precious film rolls in a resealable bag. The reason for this is your film will more than likely be subjected to a variety of weather elements. This can include rain and snow, so to eliminate the possibility of your film rolls getting wet or from getting sand in them we recommend taking a moment to place them in a plastic resealable bag to provide extra protection for the journey that is to come.


How to pack your film CARMENCITA 1


  • Thirdly, we recommend protecting your film with some bubble wrap. For those who want a more eco-friendly option, old newspapers or plastic bags (like those found at your local grocery store) will also suffice. This ensures that if our local friendly postman plays a little game of soccer with your package, it will arrive safe and sound, cushioned by the protective elements you placed inside.


How to pack your film CARMENCITA 4


  • Fourthly, boxes are your new best friend. Get rid of those flimsy paper envelopes! They will not hold up or provide much protection when tossed around or sat on or who knows what. Don’t take the risk. Place your precious film goods in a box to eliminate the possibility of us having to make that dreaded call to you to let you know that a roll or two arrived in a not-so-good condition and …sigh… it looks like you now have light leaks on your rolls. We hate making those calls, so please, put them in a box.


How to pack your film CARMENCITA 8


  • Fifthly, when paying for shipment, pay for tracking. Yes, this does cost a few extra euros/bucks but the peace of mind is worth it (also if anything should happen, it’s much easier to track down). Also, while on the subject of shipping, we recommend checking out the deal DHL offers through our partnership :). Not only can you book your pick-up from your home, but it will only take 24 hours for your film to journey from your home door to our lab door (within the EU). Outside the EU, shipping might take anywhere from 48 to 72 hours to get to us, but it’s equally as safe!


How to pack your film CARMENCITA 7


  • Lastly, in our experience of successfully running a film lab, we have found that chocolate, candy, and sweets add an extra layer of protection to your packages. We haven’t quite figured out how and why that is, we just know that it is. So we encourage you to throw in your favourite candy for the sake of your film. As Charles Schluz said “All I really need is love, but a little candy now and then doesn’t hurt.” And we certainly agree with that.


Other things to know about shipping film:


We truly and sincerely encourage you to use the comment section on your order form to convey any pertinent information regarding the rolls you’ve sent us. We sometimes find that the comment section is underutilized and so we want to take a moment to express to you that we have that comment section there for a reason, and that reason is for you to tell us anything you would like about your film rolls! There is never too much information* when it comes to understanding how you shot those rolls or how you would like them processed.


Additionally, it is totally fine to add more than one project in your package. Do you have three separate family sessions you want to send us? Maybe you’re sending us some rolls from two separate trips you’ve taken? Feel free to put it all in the same box! You can put one project all in the same resealable bag with the relevant order form inside, and then put your second project in another resealable bag with the relevant order inside. Place both projects in your box with some padding and send it off! We’ll handle the rest!


While most packages are x-rayed during the shipping process we’ve never had any problems with them. The x-rays that are used for shipping have a lower intensity than the ones used on planes. However if you want to be on the safe side, Kodak has handy-dandy downloadable “Do Not X-ray” labels you can print out and place on the outside of your box. This will let the postal worker know that there is magic inside that should be handled with care during the shipping process.

Do Not Xray Label


The whole X-ray topic could cover an entire post by itself, so to sum it up, your film is specially vulnerable when it is underexposed since the emulsion is not as dense and the flaws of the film can appear, there is several effects that derive from X-ray, and we’ve only seen them on packages that have traveled on the check-in bag of an airplane, there’s an article from Kodak that sums it up quite well**, but be ready to enter the internet from the 90’s when you open the link.


We know that it can be stressful letting your film rolls leave the safety of your hands. But, hopefully with these tips, we’ve given you a little more peace of mind and a little more confidence in sending off those precious rolls to our lab so that we can bring to life those memorable moments contained inside!


Still got questions? We’d love to answer them!

ask@carmencitafilmlab.com


* we once received a letter attached to the order form that was 3 pages long, and yes that was a little too much information.

** the Kodak article focuses a bit more on slide film which is even more sensitive to X-ray damage than color negative film, but the artifacts are similar.