TIFF vs JPG

It’s finally time to open pandora’s box. TIFF vs. JPG, how do they really work? Is one better than the other just because?
TIFF (Tagged Image File Format) and JPG (Joint Photographic Experts Group) are two great image formats that are widely used to store digital images. It can be tricky to tell the difference between them, but don’t worry! Some key differences can help you determine which format is the best option for your needs.

EDITOR’S NOTE: It’s important to mention that we will talk about TIFF files applied to photography and more specifically film scans, so we will skip topics such as layers or transparencies. Sorry about that!
COMMON MYTHS ABOUT TIFF FILES
QUALITY
One myth is that TIFF files are always higher quality than JPG files. While this is generally true, it is not always the case. It really depends on the quality of the original image, how it was scanned, and how it was compressed.
It is a bit like saying that a family-size pizza tastes better than a single-size pizza just because of its size 🙃🍕
FILE SIZE
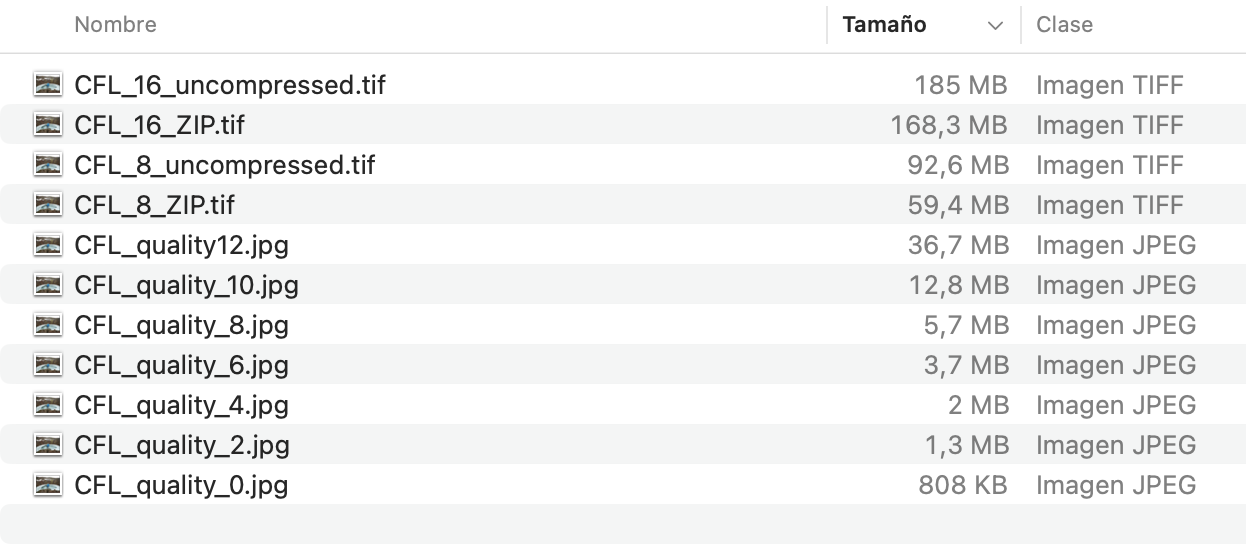
Another myth is that TIFF files are always much larger than JPG files. While TIFF files tend to be larger, they can be compressed to make them smaller, and also JPGs can be compressed at a very high quality (12 for Photoshop users) resulting in a file that can rival the size of a TIFF sometimes.
We do not encourage you to judge quality by size in any case —A bit of a zen life lesson here too—.
Analogy time
Think about it files as bottles. An uncompressed 16-bit TIFF file would be like using a 5-liter bottle for storing everything in your fridge as a default.
250ml of oil → 5L bottle
500ml of yogurt → 5L bottle
1L of juice → 5L bottle
0,75 of vermut → 5L bottle
Probably by now, you realize that you would need to buy a new house and a new fridge the next time you go to the supermarket.
Using lossless compression would allow you to have a kind of flexible bottle that you can adjust to the size of the content. Of course, you can still expand them to the max, but if you like to keep a liter of juice you can just simply make the bottle size 1L and save 4L of space along the way!
JPG, on the other hand, would be like having all your fridge divided into 330ml bottles to perfectly optimized for your fridge size. You would be able to use 100% of the space of the fridge.
250ml of oil → 1x 330ml bottle
500ml of yogurt → 1x 330ml bottle
1L of juice → 3x 330ml bottle
0,75 of vermut → 2x 330ml bottle
You would be losing a bit of the original quantity, but the taste will be the same! Also making you able to make the most out of your fridge space + making it super easy to transport.
Again, this is an oversimplification of how the storage of images really works, but our goal is to debunk myths and for you to leave this article making smarter decisions when storing your files.
COLOR
Another way to compare the two formats is in terms of color. The only key difference here would appear if we compare 16-bit TIFF vs 8-bit JPG files which will naturally have a narrower color range than TIFF files. But that’s a bit like apples and pears. More on bits down below!
With the standard settings, TIFF and JPG files can both hold to the same standard in terms of color accuracy and range.
LOSSLESS VS LOSSY
Compression is like this diabolical word that any photographer who prides themselves on shooting high-quality photos never wants to hear mentioned in conversation. And while that was true for many reasons in the past, especially in the early days of JPG, we have come a long way since then, and we are about to tell you why.
Also, it is very important to understand compression ensures your file will preserve 100% of its quality once uncompressed! It’s called Lossless compression, and it was one of the greatest inventions of our time! It’s like the LED light was to the light bulb!
You probably already know ZIP, LZW, or RAR files; these are Lossless compression too! Do you love .zip or .rar files? Then you love lossless compression!
If something made “the world a better place” that is compression. Let’s dig into it!
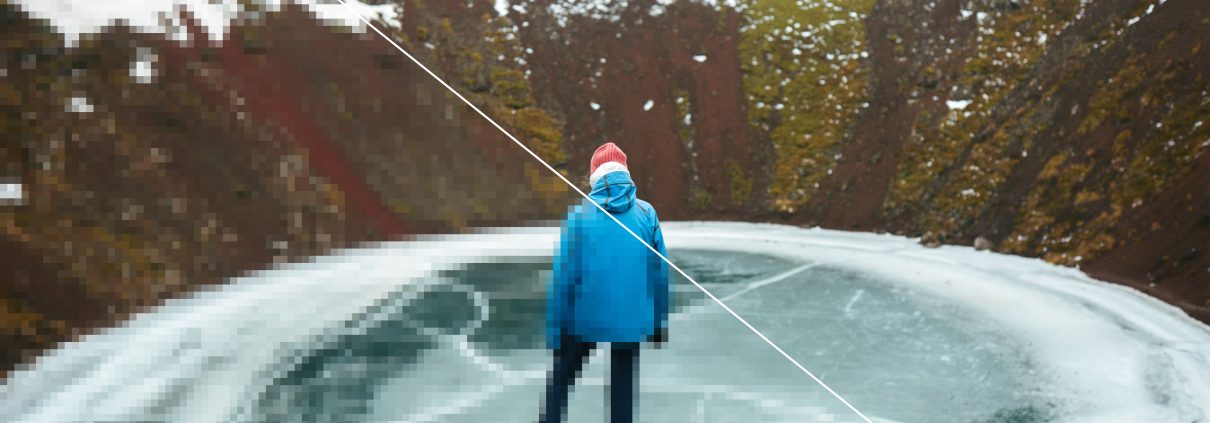
The following images have been 800% zoomed in to help you see the detail.
LOSSY COMPRESSION
Lossy compression is undoubtedly the most efficient of all; we can bring a file of 114 MB into a file of 12,7 MB without being able to tell the difference in plain sight. Don’t believe us? Check for yourself!


These algorithms are designed to discard some of the data our eyes do not notice or find irrelevant from the original image to reduce the file size. Paradoxically, very fine details such as noise or super fine texture take most of our precious hard-drive storage space and are the parts of the image about which our eyes care less.
For all the audiophiles out there: .jpg is to images what .mp3 is to sound.
*We used the JPG file with the lowest quality compression (0) for testing and educational purposes. Note that JPG quality starts to decline from quality 6 onwards.

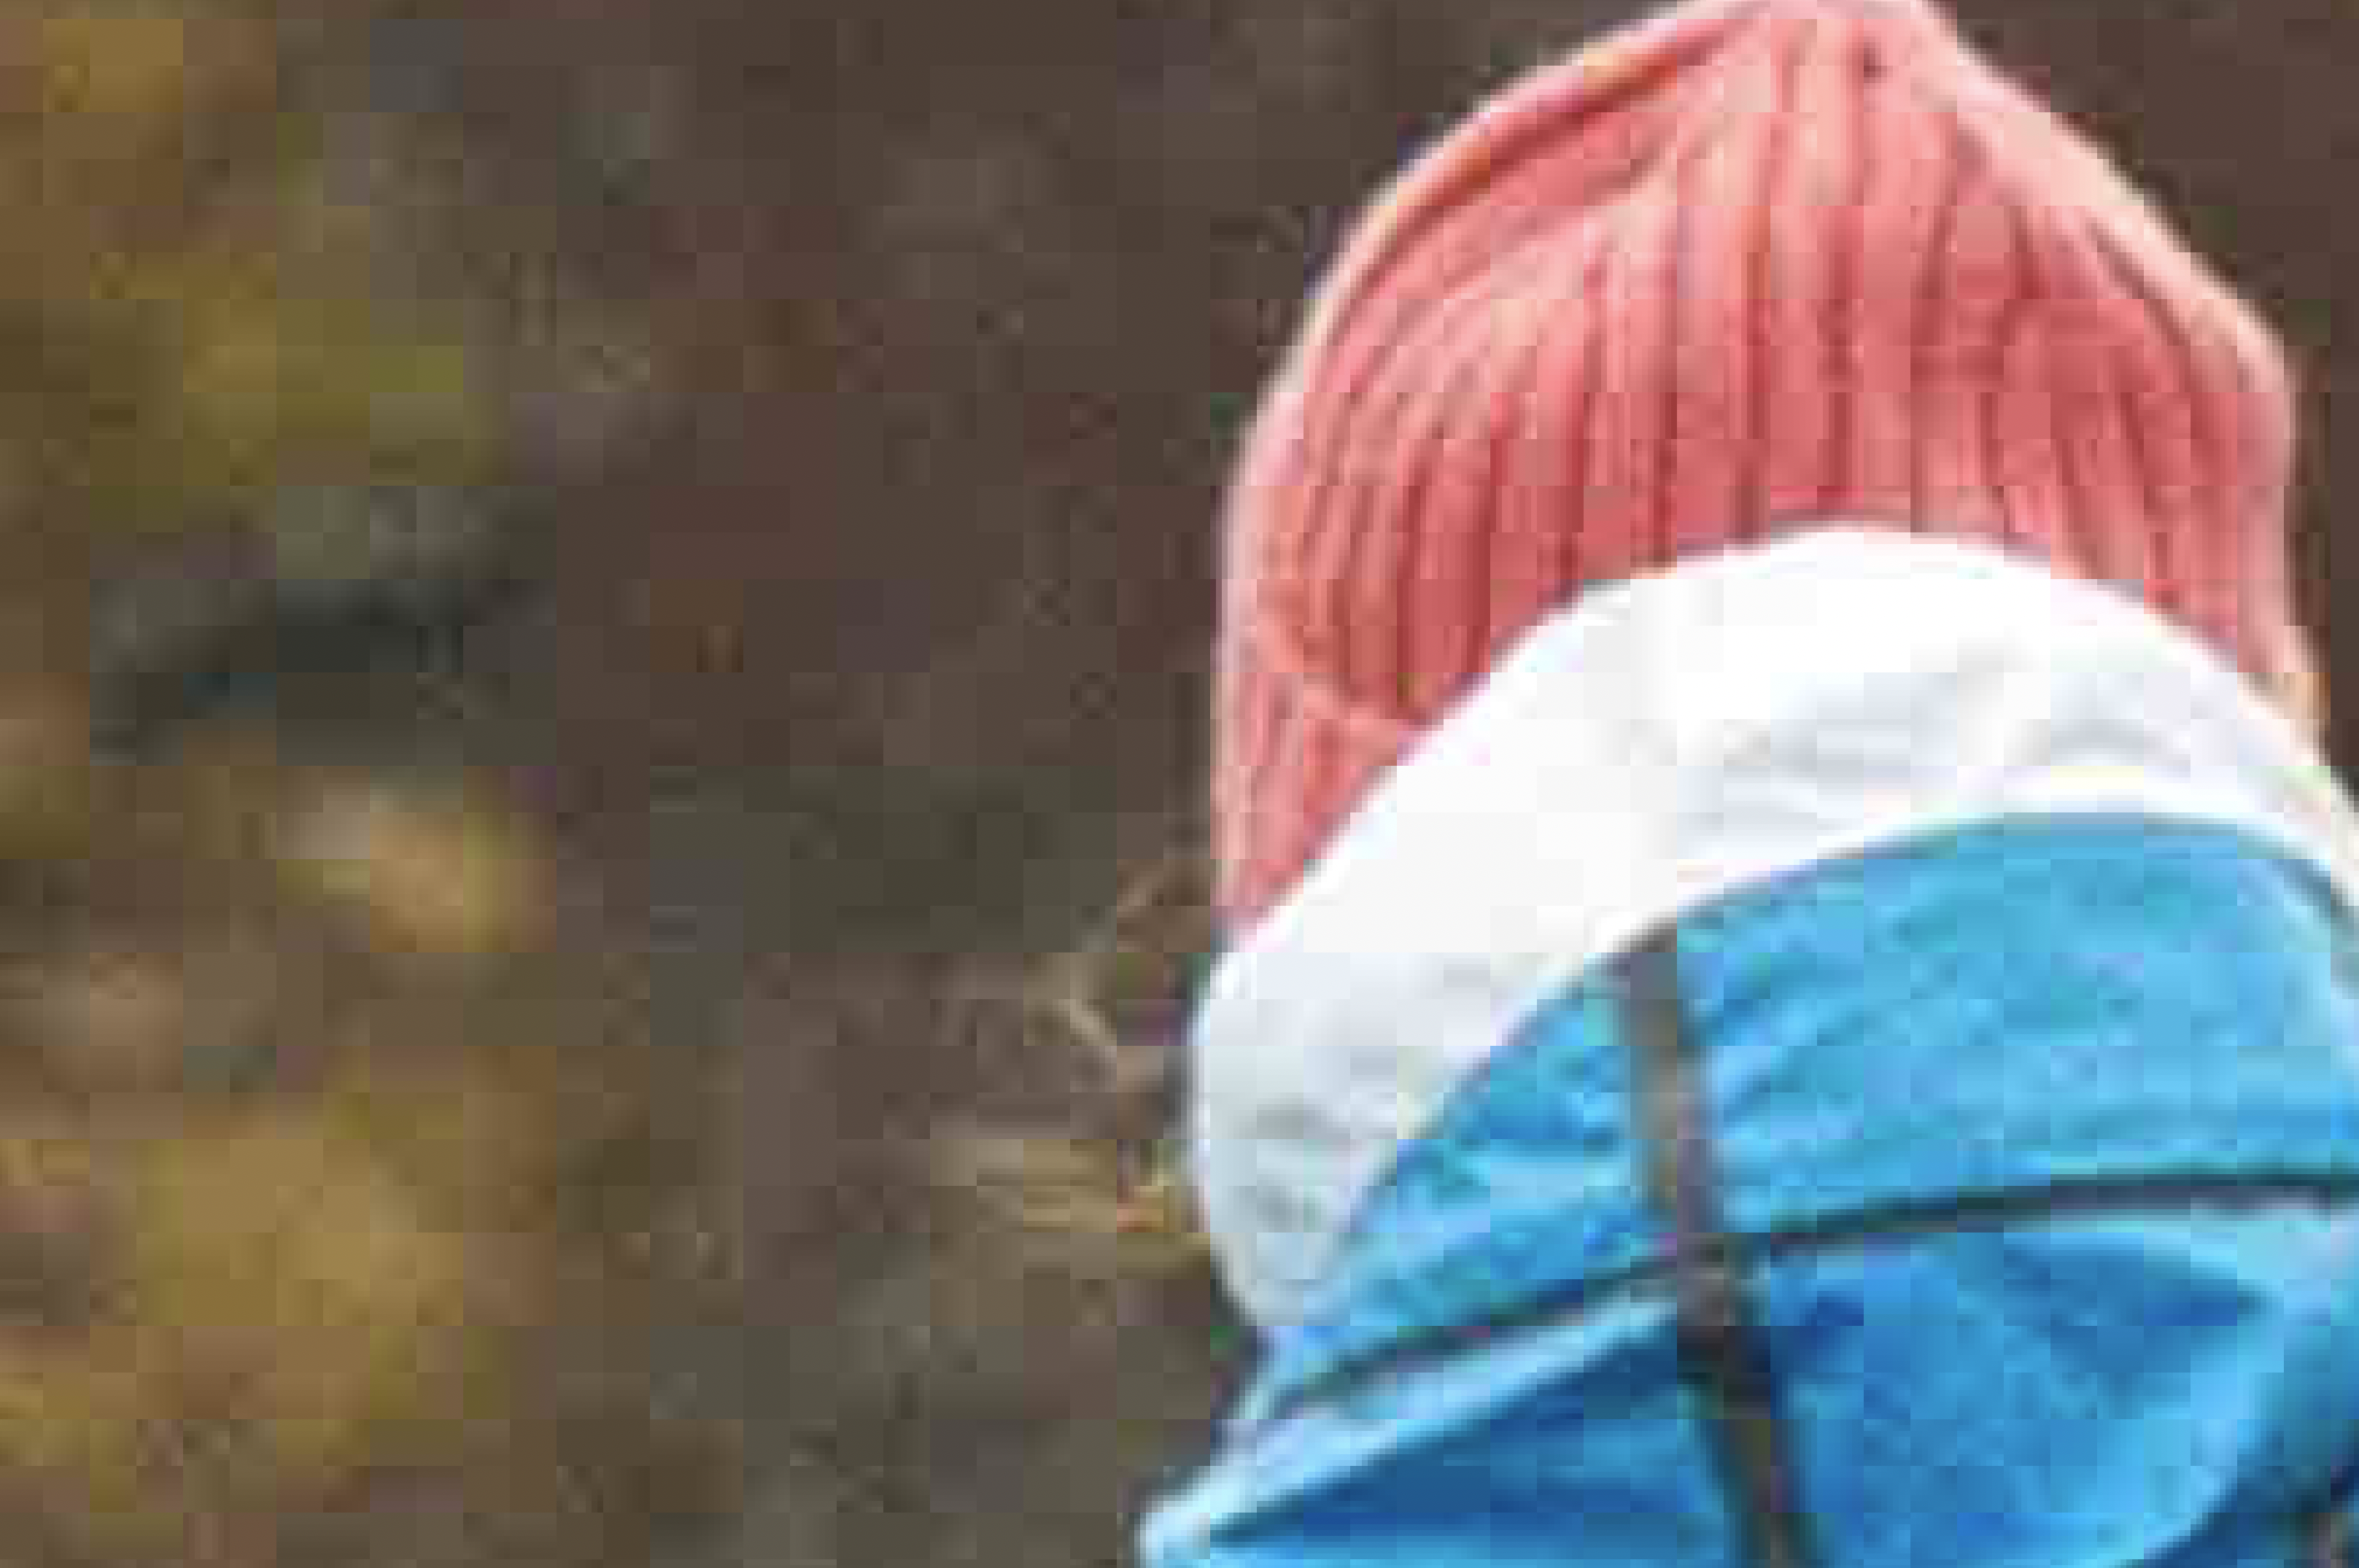
As you can see above in this exaggerated example, the JPG file is made of blocks (fun fact, the blocks are 8×8 pixels) that are coded individually with a mathematical algorithm. Depending on the quality amount we use, ranging from 0 to 12 in Photoshop, for example, you can create a more or less precise representation of the original image.
Lower quality = less details. We simplify the information blocks the less quality we use, and at some point, we can start seeing them completely.
That being said! You would be surprised by the amount of compression we can apply, reducing the file size brutally (remember the image at quality 0 occupies 808Kb) and when seeing the image from zoom out the difference is hard to tell.
To illustrate even more, we took the JPG 0 and subtract it from the original file, that way we can see all the detail of the image we “lost” during the compression process.
As always… the devil is in the details!

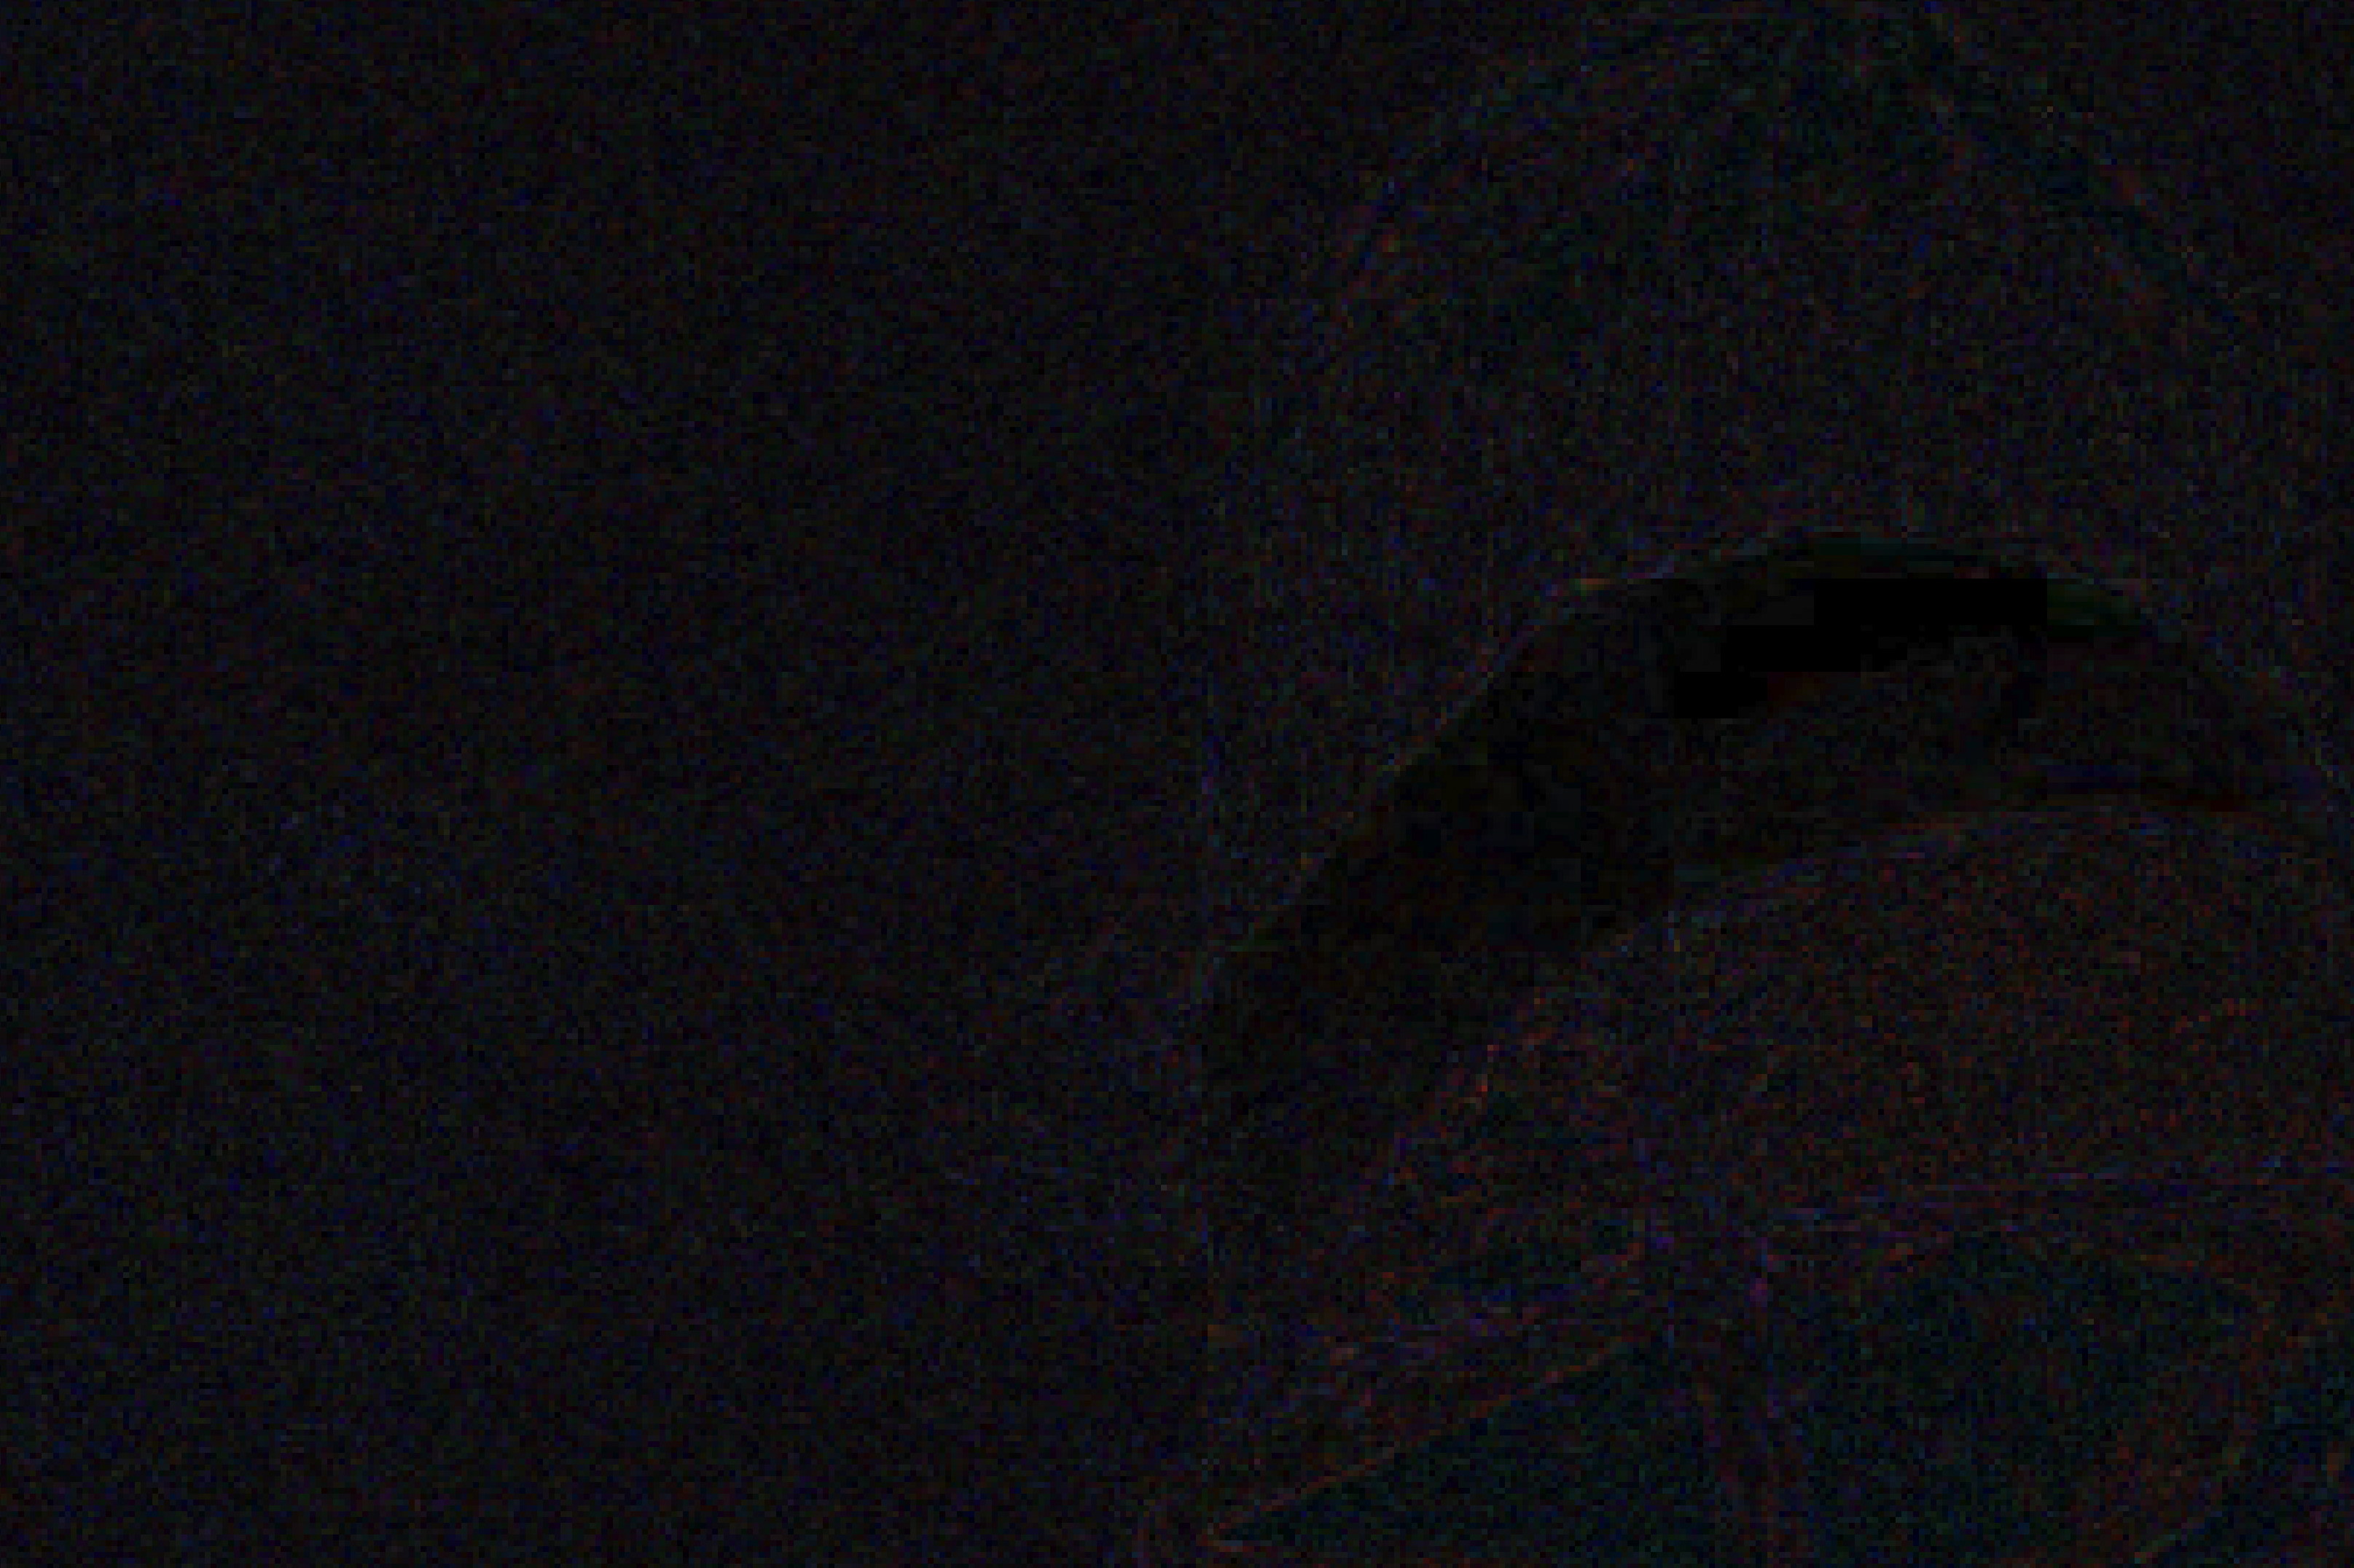
JPG quality 10 vs JPG quality 0 through the Difference blend mode*.
*When subtracting two pixels with the same value, the result is black. So what remains is the actual difference between JPG quality 10 and JPG quality 0.
LOSSLESS COMPRESSION
Lossless compression algorithms are used in many applications aside from imaging, such as medical, scientific data management, graphic design or even sending documents. For example, in medical imaging, lossless compression is used to ensure that the original data is preserved for accurate diagnosis and to provide reliable and error-free transmission.
Lossless compression helps to save disk space while maintaining the accuracy of the data, preserving the accuracy and completeness of the original data. Furthermore, it allows for maximum image quality when saving files in formats such as TIFF and PNG.
Lossless compression algorithms are great for TIFF files because they let you keep all the image quality while taking up less disk space. Basically, they make sure the original data is preserved, and the graphic design stays the same. Even better, they shrink the TIFF file size without affecting the quality of the image. This means you can store big, high-quality images in a smaller file size, making the storage and transmission of image data more efficient.
As you can see, there is absolutely no loss in either the uncompressed or compressed 16 TIFF files. Not even in the 1600% zoomed image below!
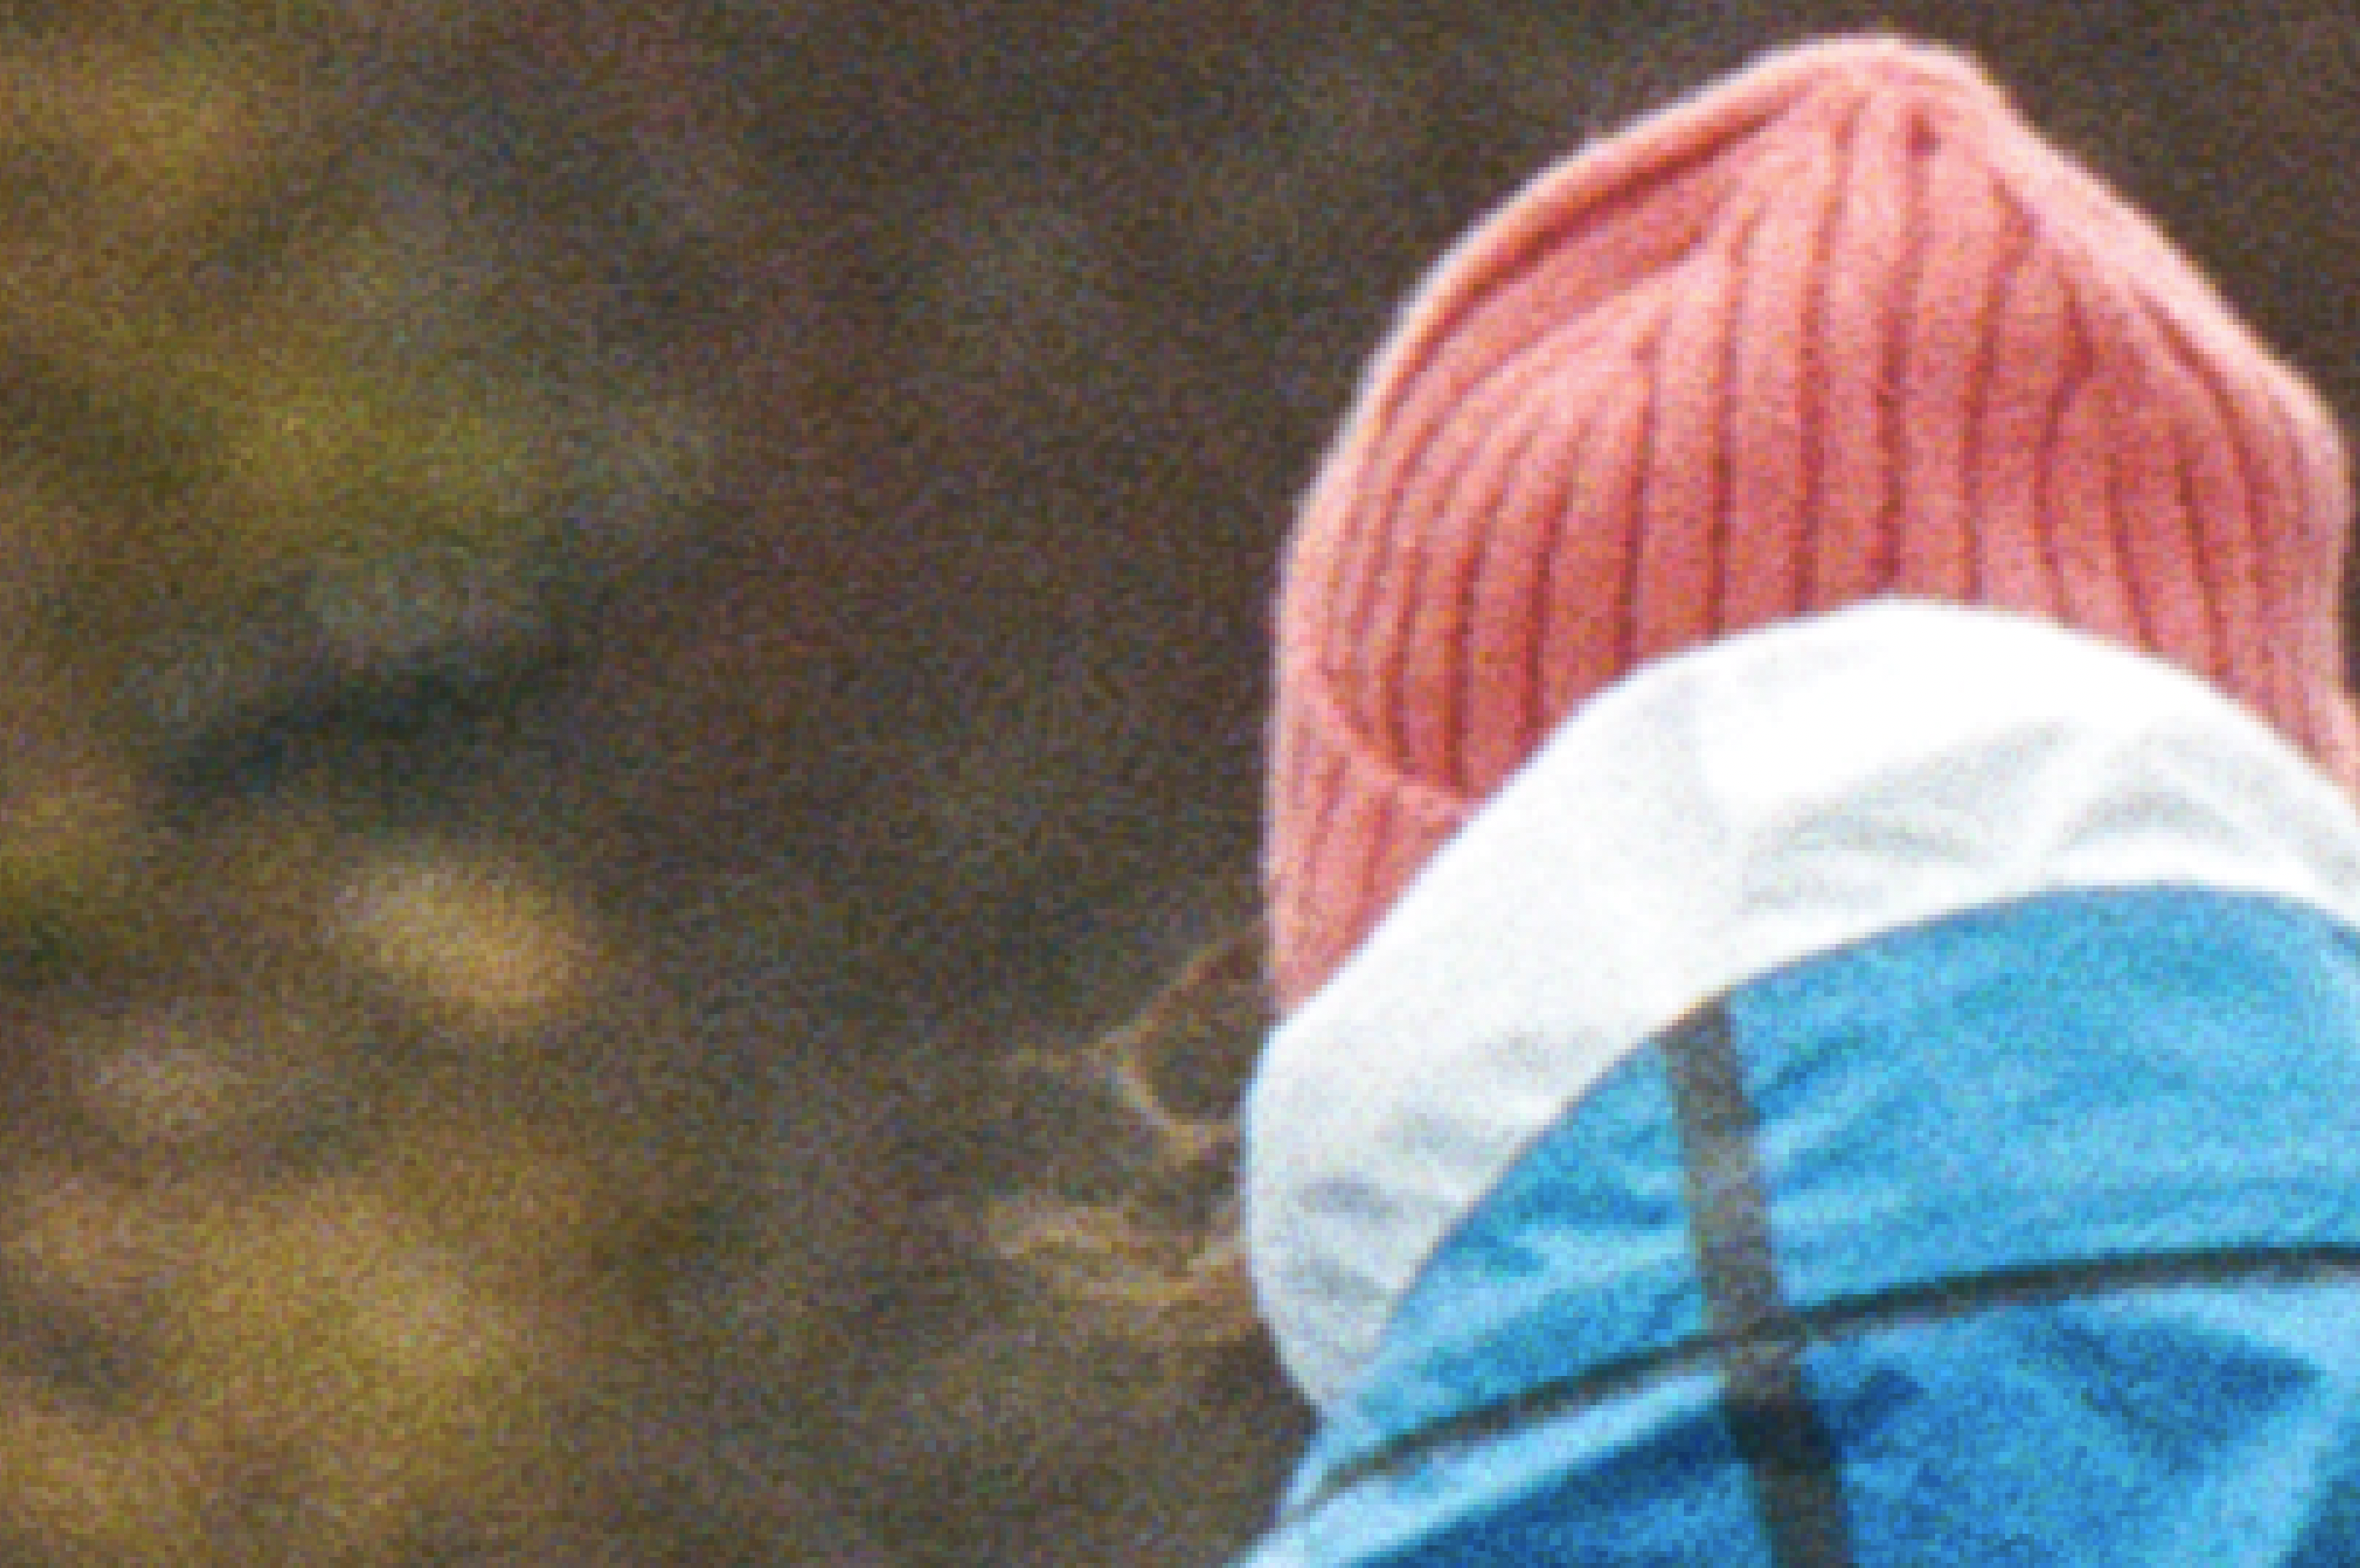


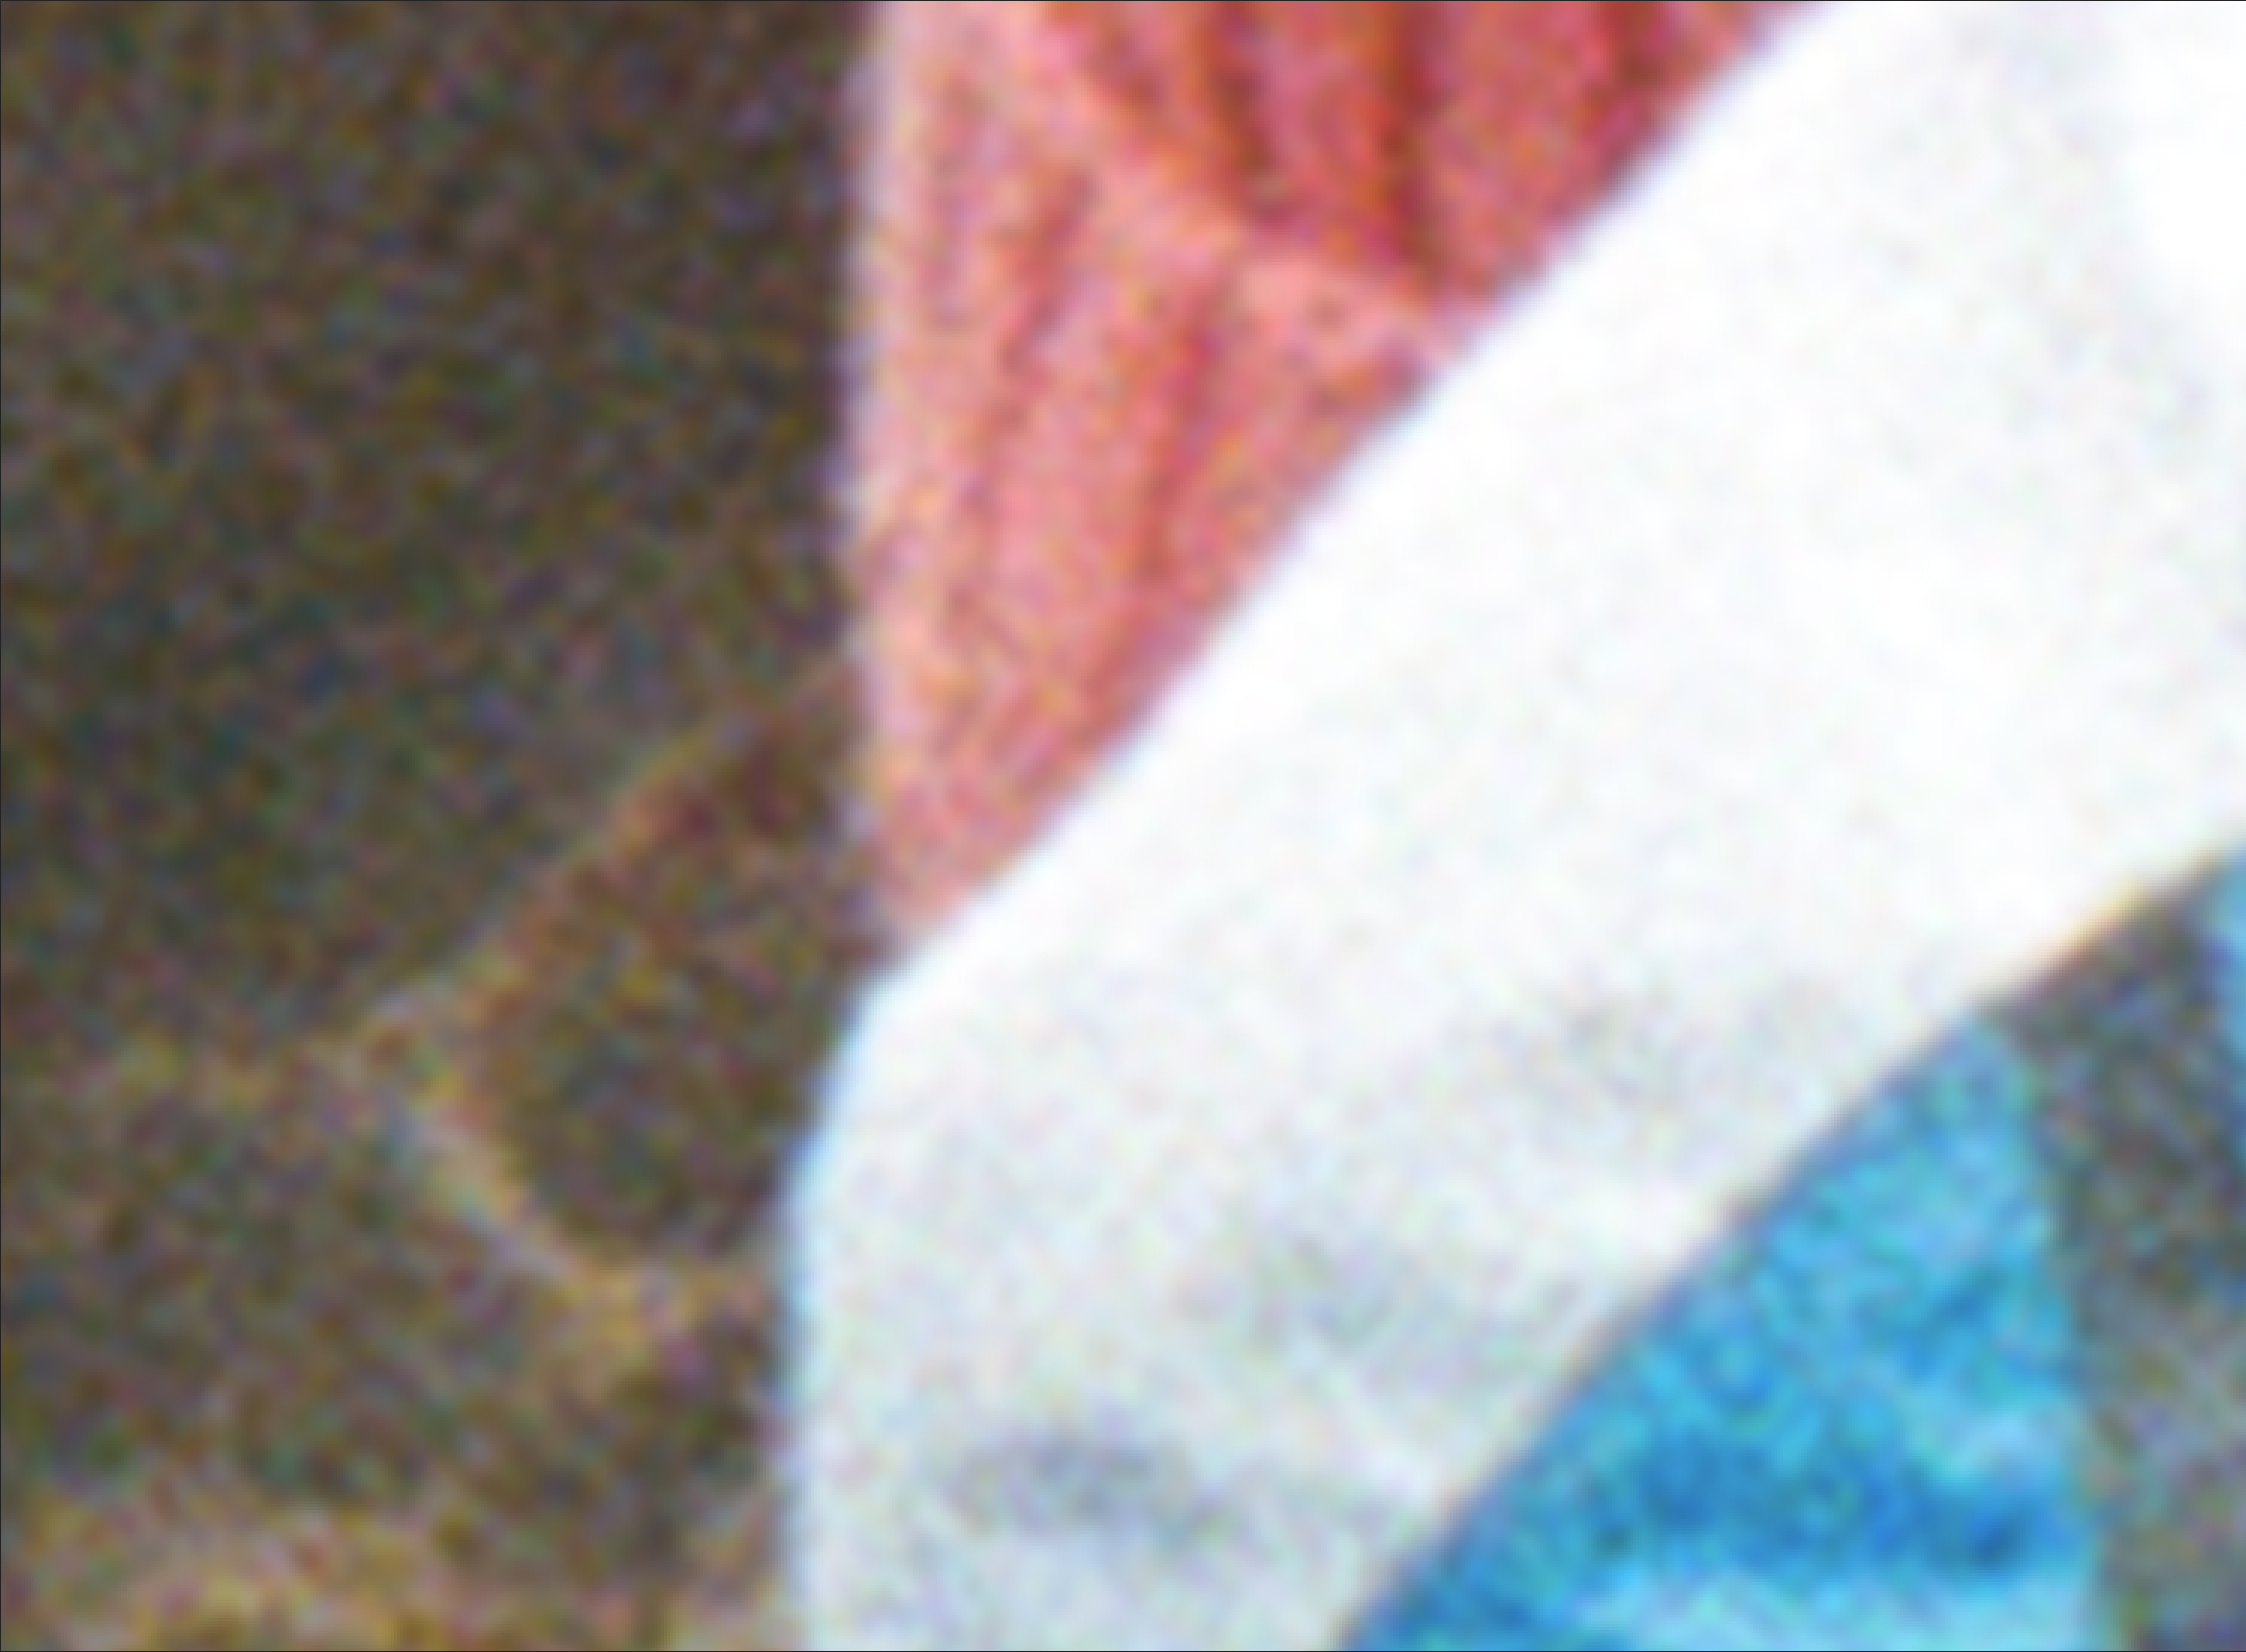
If we take an XXL scan from our lovely Noritsu in a TIFF uncompressed 16-bit format, it would take around 185 MB for 1 frame (making it ~8.00 GB per roll of 35mm depending on the images 🫠).
Now, if we choose to save it with the built-in option of ZIP compression in Photoshop, the result is a 168,3 MB file on our disk with the exact same quality when we will open it and uncompress it to its original size in Ps!
That is a 10% reduction in the file size, keeping in mind the quality of our final file is exactly the same bit by bit! It doesn’t seem much but it’s 800Mb with the exact same quality files!
If we moved into 8-bit file territory, the optimization would be almost a 40% reduction. That’s because in 16-bit files there is an extreme amount of redundancy. Remember 16-bit is not double of 8-bit… but x250 times more information! (an 8 bit has 256 values, and a 16-bit has 65.536 values)
(Sorry for the non-geeks, but this topic is hard to explain without numbers 😅)
8-BIT VS 16-BIT
TIFF files can also be stored in either 8-bit or 16-bit format. 8-bit files are limited to a maximum of 256 shades of color, and while this may be adequate for most regular images, 16-bit files boast a maximum of 65,536 distinct shades of color and are much more suitable for photos that require a greater level of detail and accuracy.
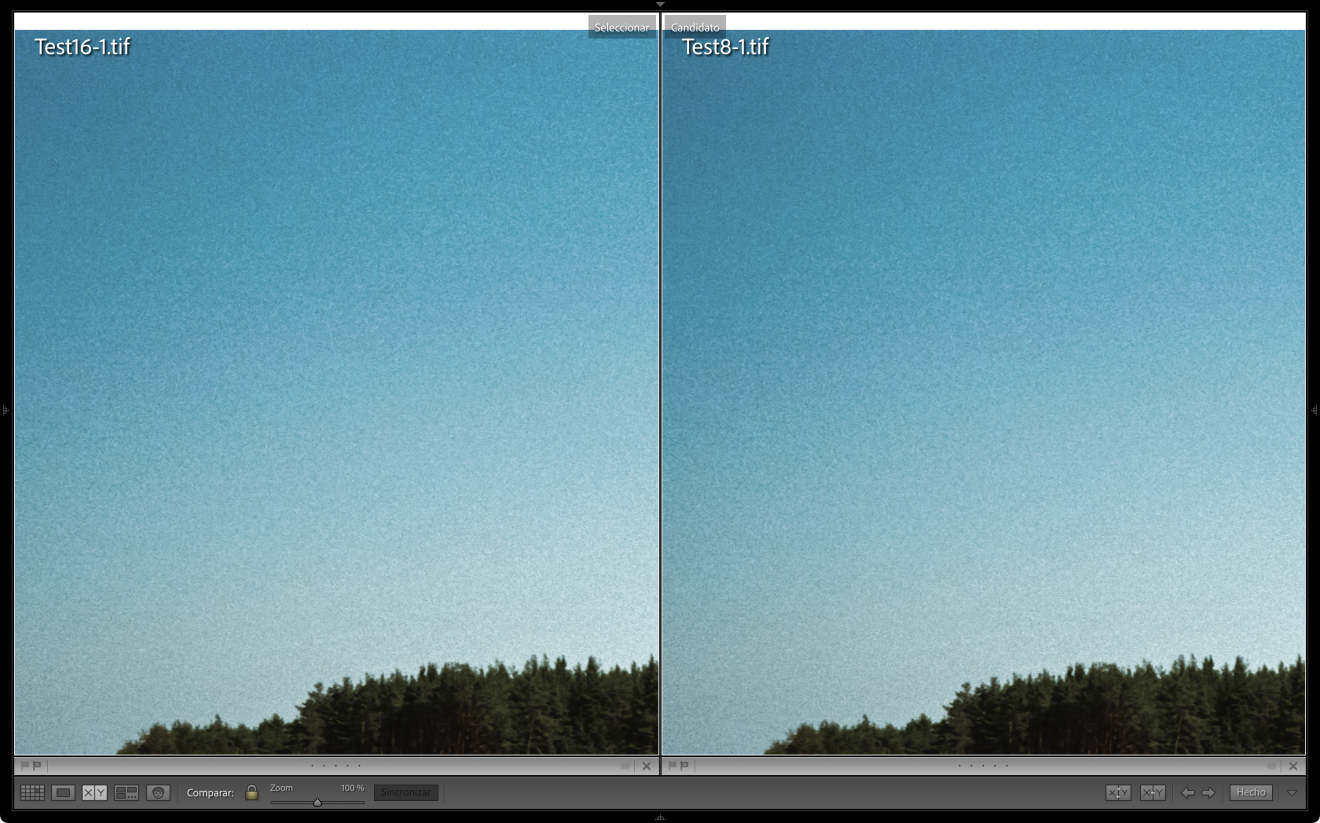
This is because 16-bit files allow for a much wider range of tonal variation, providing far more subtle gradations of color and nuance. For this reason, 16-bit files are the ideal choice for photos that need to capture the natural beauty of a scene or object, as they can more accurately reproduce the range of colors and shades that are naturally present (I’m looking at you infinite blue skies with endless shades of blue and white).
The compression of the scanners is very good, in part because of the sensors. The difference in skies is often more critical in digital cameras but we can see the example here.
If we re-export the original 16-bit to 8-bit and apply levels and curves to tension the color gradation of the sky, we can see how the tonalities “break” differently. And in the limits, we can see how 16-bit saves more subtle tonalities.
It’s important to note that JPG files will always be 8-bit.
TIFFS ARE NOT RAWS
Another common misconception is that TIFF files are as flexible as RAW files when it comes to editing film scans. While there is some truth to this—16bit TIFF files will have more room for rendering color transitions—they are not as versatile as RAW files. RAW files contain all of the original data from the camera’s sensor, which gives them far more flexibility when it comes to editing.
TIFF files, on the other hand, are limited in the amount of editing that can be done, as some of the original data has already been discarded by the process of scanning and the negative itself.
For this reason, we can’t stress enough the importance of making a good capture during the scanning process to get the image as close as you imagine them to be in the final process!
CONCLUSION
If you made it so far, it means that you really care about this. We hope your brain is not melting from such technical jibberish. But to be honest, we feel that if you are taking your photography seriously, this is information that you probably like to have.
Knowing the differences between these two formats can help you make the right choice for each particular situation.

Those who do pixel-level retouching/adjusting to their images need to capture every single leaf in a landscape or render butter-smooth color transitions. In those cases, 16-bit it is. And for everything else… Mastercard JPG is fine.
Without a doubt, JPG is the king of the hill on the internet. Actually, without JPG the internet as we know it today wouldn’t be possible due to its versatility and efficiency. It is ideal for sharing images online and ensuring that they look great while still being easy to download.
Additionally, JPG images can be compressed and optimized to further reduce the file size, allowing them to be quickly uploaded and shared without sacrificing quality. JPGs are also supported by most image editing software, making it easier to adjust the image. All in all, JPG is a great choice for sharing images online or for any other purpose where file size or compatibility is important.
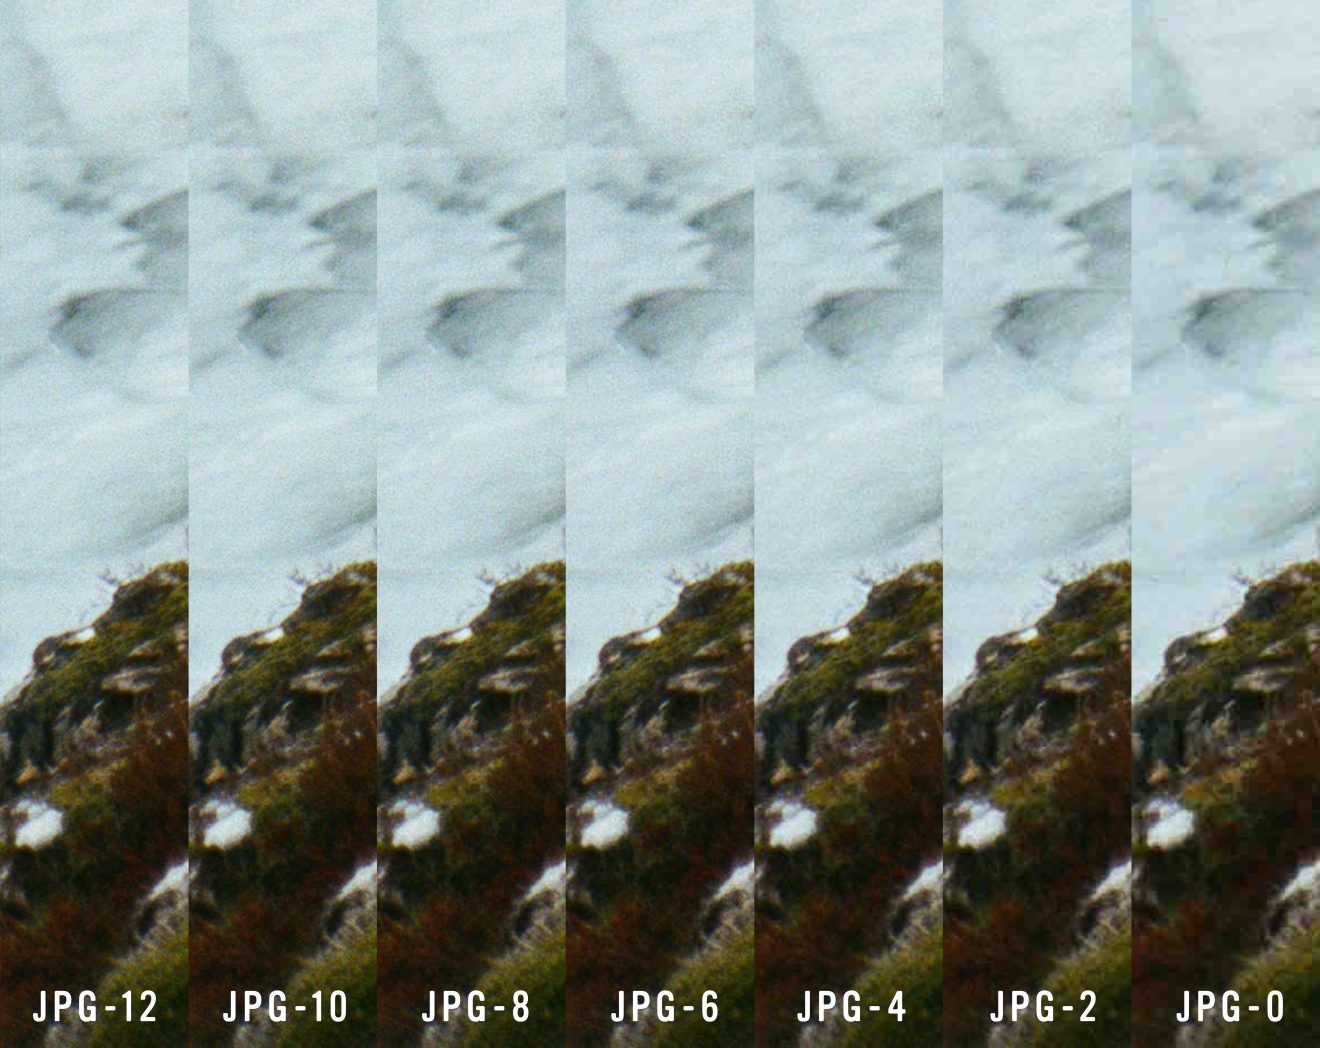
Here is a comparison of how the JPEG compression affects an image zoomed at 800%, so you can see how the image losses information progressively but still at JPG-8 or even JPG-6 still retains a great amount of detail.
SO, WHICH ONE SHOULD I USE?
As most things in life, there is no one format intrinsically better than the other. We always encourage photographers to go for JPG if they are not sure.
For rescans or work that needs to be enlarged out of the web, TIFF is our format of choice.
If you still have questions buzzing in your head, contact us at ask@carmencitafilmlab.com, and we will be more than happy to answer as always!
Making film photography more accessible and easier to understand is the reason why it exists, and that’s why in between all the buzz of the daily we create time to put these articles together and help you understand this thing called photography that we all felt in love with.
DIG DEEPER
If you want to explore the depths of the world of JPGs even more thoroughly, you need to check out the detailed video created by Branch Education on Youtube. This video delves into the intricate details of the algorithm, covering a variety of topics such as file compression, color profiles, and image types.
So, if you’re looking for a comprehensive guide to understanding the nuances of the files we use in our daily lives, then this video is an absolute must-watch!
Head of the lab since 2013 and currently managing the team, developing new projects and trying to bound the international film photography community. These are only my personal thoughts, you may or may not find them relevant, I believe there is nothing healthier than a good debate 🙂
– Albert Roig, Manager at the Lab


